 |
|
 09-03-2023, 08:30 AM
|
#21
|
|
Moderator
Join Date: Nov 2006
Location: Ohio
Posts: 12,656
SUN #89
|
Hi Bob,
Your team is buzzing right along! Super, good job.  . There are just a lot of little details all over on these campers. None of them are hard to overcome once you have been through it. And in your case, having many hands helps. You can divide and conquer; each one gets their task and go to it.
Quote:
Originally Posted by Rlanger

Good morning John B.
believe it or not, we got almost all of the decking down last night save the front and back pieces. Looks like, for the most part, we got lucky. Almost all of the rafters were square with the sides and in the front not much needed to be modified. A small shim here and there but there easy fixes.
True to your posts, once we got back to the fridge vent things changed fast. There was one rafter that had to be built up quite a bit. We kept measuring and remeasuring thinking we were doing something wrong.
|
Yes, the sunk rafters seem, well, wrong. We are dealing with a thin wood truss made from softwood. And, the camper lives outside in moisture with no venting in the attic. I'm actually surprised at how good the rafters hold up. The arched top rafter chord is a pre-bent arch done by some heat/wet or steam process (I have not yet mastered how to reproduce that, yet anyway.) to have the arched wood stay in that shape. Going through moisture changes, whatever stress is left in the wood is going to deflect into whichever direction the stress wants to take it if it is not contained. The budboard roof has no connection to the top chords; the rafters stay put pretty darn good from what I have seen. By using decking, it helps keep the rafters in a better holding position.
Quote:
Originally Posted by Rlanger
Conversely two or three rafters down we met one that was obscenely high. For this one sanding wasn't enough and building up the adjacent rafters would have thrown off the whole works. So for this one, we removed the stapled-on 1/8 side pieces of the rafter, forced the top piece of the rafter down (didn't take much force), and then put new pieces of 1/8 on each side that are longer than the originals to hold everything in place. I had to cut them to follow the arch.
|
I have not yet had an insanely high one before. Yet anyway. Your process of removing the plates, lowering the top chord, and making new plates would be what I would have done also. Good job! For the future, I am not sure if you did, I used, and Sunliune did too, glued and stapled the plates on. They are only 1/8" thick luan and need all the bonding strength they can get. You will be OK on one rafter if you did not glue it. The decking is helping spread all the point loads out now.
Quote:
Originally Posted by Rlanger
I'm glad you posted that information on using drywall tape to seal the deck seams. I, too saw the dicore post that said to use construction tape and have three rolls of it ready to go. But I thought about that last night, "Wait a minute. This bonding glue says it doesn't stick to plastic. Tape is plastic..." I'll be returning those to Amazon and picking up fiberglass drywall tape instead.
|
Yup, there are still a lot of roofing directions that state to use the solid tape. And most all RV roofing is now on water-based glue that needs the porus substraight. It may be, that years ago, when they had oil-based glue, the glue stuck to the tape. Then, time ticked by; they did not stop and think about the new adhesives not sticking to the tape and just left the instructions alone.
Quote:
Originally Posted by Rlanger
Today we're going to finish the decking, all the cutouts and sand, sand, sand.
Originally we were going to start putting on the EPDM tomorrow. But based on the forecast and the warning about heat, I'm not going to have enough glue. I ordered more, but it won't be in for a few days due to the holiday and my local Camper World and other stores say they don't have any in stock.
So tonight we'll close up the vent openings with some 1/8, lay out the roof, and then cover her up for a few days. This will also give me a chance to dive into some other posts about finishing this up, including the attic vents and especially the gutter hack.
|
Sounds like a good plan. OK, what is my gutter hack?  That is the second time you said this, I have to ask... You mean the flat head screws and the Eternabond tape to get rid of the caulk issue, the mold yuk behind the vinyl screw cover, and the screw rot?
Quote:
Originally Posted by Rlanger
Questions:
When you round the sides, how much are you taking off? Just enough that it's not sharp or rounding it like trim molding? I want to make sure I don't run into problems when I use the butyl hack to fill in the gaps.
|
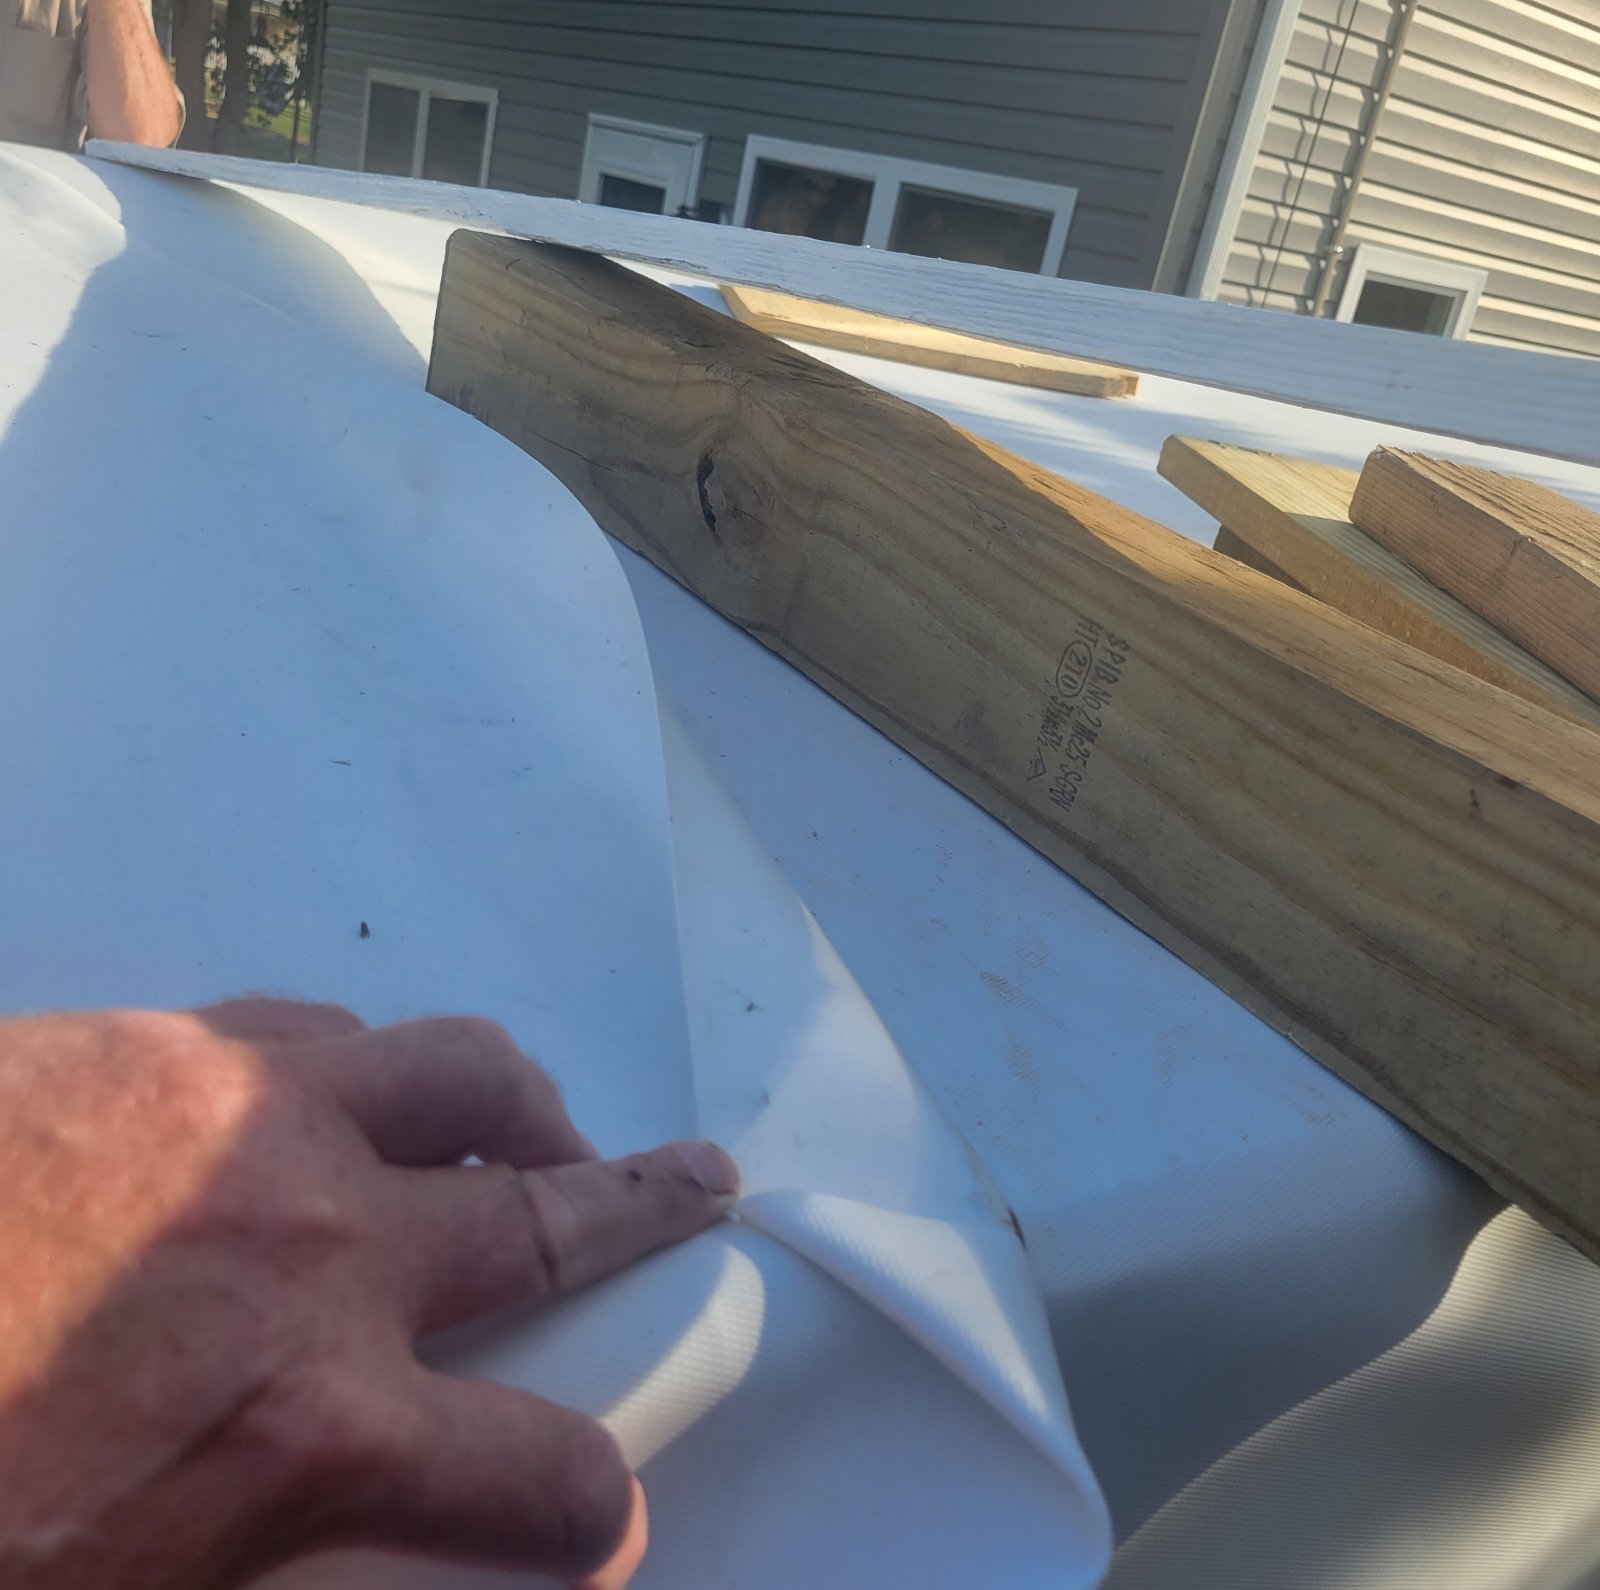
On the 14 x 14" roof vents, the membrane is wrapped a full 90 degrees; at these locations, using a 1/16" - 1/8" sanded radius is OK and ideally not less than 1/16". No need for more than a 1/8". The same radius goes for the back wall deck sheet; this radius is under the molding, and I ran the rubber down the back wall where Sunline did not. I have seen many roof leaks at this back wall, and having the membrane wrap down the back wall under the molding helps lower the leak rate.
On the side walls, the deck sheet factory cut edge, the membrane is not rolling over a hard 90 degrees as the deck sheet is usually shorter than the wall. You for sure want to break that factory sharp cut edge, but I would say you are in the 1/16" radius zone. No need to do a heavy rounded corner (like a 1/8" radius or more) as that can create a dip as the membrane is then unsupported and out under full rain.
The front wall deck sheet cut edge can be in the 1/16" range. An 1/8" will not hurt, but this is a tapered edge.
Quote:
Originally Posted by Rlanger
When you taper the front deck down, do you use a belt sander to make it reach a point? Also, to confirm, how far back do you start the front taper? Right where the front panel starts?
|
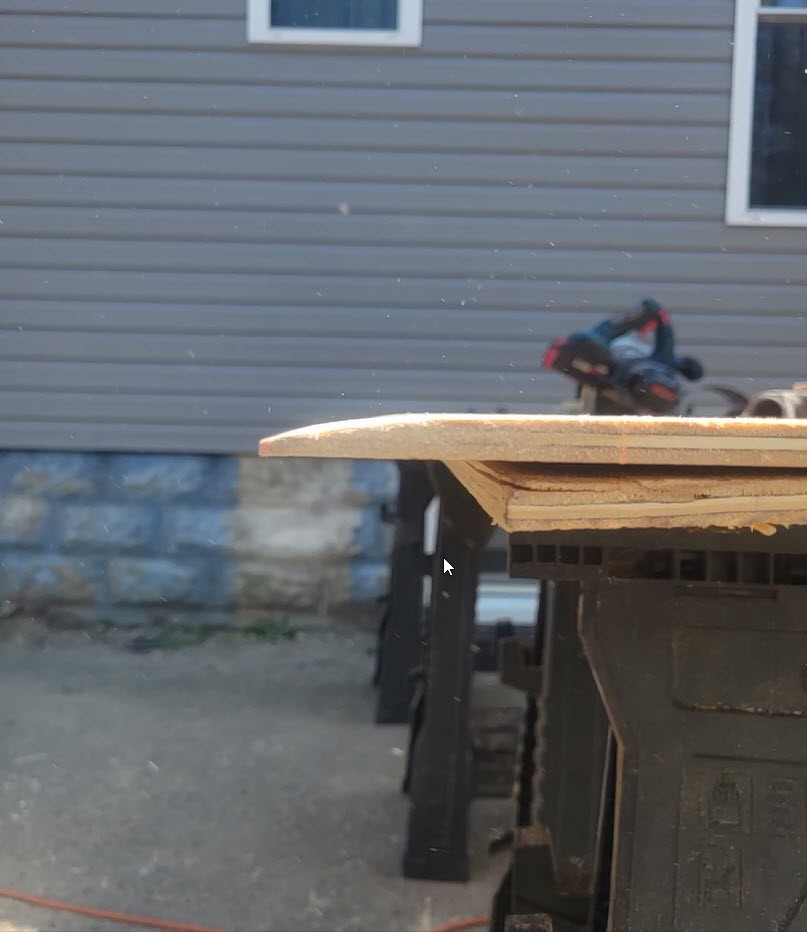
At the front, the taper is approximately 2 to 3" down the sheet. I make the taper length whatever the front siding overlaps onto the roof, plus a little bit more (~1/8 to 1/4")no need to make it wider.
I have used a sander and a power planner to cut that taper on both the rear and front wall deck sheets.
This taper was a belt sander. I never thought of using the planner in the tool cabinet. 

This taper is with the power planner. Much faster. A high-speed carbide blade cuts more quickly than low-grit sandpaper. However, both get the job done.

The planner cuts cleaner. The red colors are just the wood color of the shade of wood. There are no shims here.
I cut the taper to about 1/16" min to about 1/8-3/16" max. No point on the end; it will crack too easily.
Quote:
Originally Posted by Rlanger
Thanks again John B for all this great information. This project would have been a disaster without you!
Now... Off to Lowe's
Bob L.
|
You are very welcome. Glad to help and we all learn from each other.
Have a good workday.
John
__________________
Current Sunlines: 2004 T310SR, 2004 T1950, 2004 T2475, 2007 T2499, 2004 T317SR
Prior Sunlines: 2004 T2499 - Fern Blue
2005 Ford F350 Lariat, 6.8L V10 W/ 4.10 rear axle, CC, Short Bed, SRW. Reese HP trunnion bar hitch W/ HP DC
 Google Custom Search For Sunline Owners Club
|

|

|
|
09-04-2023, 07:20 PM
|
#22
|
|
Junior Member
Join Date: Oct 2021
Location: New Jersey
Posts: 15
SUN #12992
|
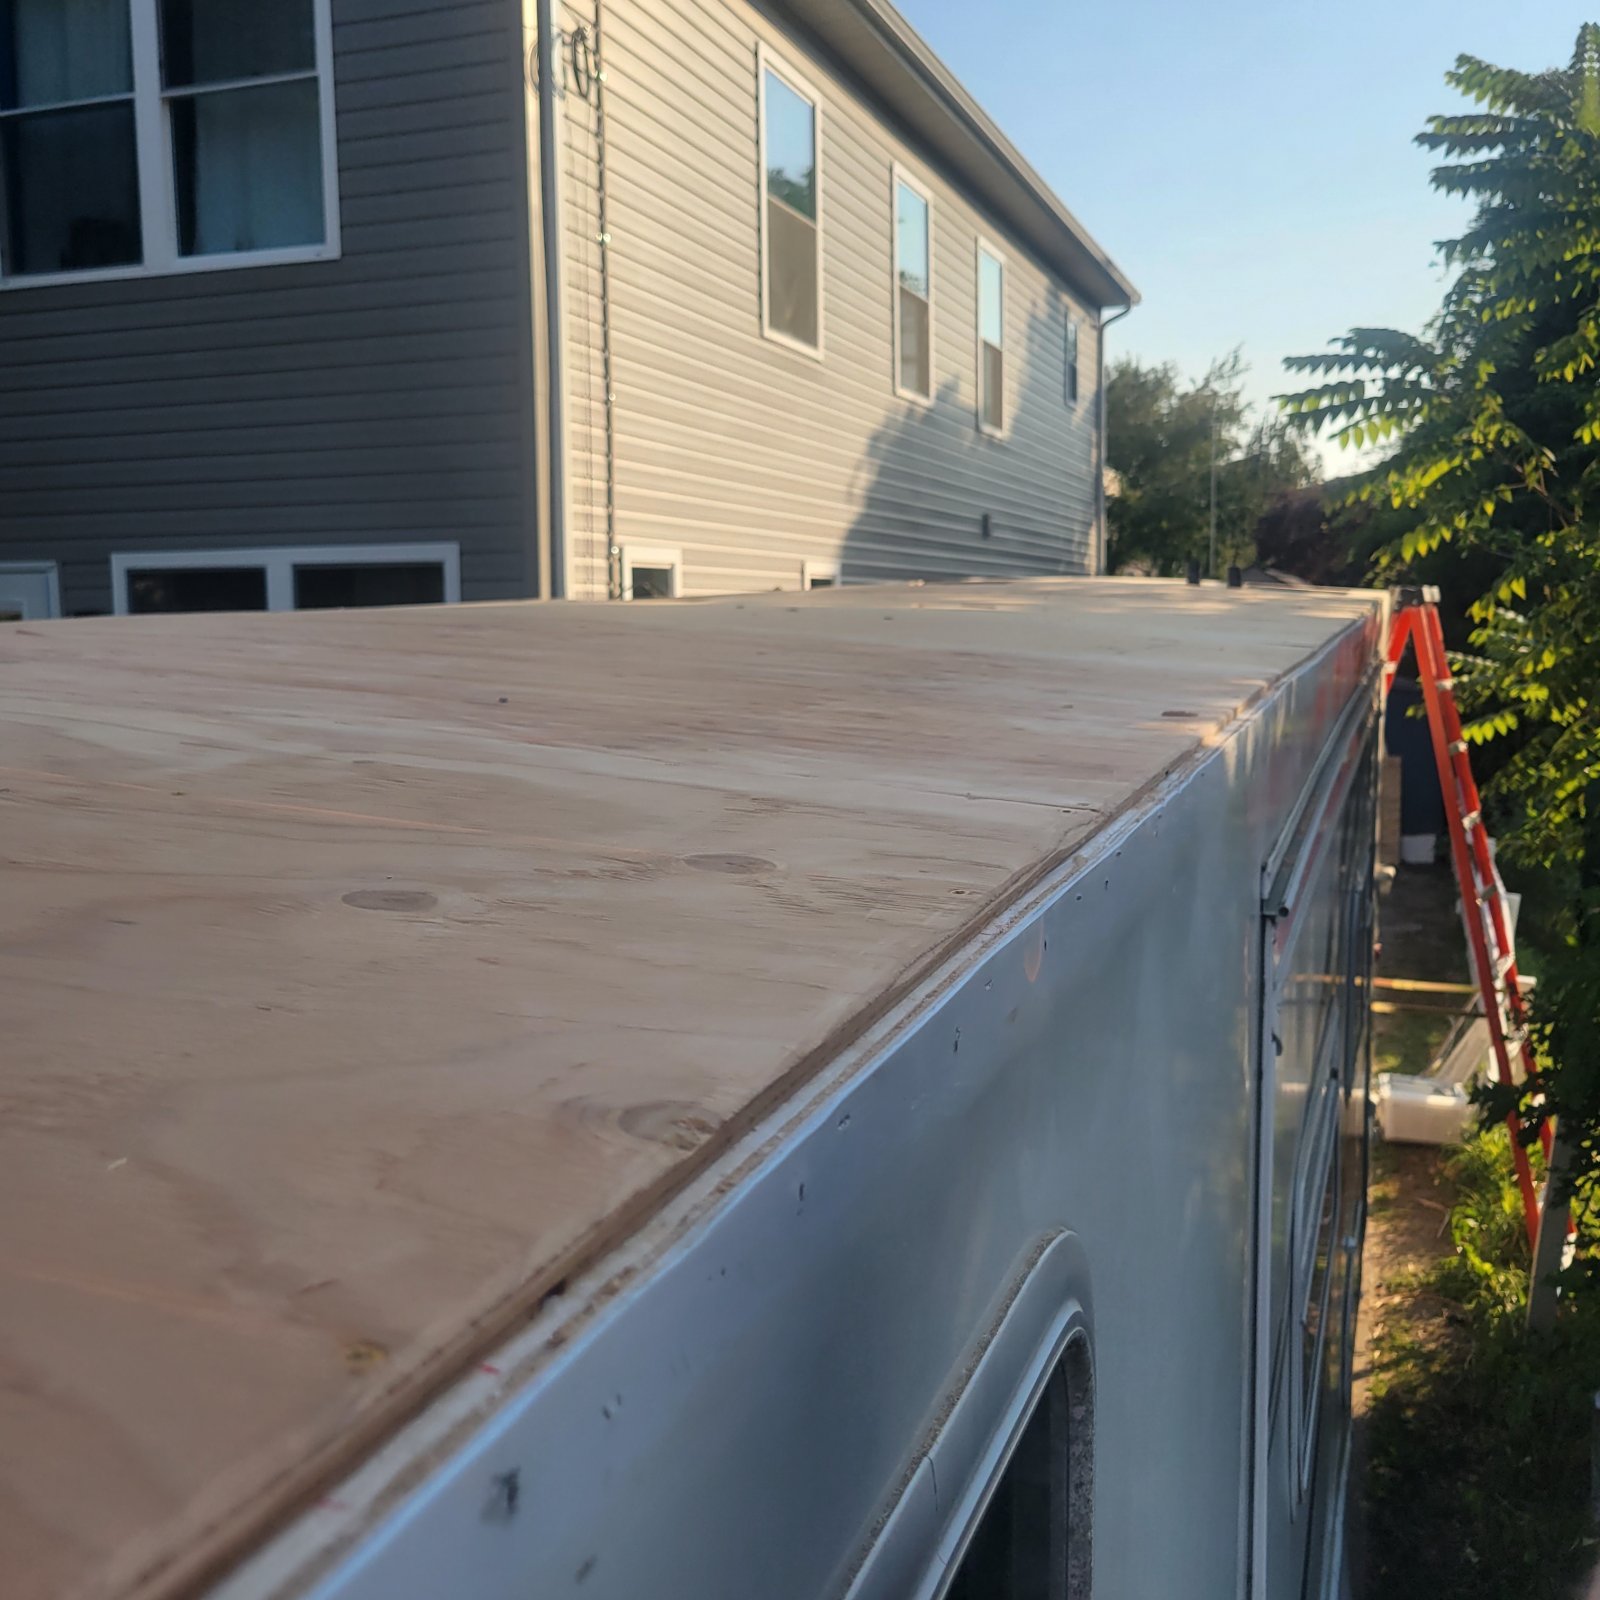
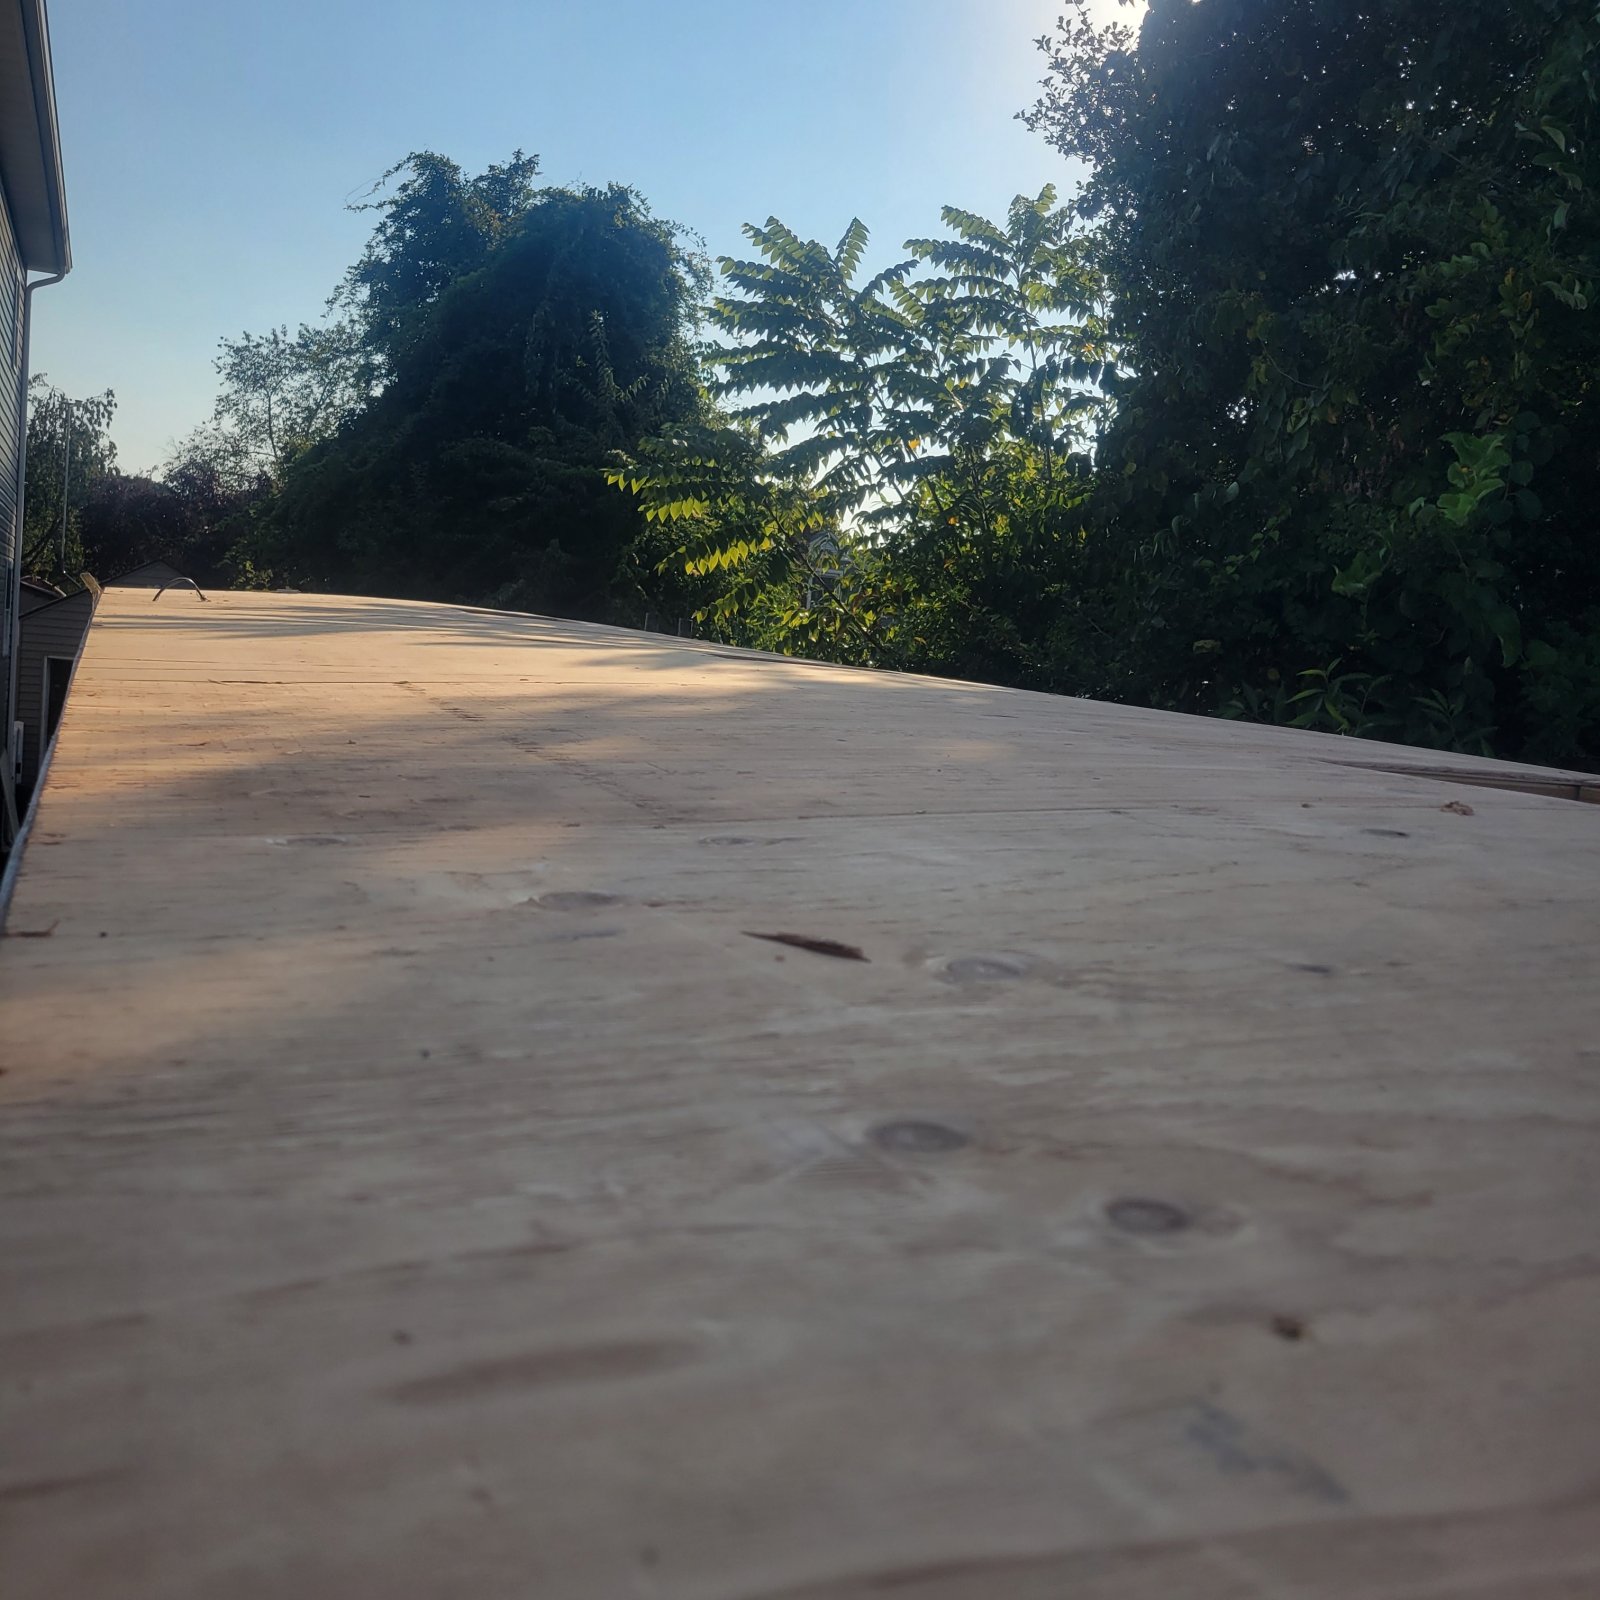
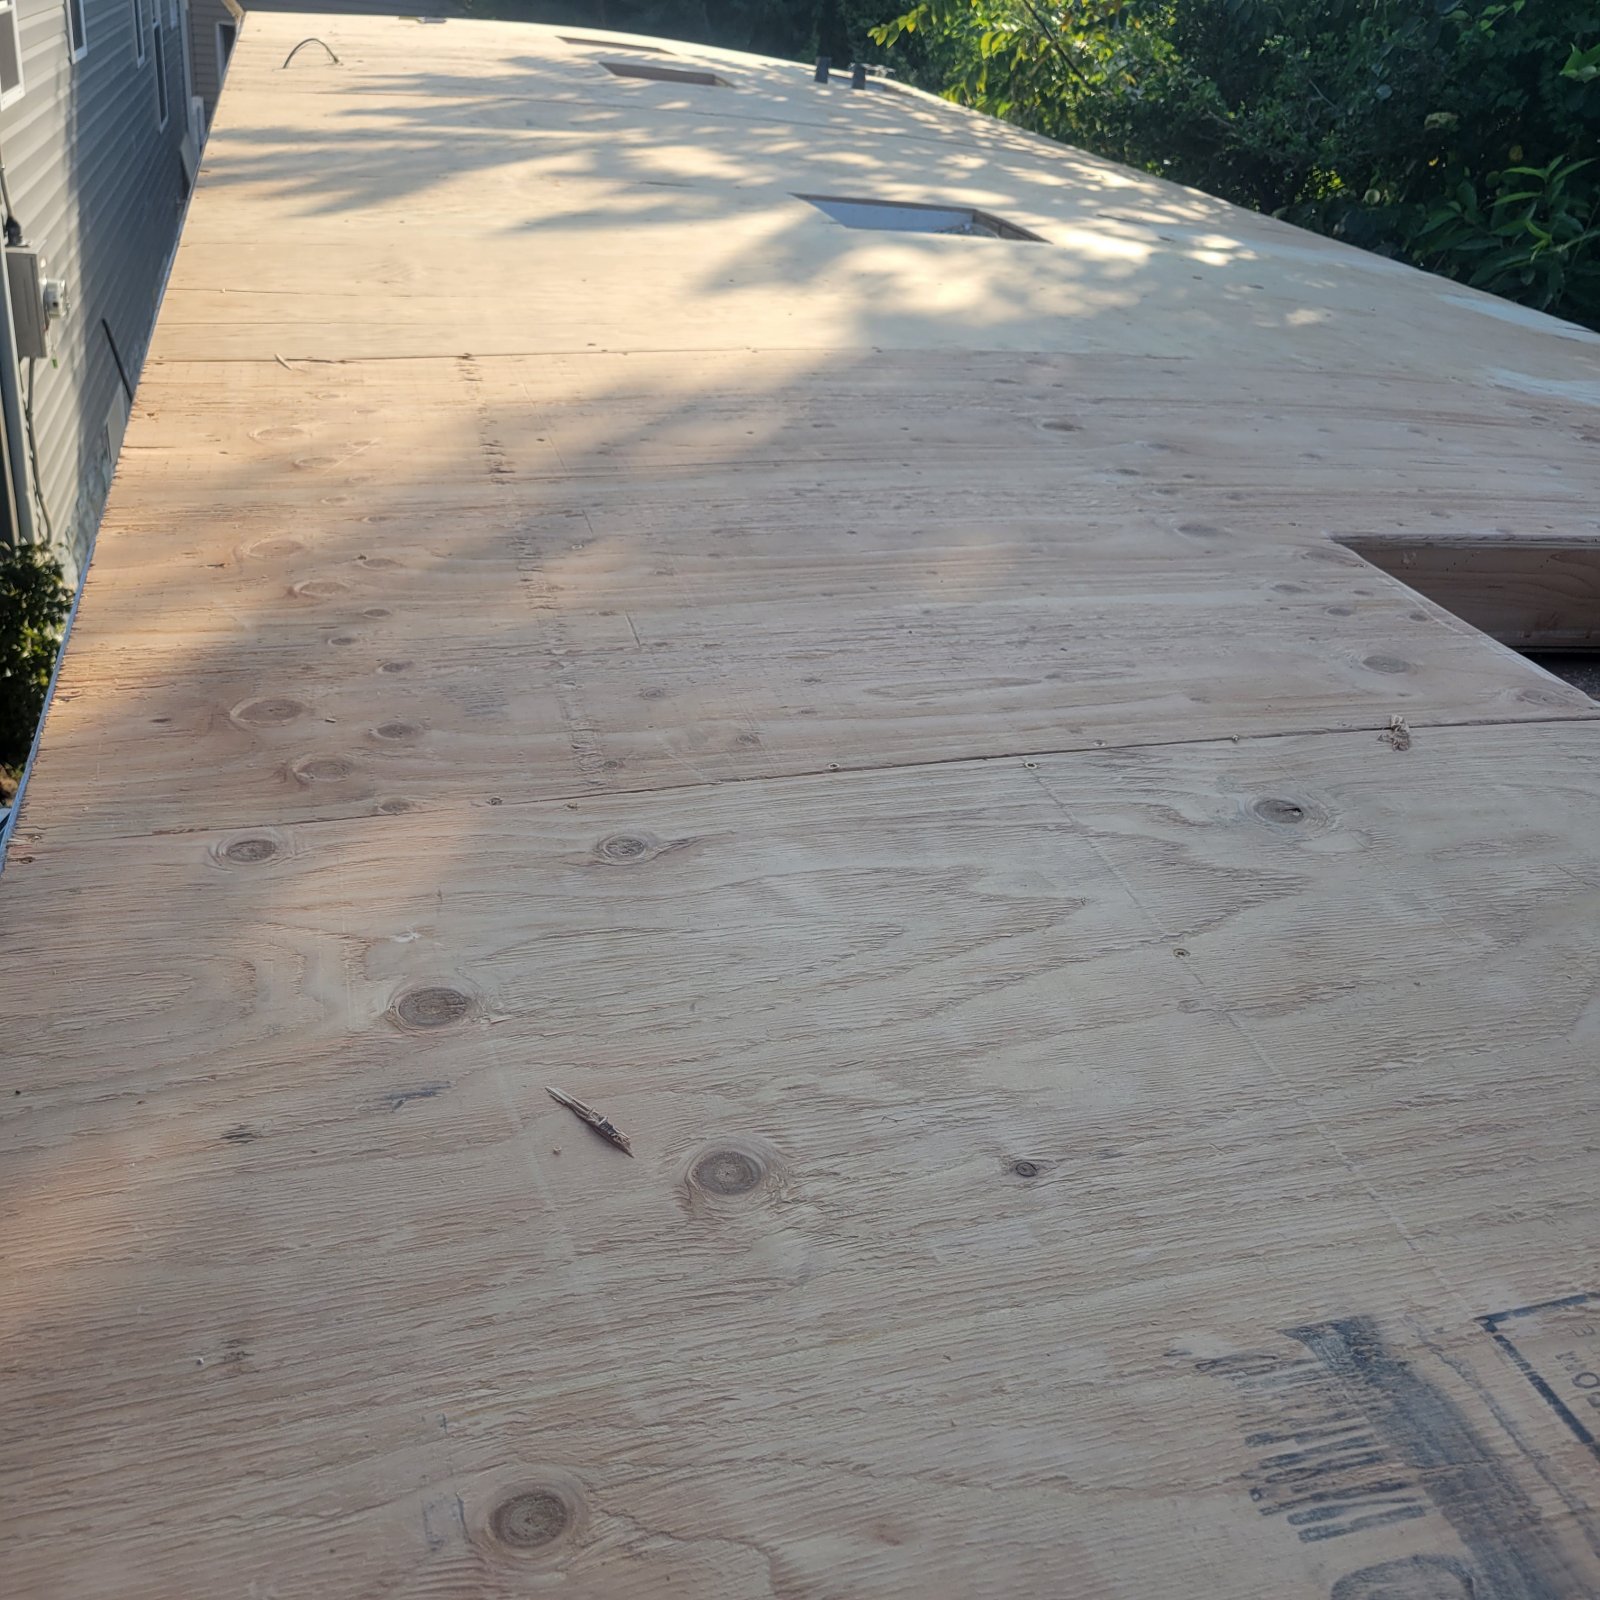
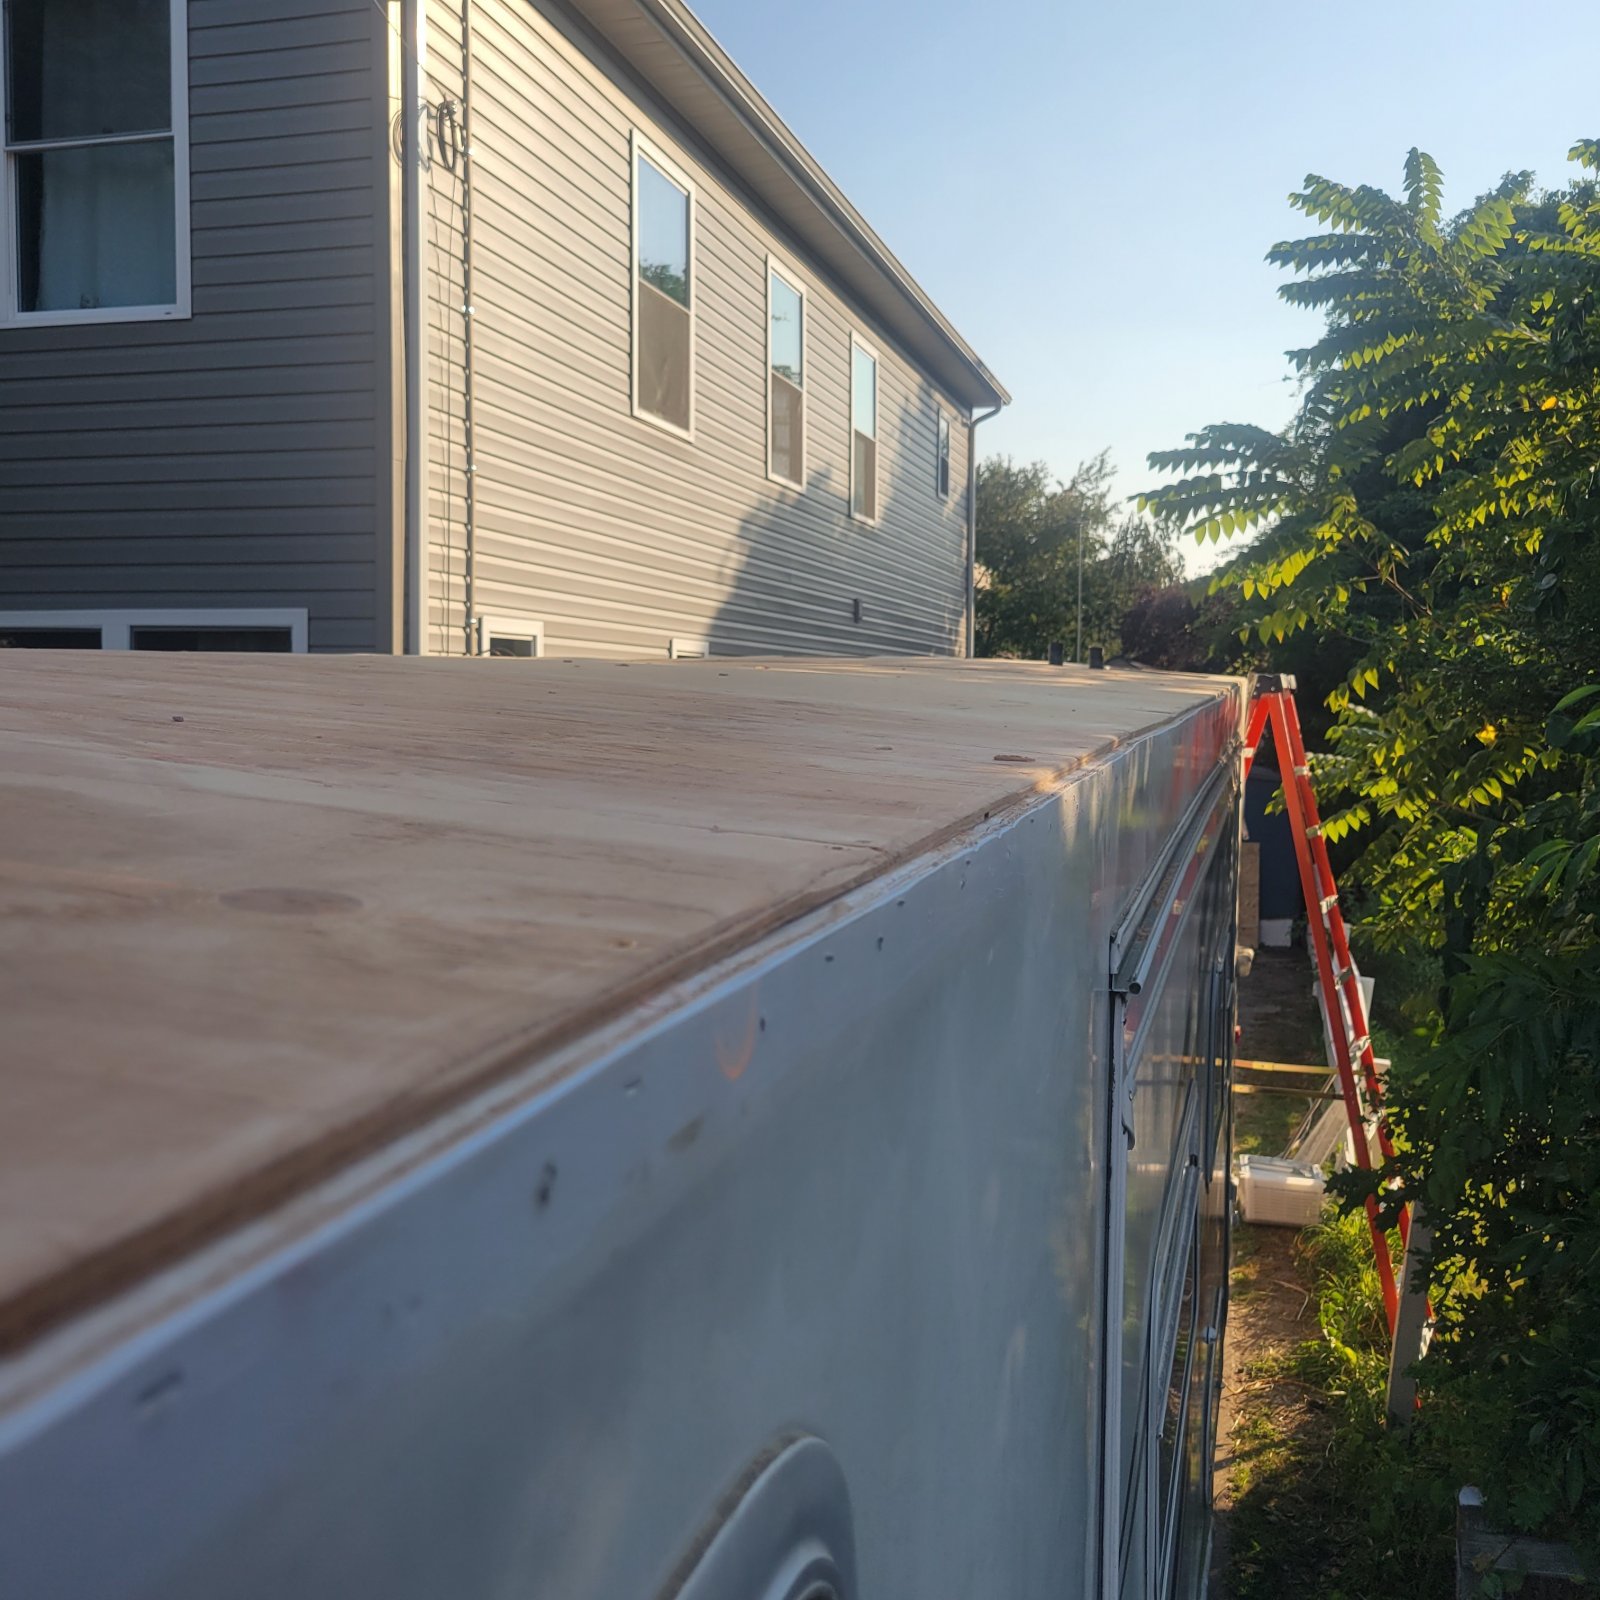
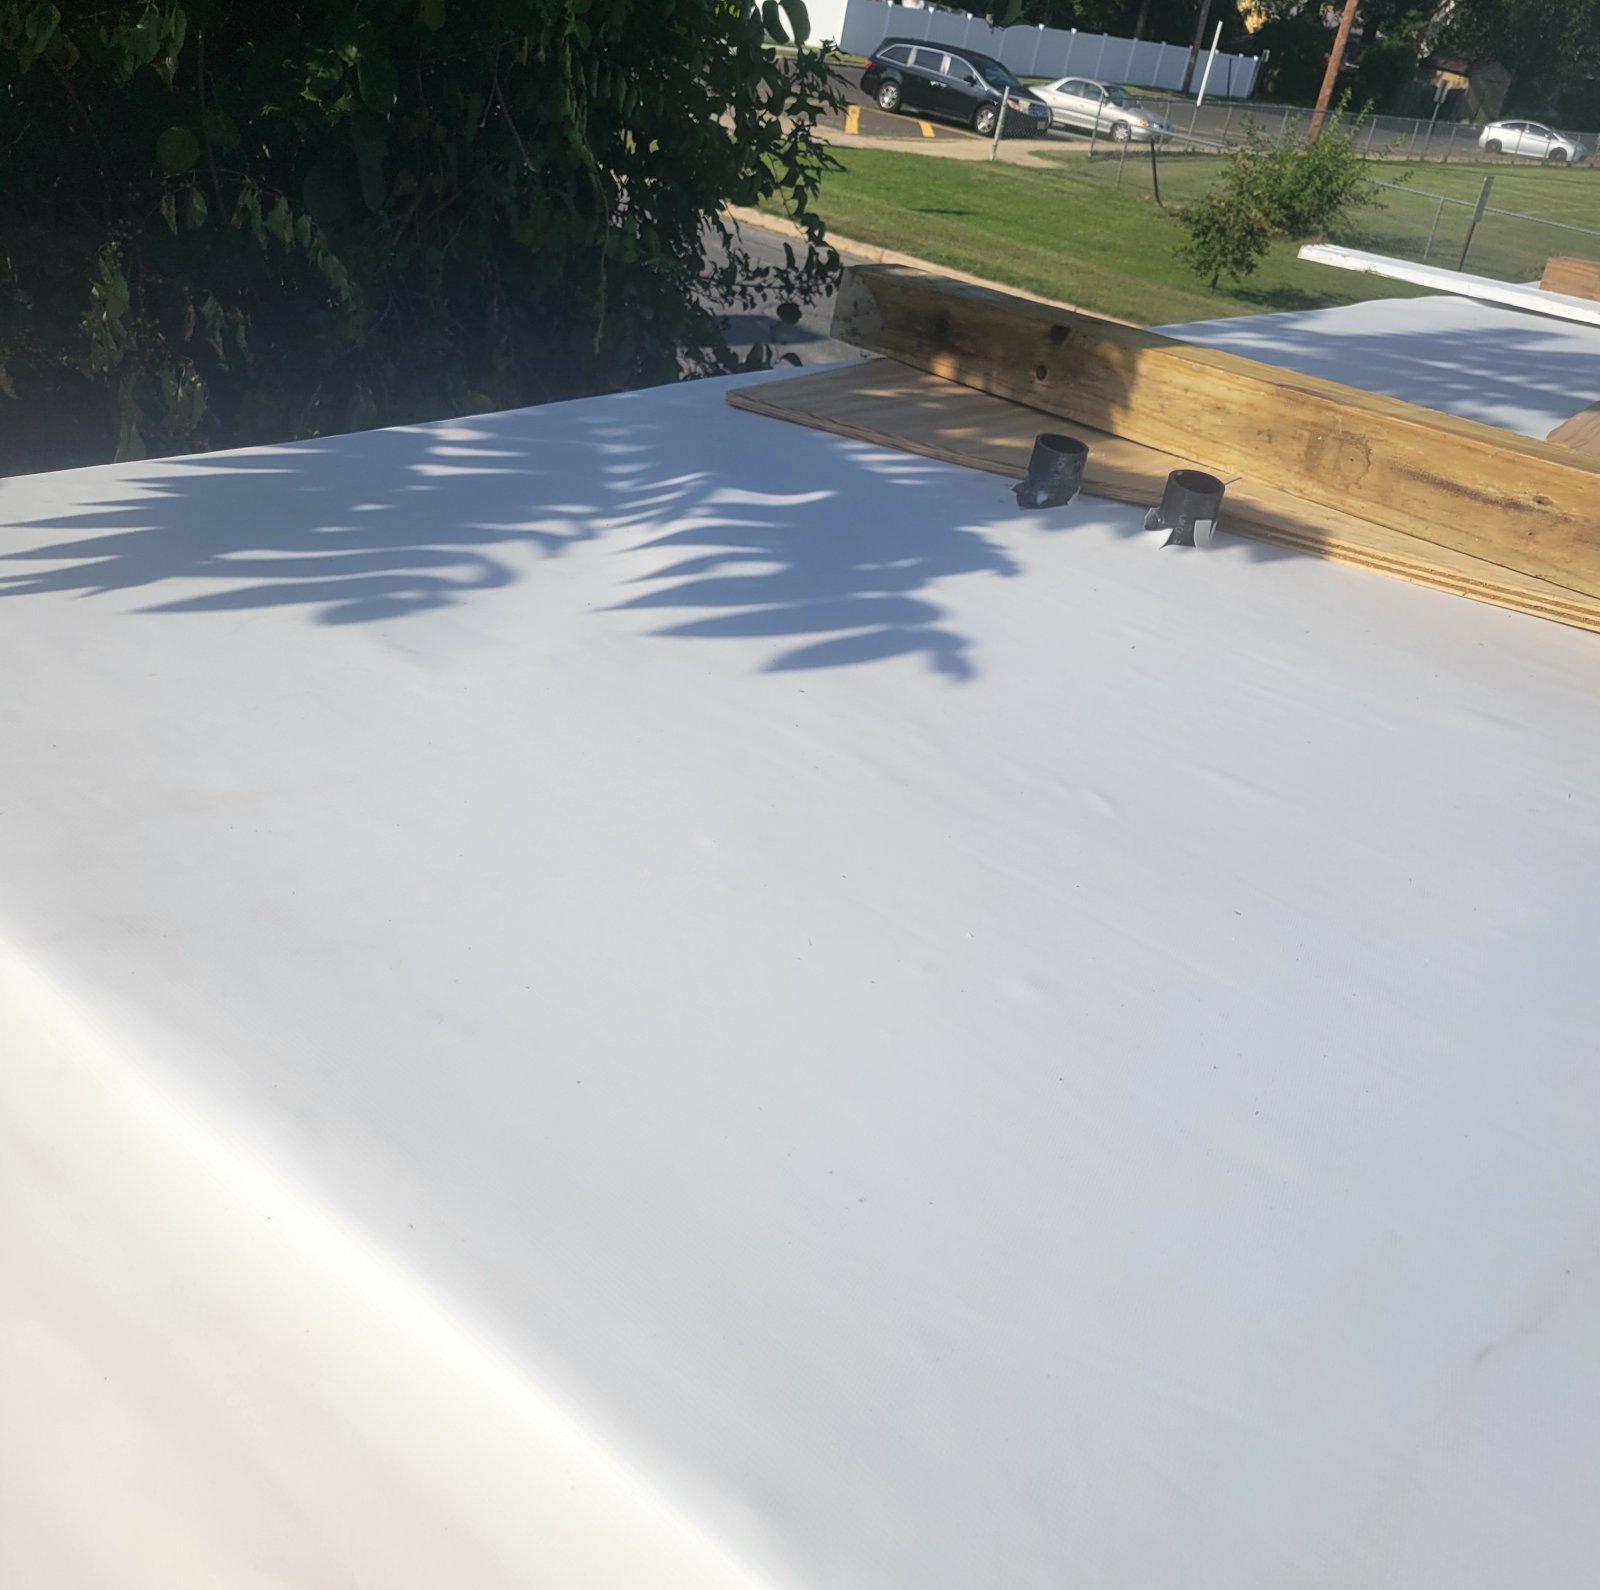
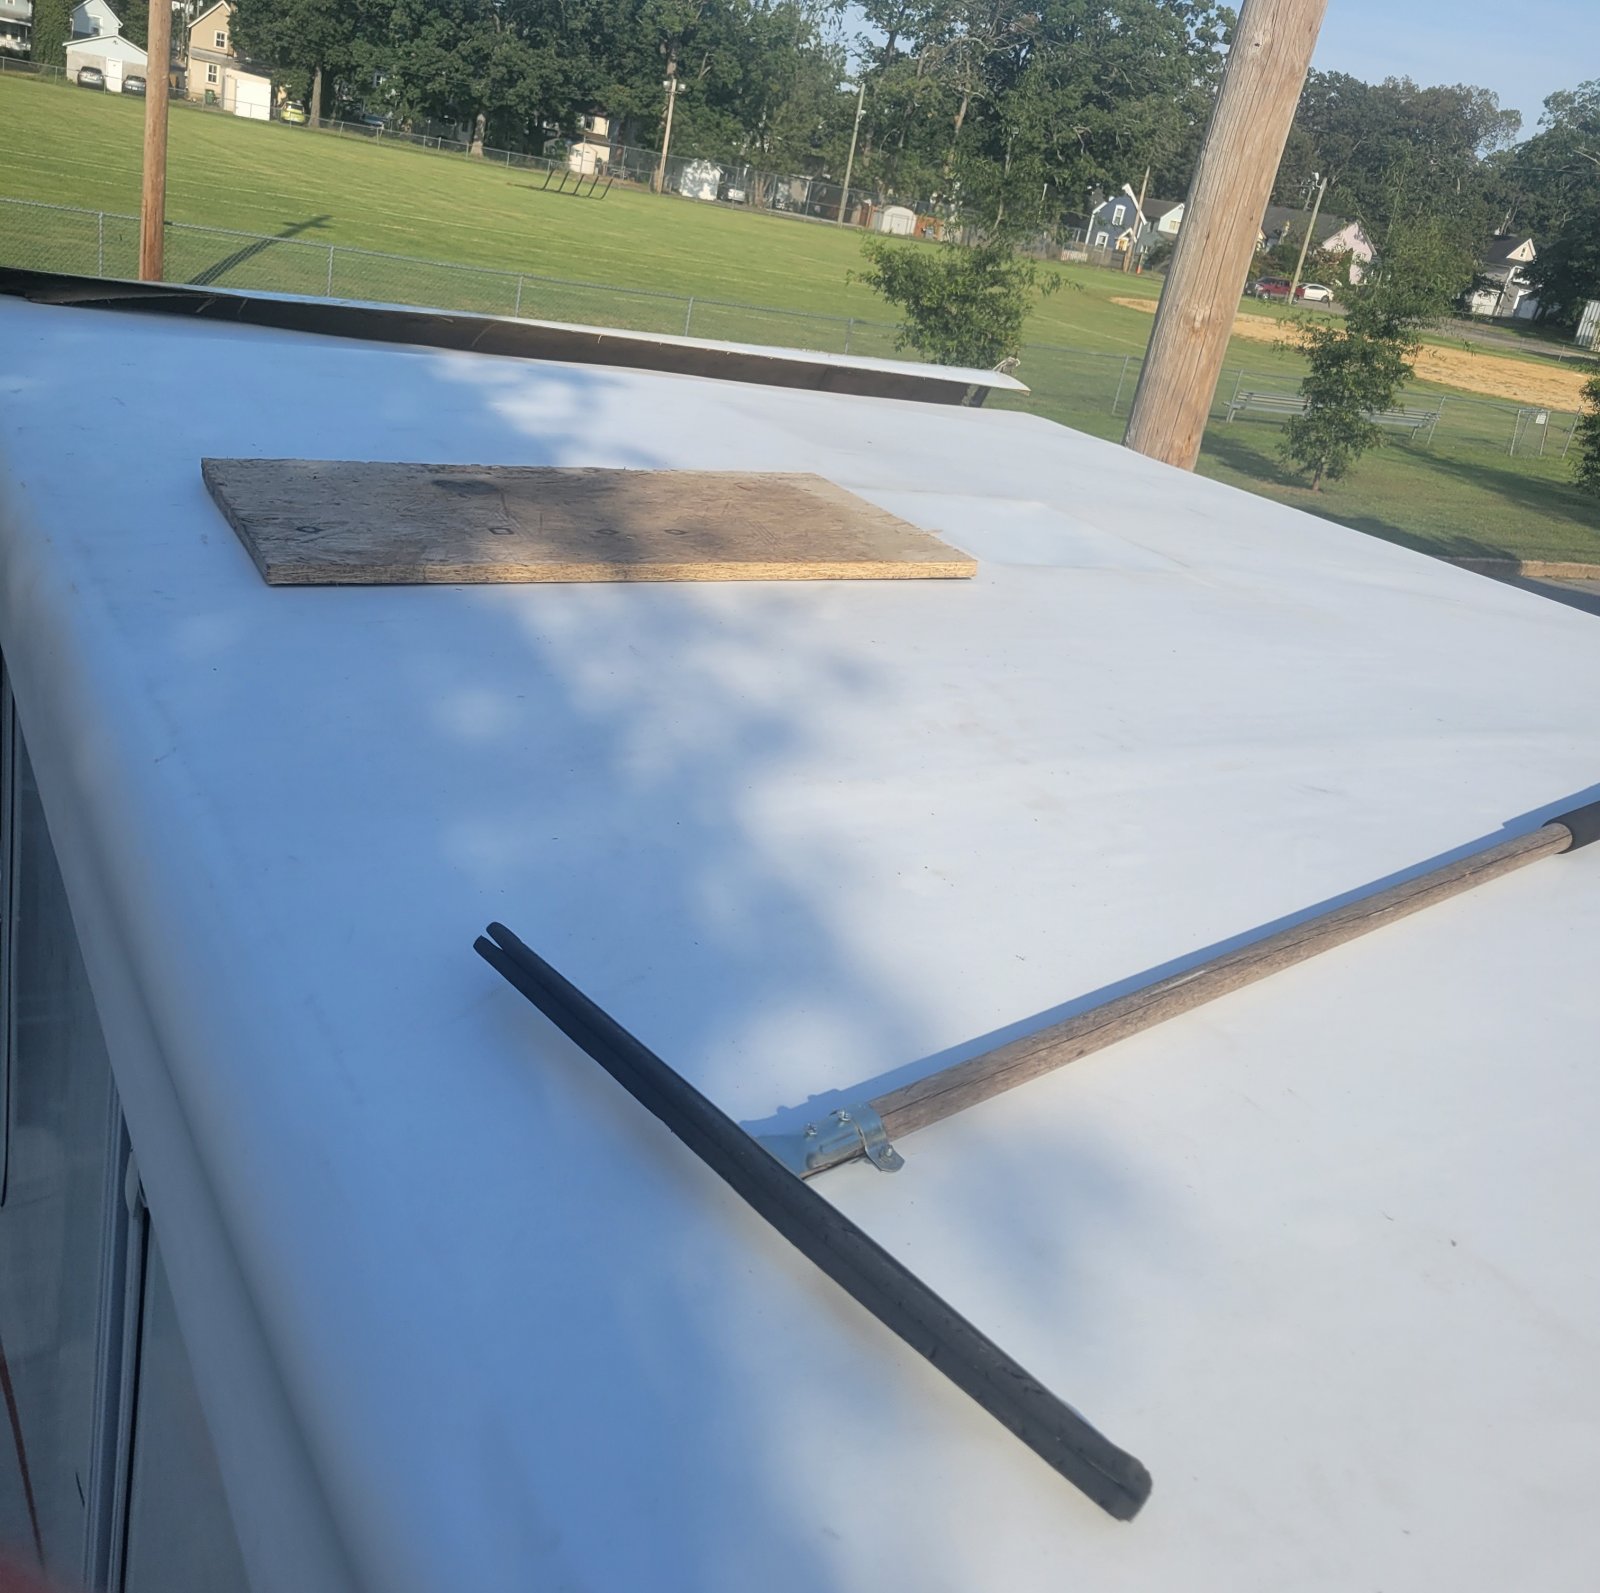
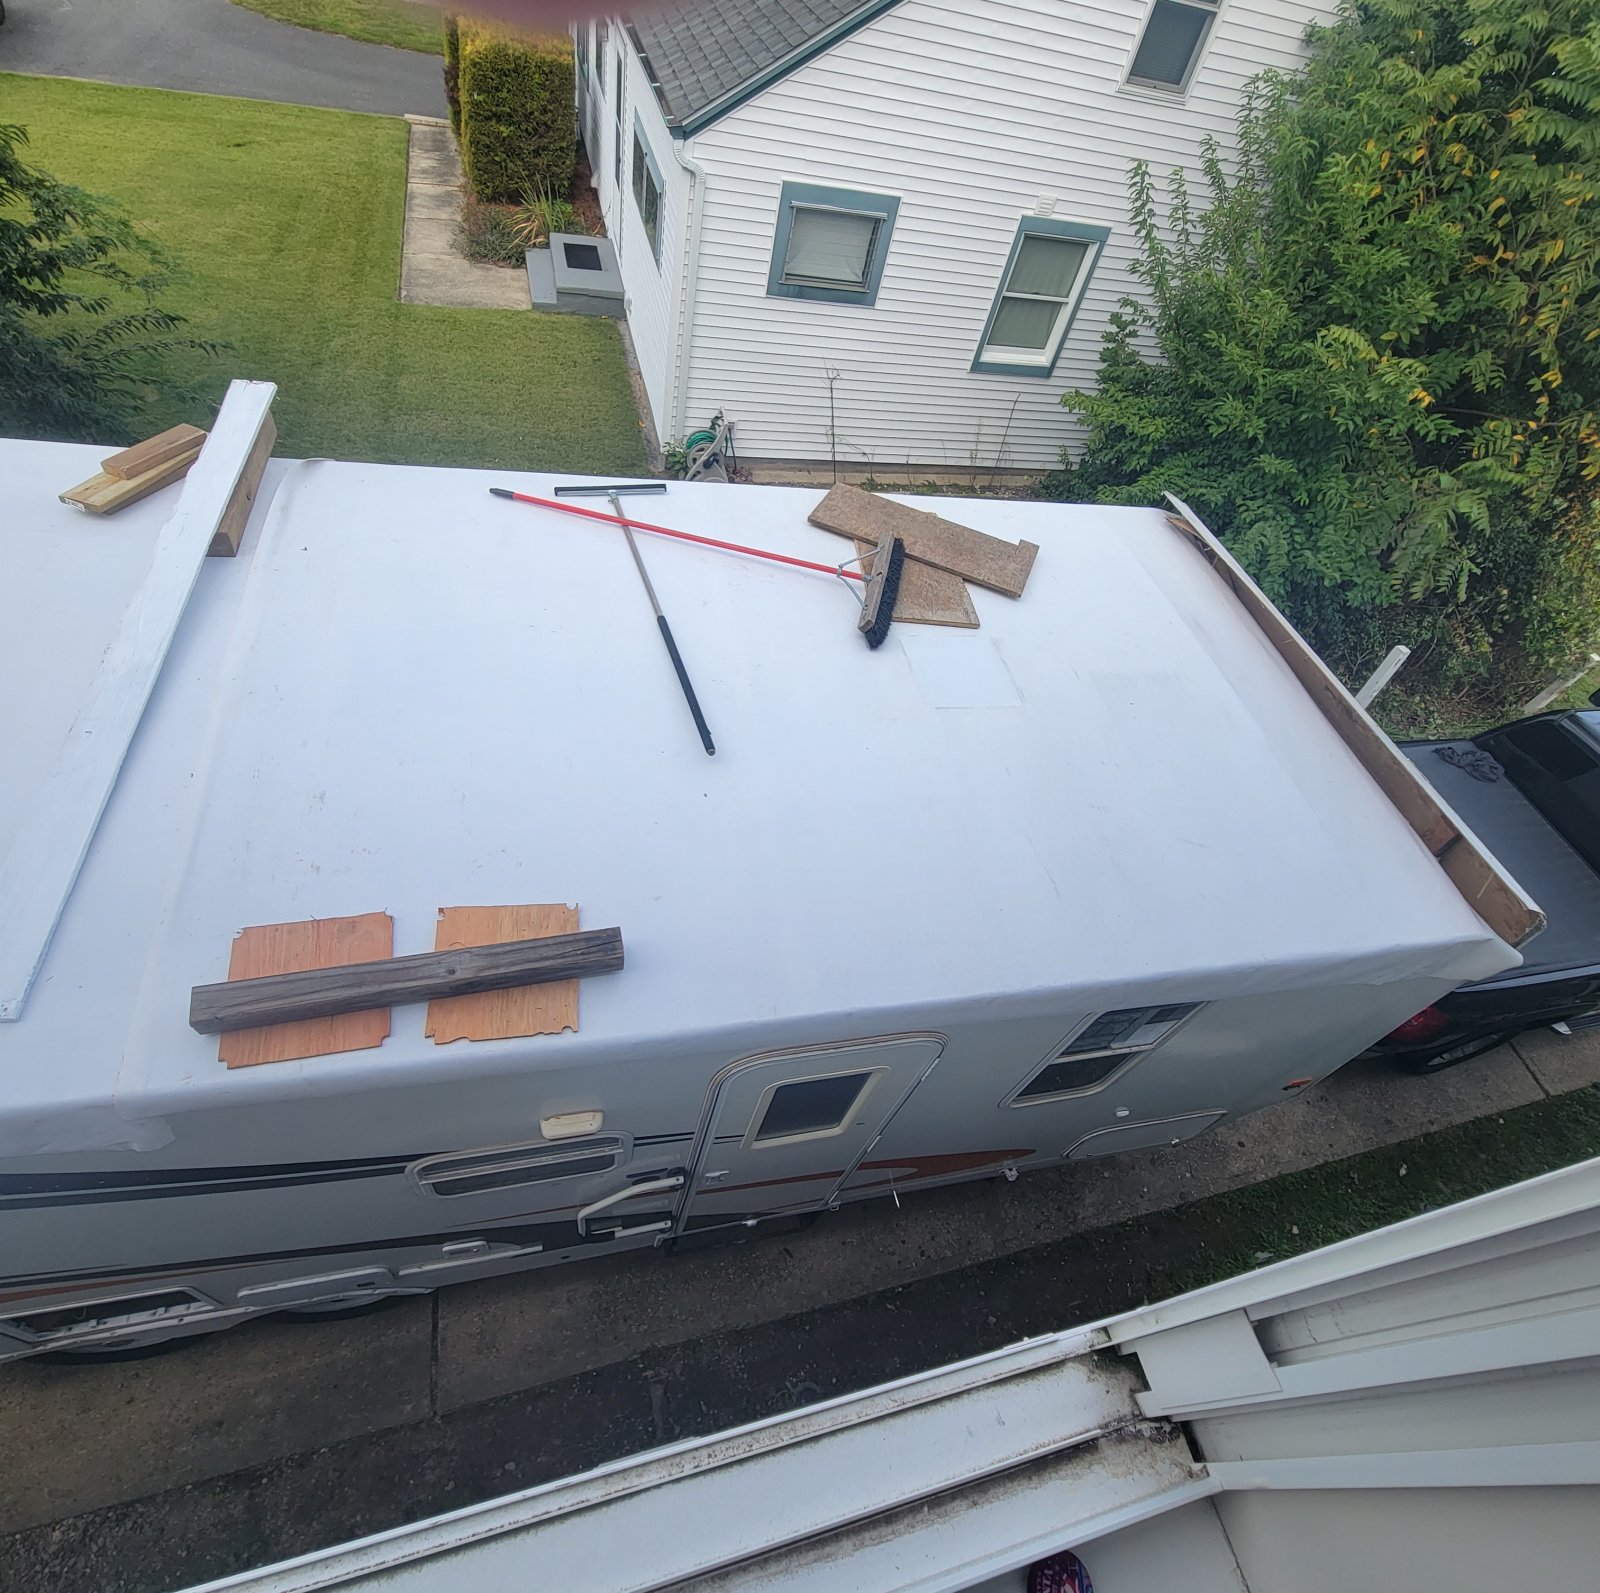
Hey John and anyone who might be following along. Sorry I didn't post an update until now. We spent the last two days cutting, screwing down the decking, and sanding sanding sanding. Oh, we also did some sanding.
We are now ready to put down the EPDM. But alas, no more days off, waiting on extra glue, and the weather is supposed to get nasty towards the end of the week, we decided to button her up and throw the cover on. Hopefully, we'll have everything in place for this weekend, but honestly, the 7-day isn't looking too promising. We'll do it when we can!
Here are Photos from Sunday
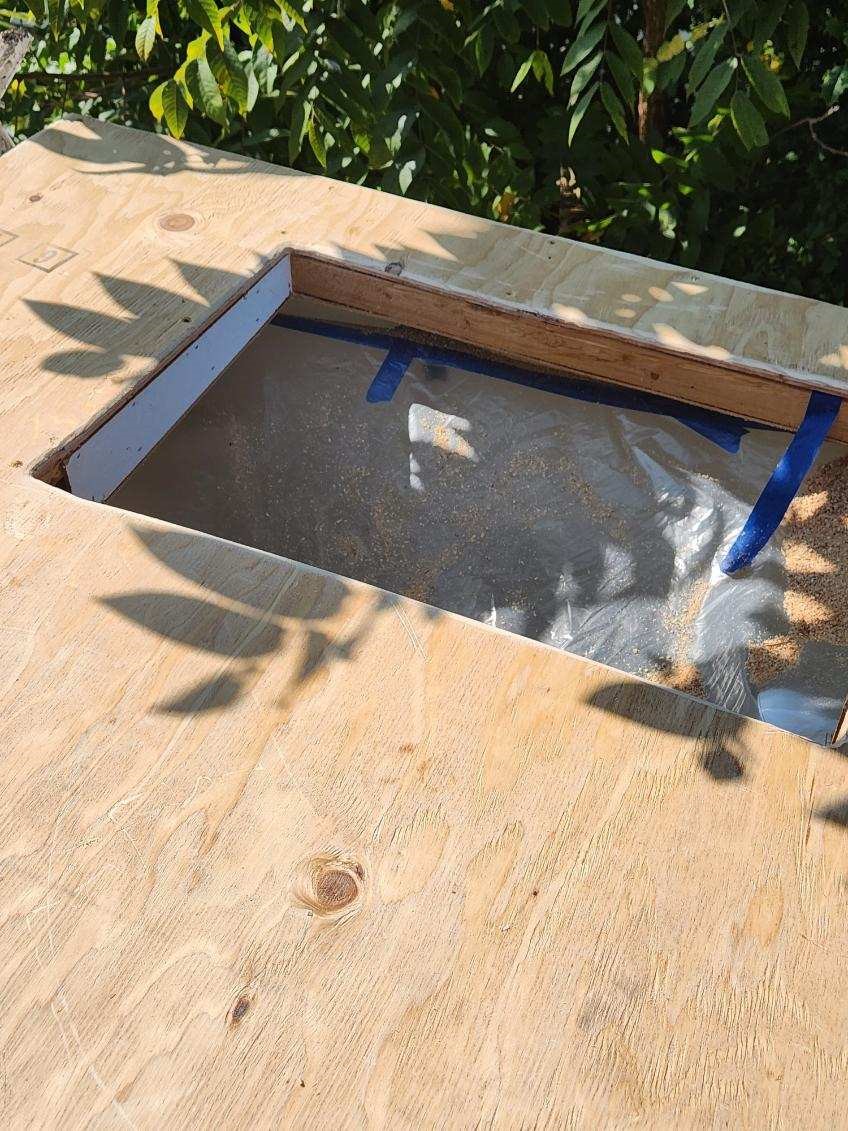
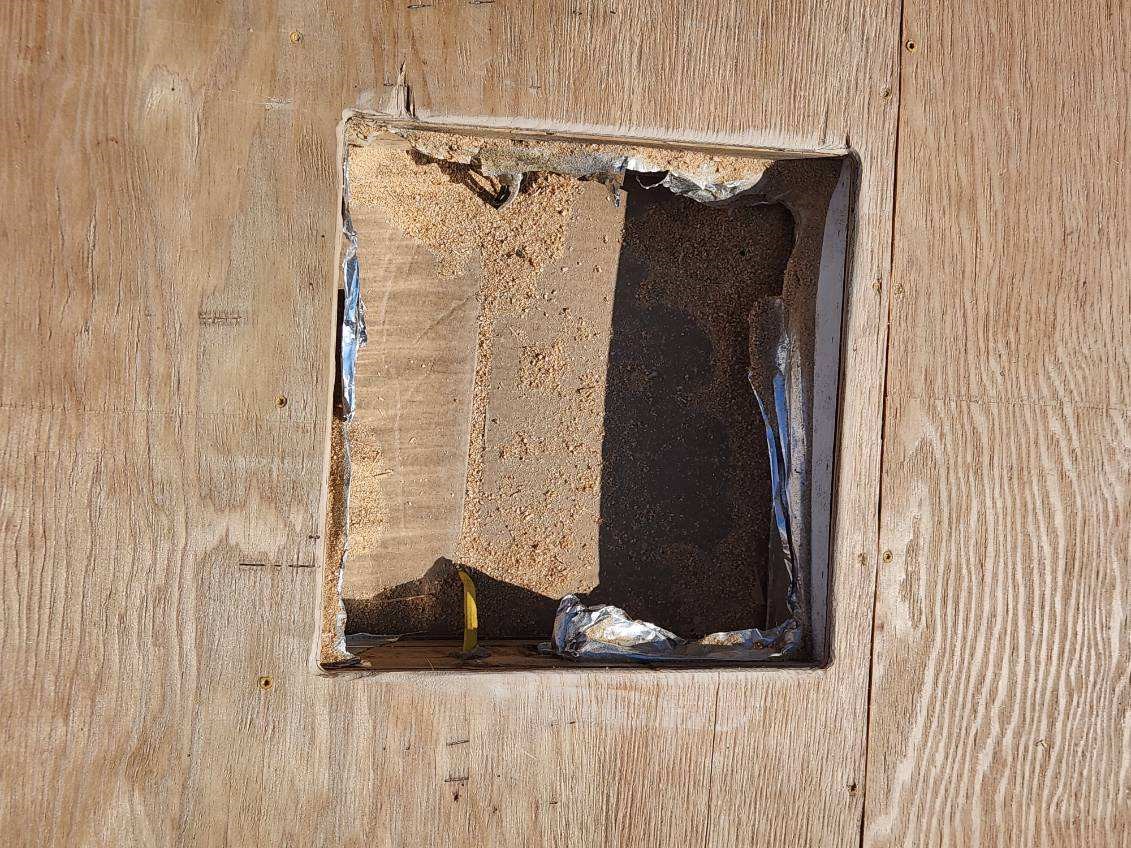
John B, your tip about using a router for the openings was spot on. I don't know why I never think to use one for cutting (I always used them for decorating).
After taping up the openings


My buddy Chris did the honors
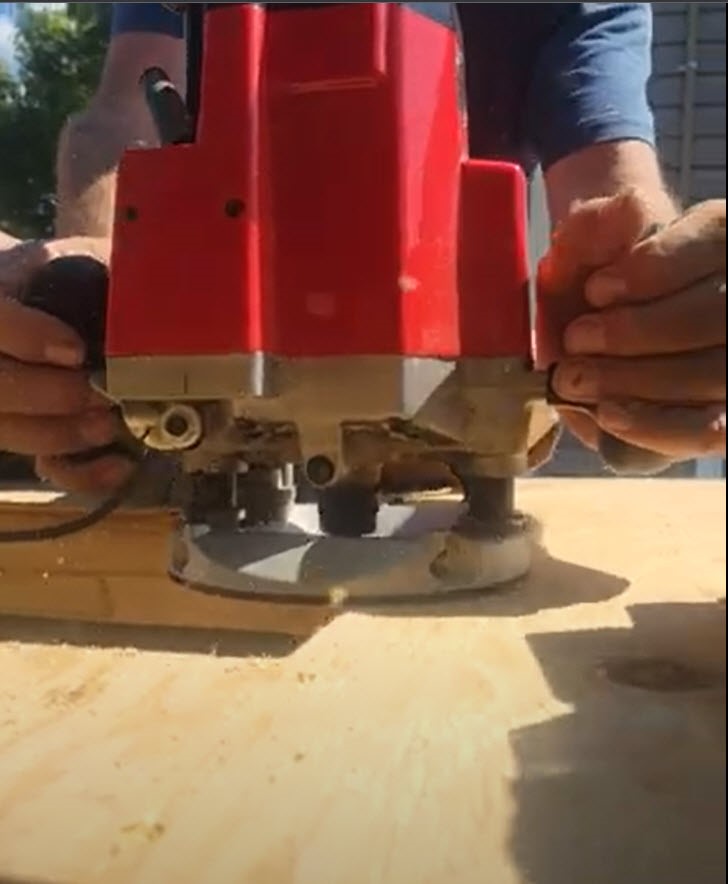
Then we sanded over the edges
Then came the front piece. My wife Becky did a heck of a job sanding this down.
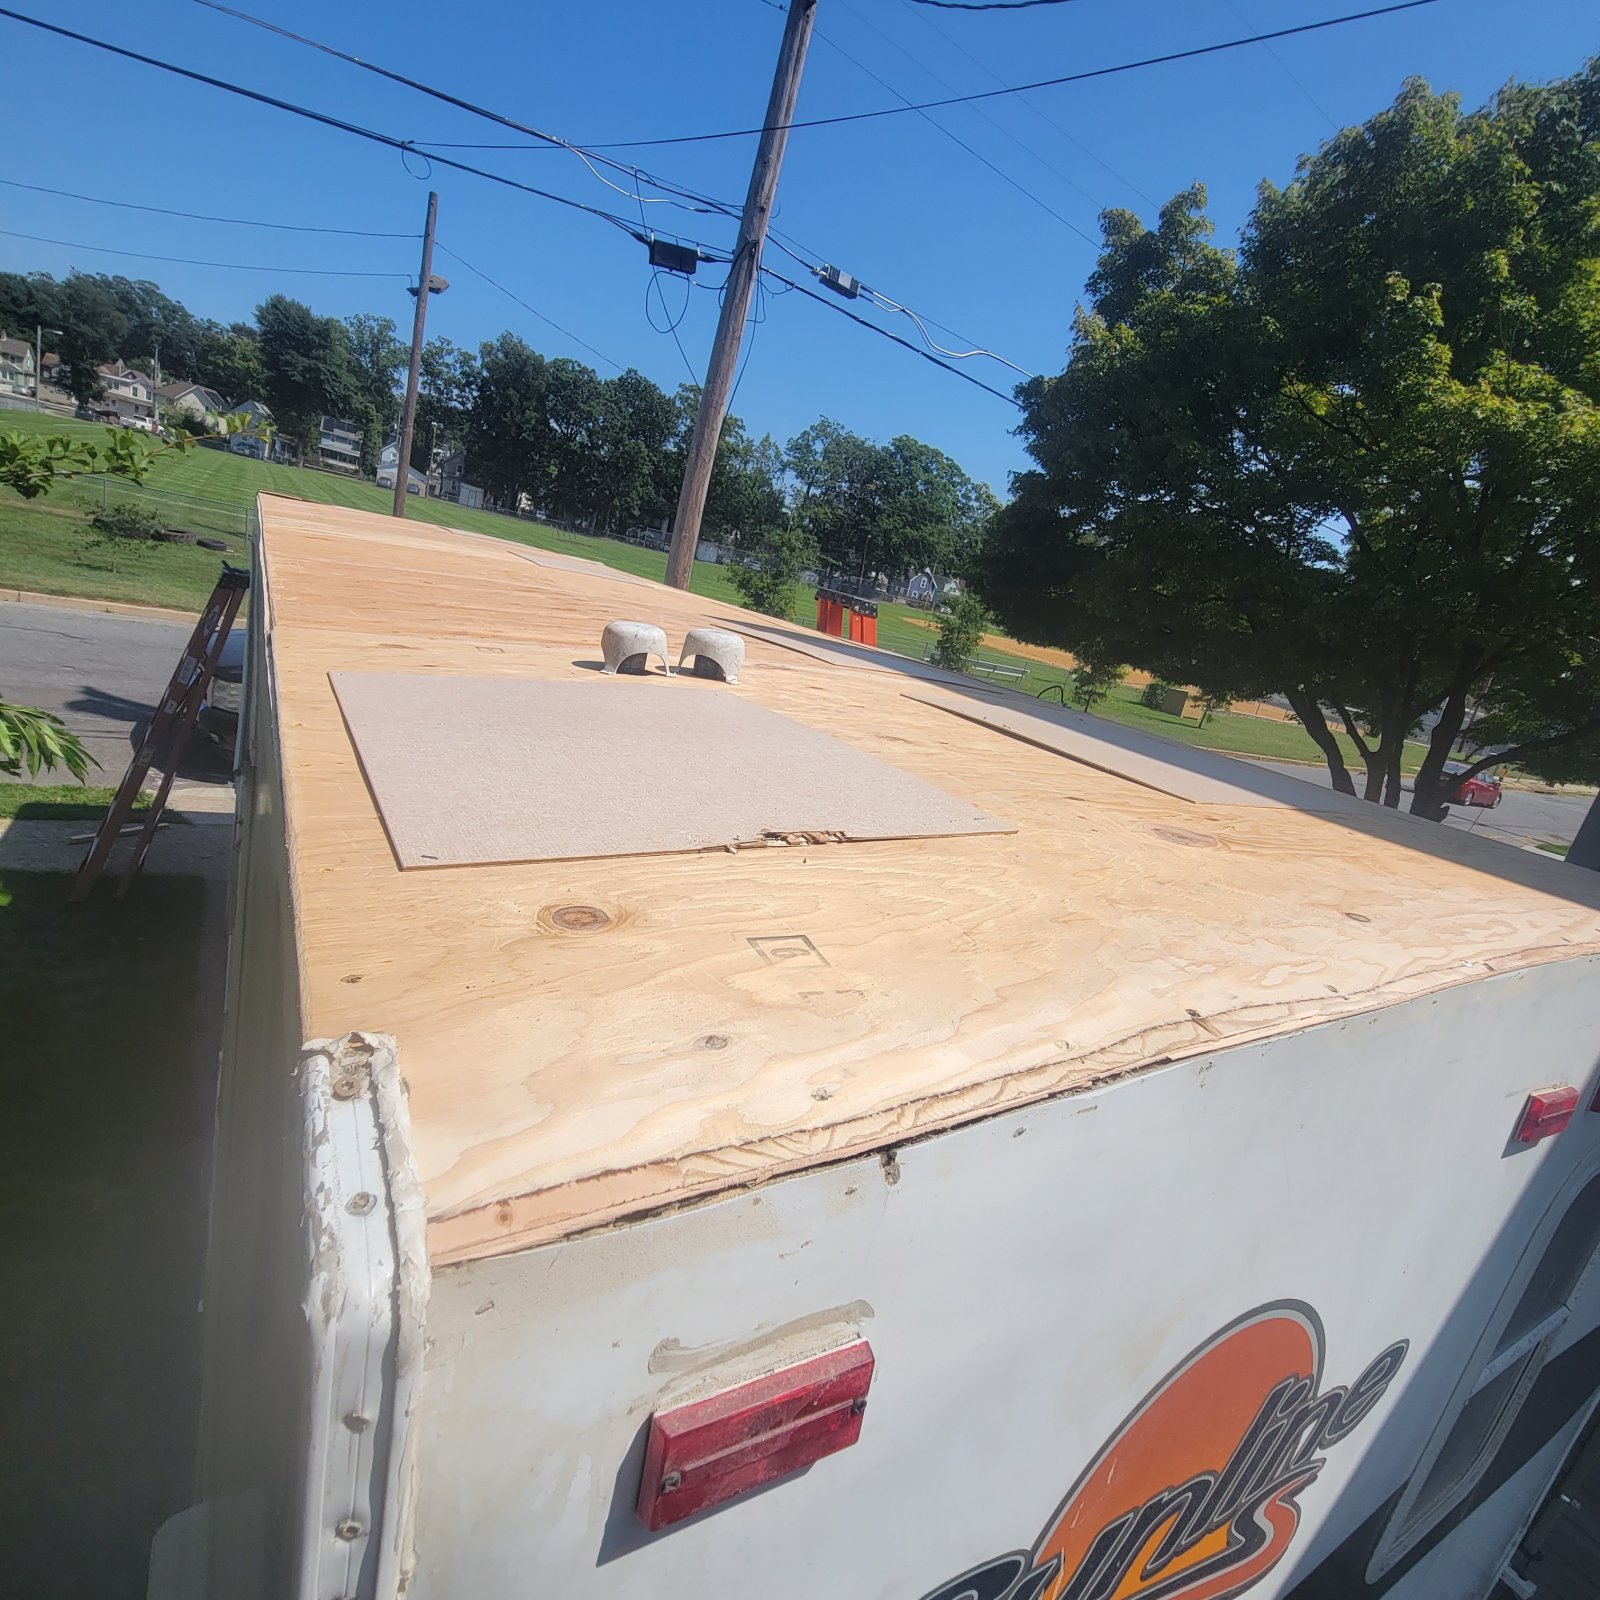
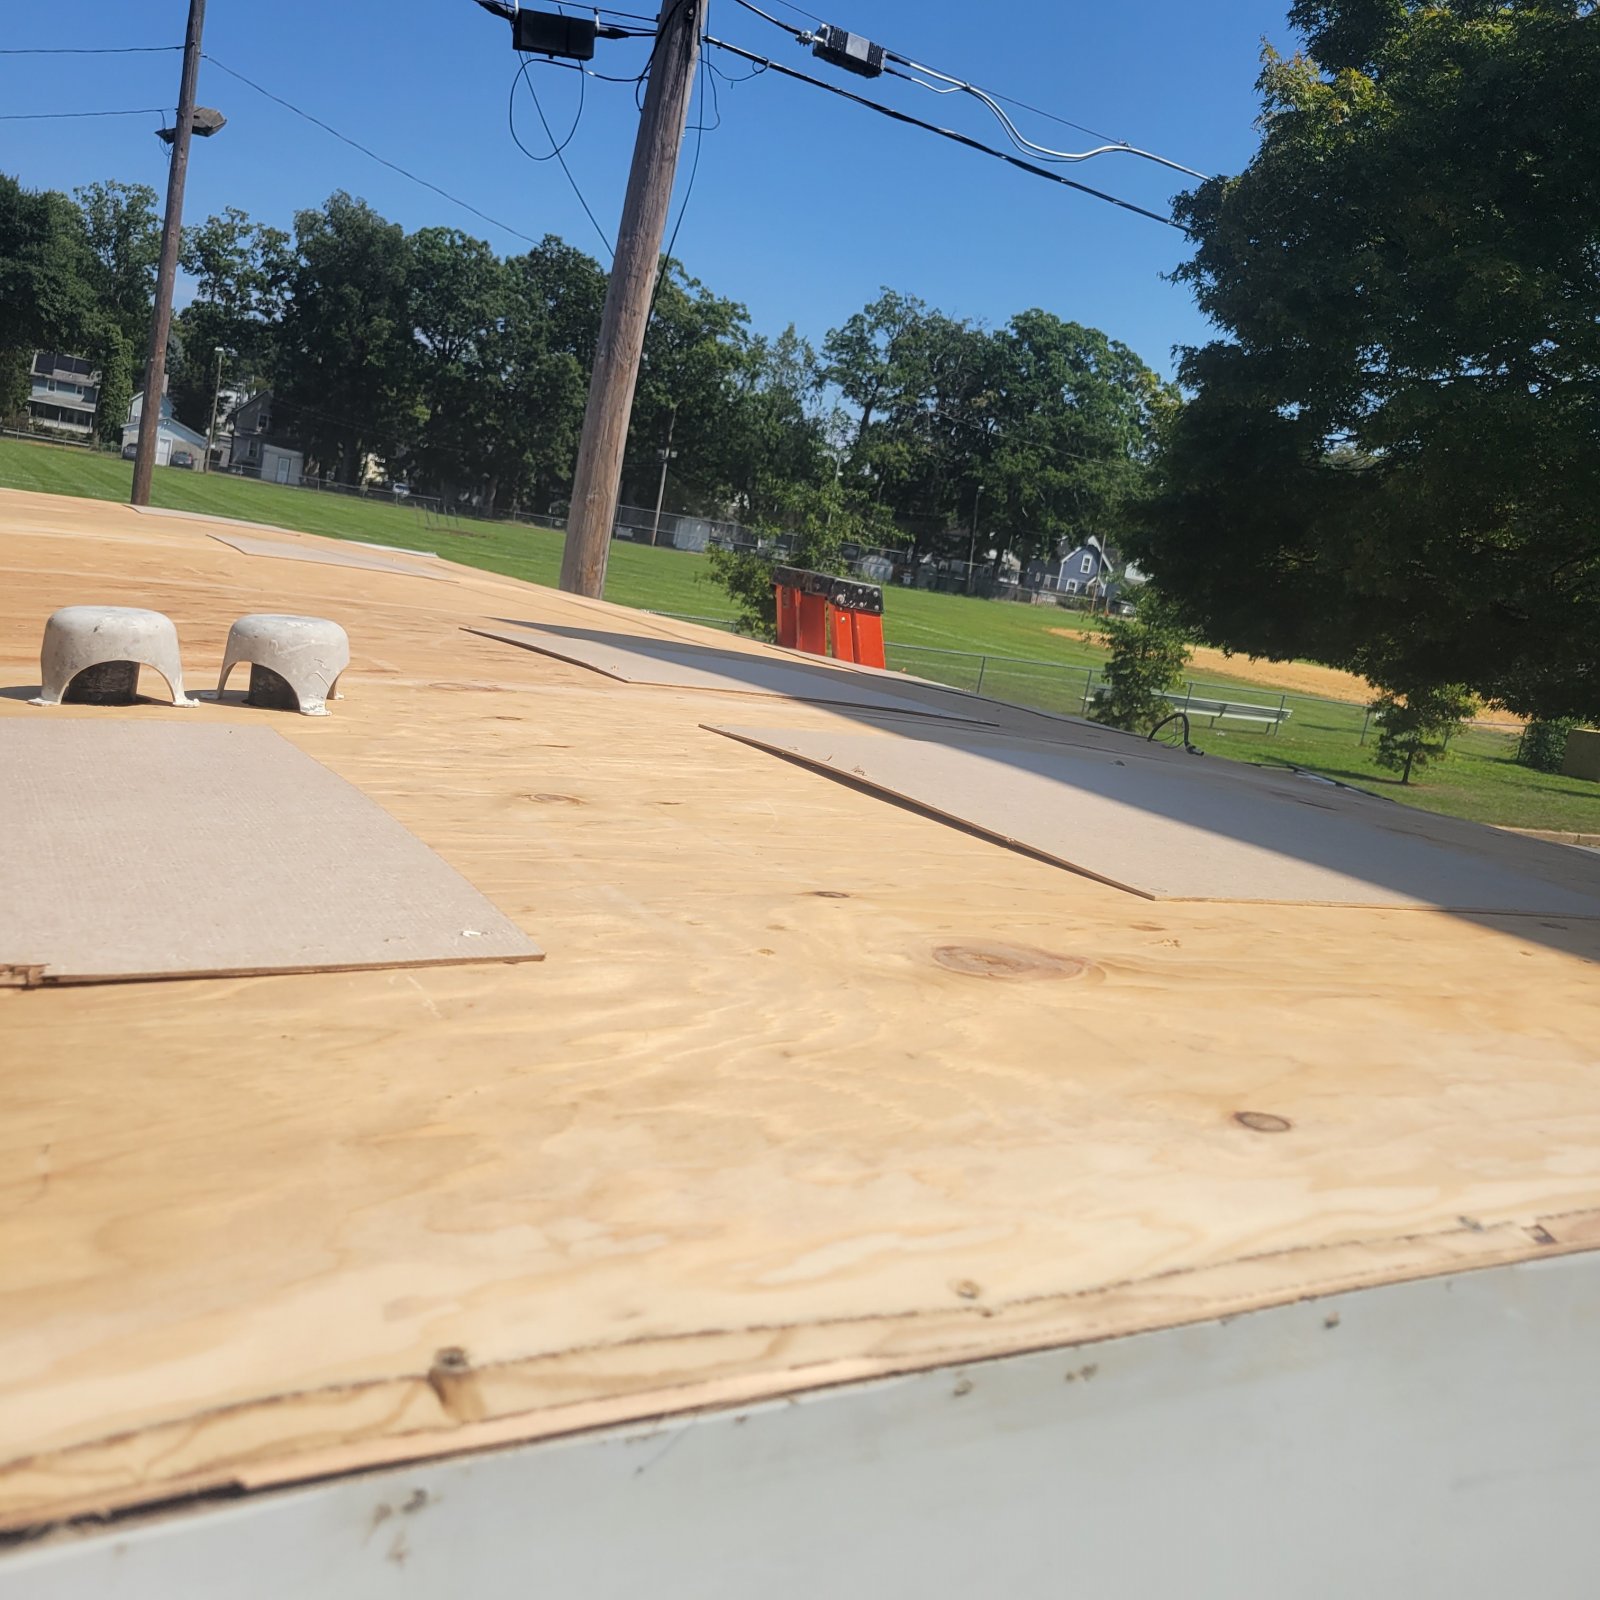
And it fits great. (Obviously, some more cleanup to do!)
By the end of the Day Sunday, we were just about done cutting and rounding all the edges. But, a keen eye might see that we missed cutting out one of the vents!
Originally we were going to take the day off Monday. It's been a LONG weekend. But Chris and I don't like leaving projects unfinished. As is usual he was reading my mind and showed up at 9.
We cut out the missing refrigerator vent, finished the rounding, checked for where we needed more screws, and checked for high screw heads. After we cleaned off the roof we triple-checked our work.
Maybe not quite up to John B standards  but I think it looks pretty darn good.
You can see in the pictures above that we don't have alot of room to work. We moved the trailer to the end of the driveway so that the tounge is on the sidewalk. That's our house in the background. The Tree on the right is in my neighbor's yard where we have about 12 feet from our house to his fence. But we get along great with our neighbor and he let us take down some of the fence planks to give us more room.
Some replies...
Quote:
|
...with the power planner. Much faster. A high-speed carbide blade cuts more quickly than low-grit sandpaper. However, both get the job done.
|
I looked at picking one up at Harbor Freight on Sunday and almost bought it with my 25% off coupon. I figured "Nah, how often will I actually use it? Besides, I know how to use a belt sander" 30 minutes into sanding just the back I was ready to return to the store and pick it up! Did I mention that there was a lot of sanding?
Quote:
|
Yup, there are still a lot of roofing directions that state to use the solid tape. And most all RV roofing is now on water-based glue that needs the porus substraight. It may be, that years ago, when they had oil-based glue, the glue stuck to the tape. Then, time ticked by; they did not stop and think about the new adhesives not sticking to the tape and just left the instructions alone.
|
You got me thinking about this and the fact that I'm dealing with an unknown vendor. The vendor's site says to use "Seam Tape" over the joints, that's why I bought it to begin with. But they don't specify what kind of tape. I have an email to their support, we'll see what they say.
In the meantime, we're doing a little test. I cut off two, 2-inch squares of the roofing, put a strip of the seam tape and another strip of fiberglass drywall tape with a little of the acrylic roof glue down and the squares on top. I'm going to let them dry for a bit and see which one holds better. So far, it feels like the fiberglass tape will work, but the vendor's website says that their glue is not for fiberglass (they probably mean fiberglass decking)
Quote:
|
OK, what is my gutter hack? That is the second time you said this, I have to ask... You mean the flat head screws and the Eternabond tape to get rid of the caulk issue, the mold yuk behind the vinyl screw cover, and the screw rot?
|
Yep! That's the one! I was very surprised when I took that screw cover off, especially around the awning. Algee, mold, and rusty screws. Luckily most of the screw rust is just the heads. Some threads but don't see any wood damage. Would like to keep it that way.
Finally, the questions:
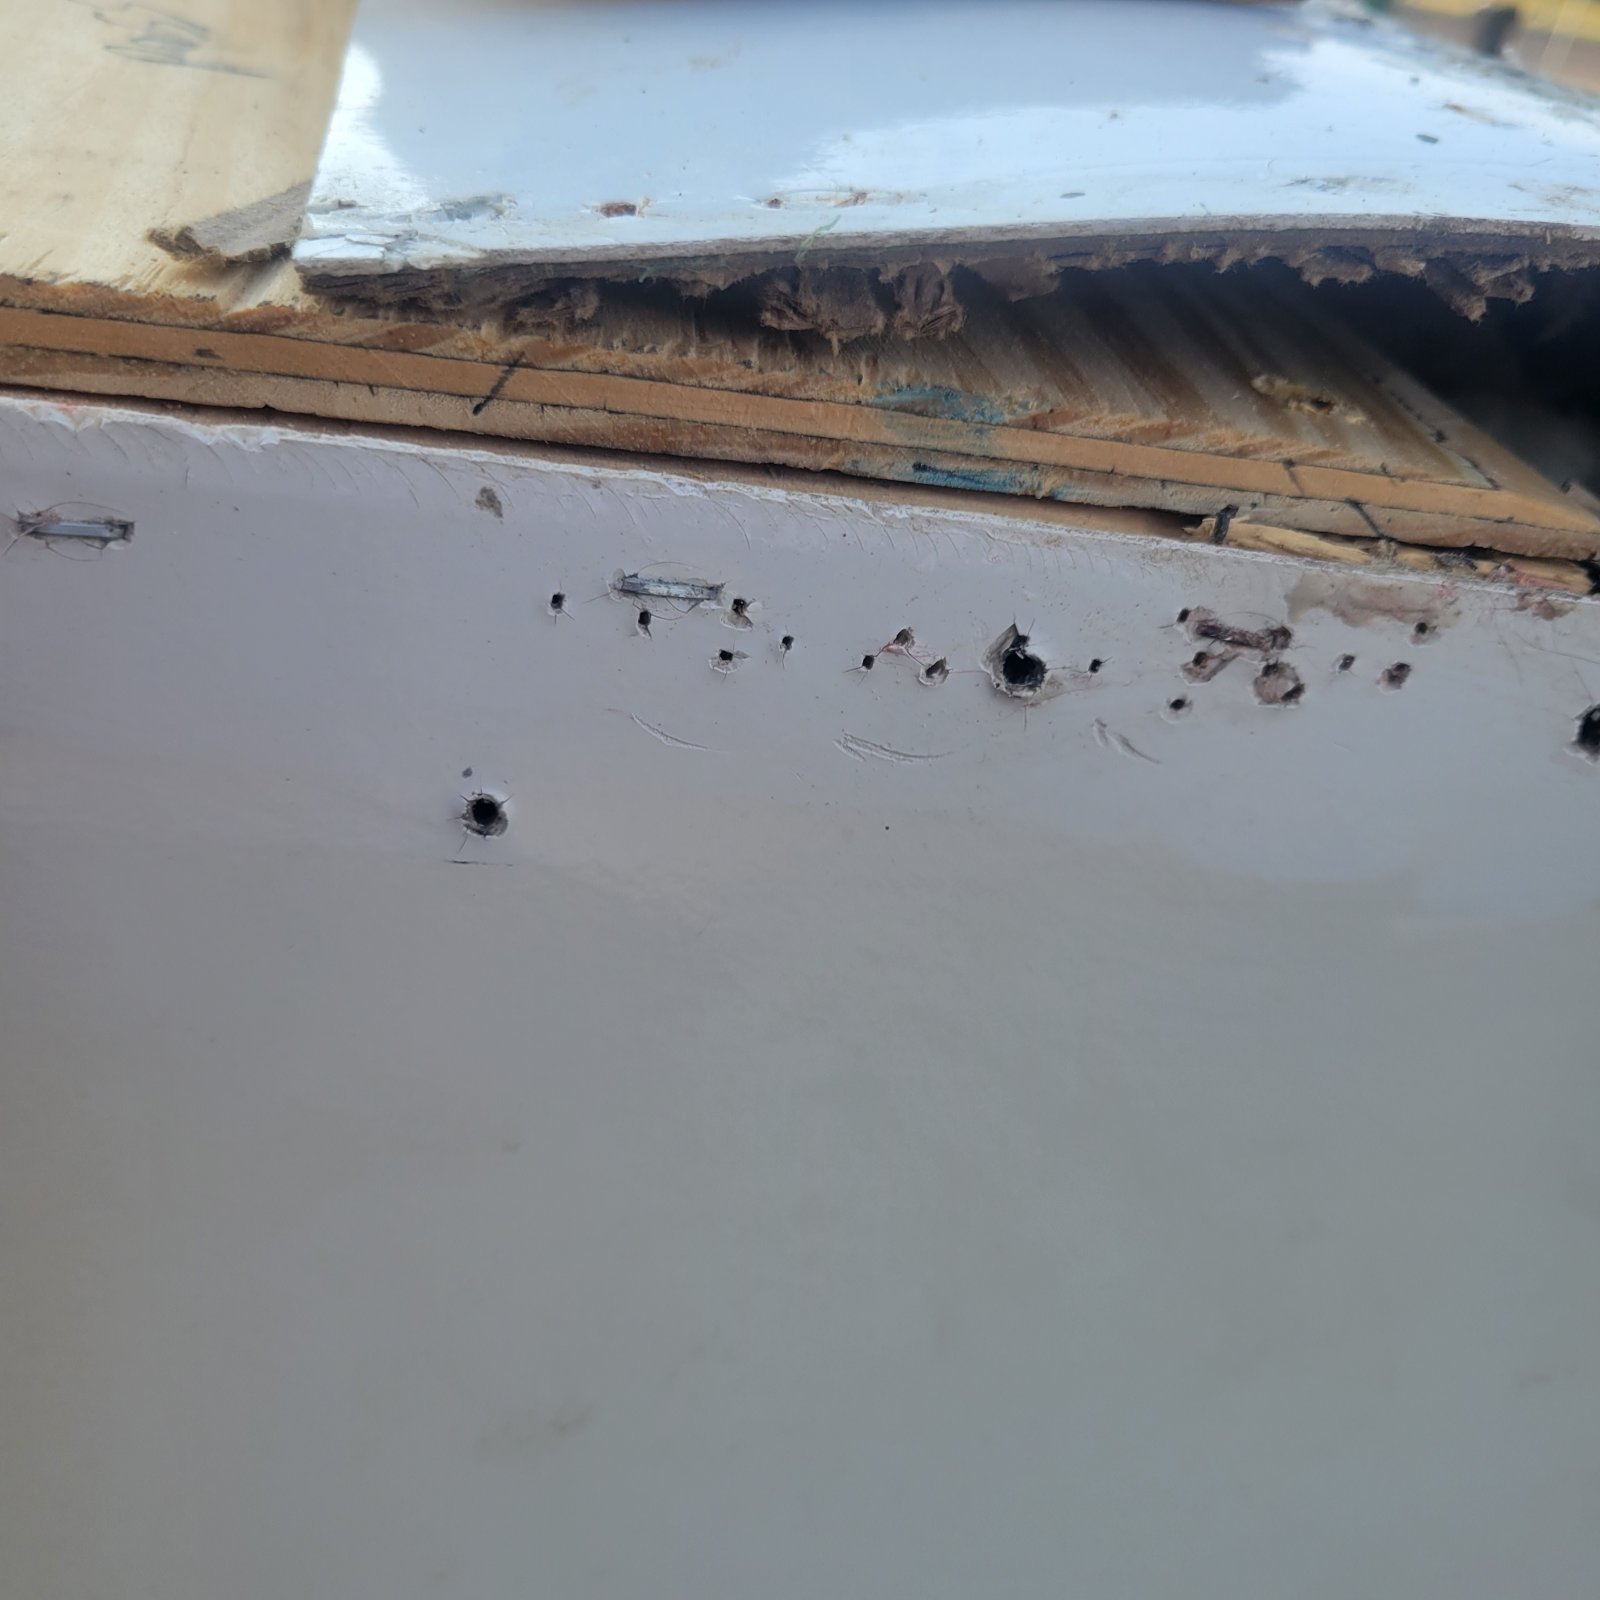
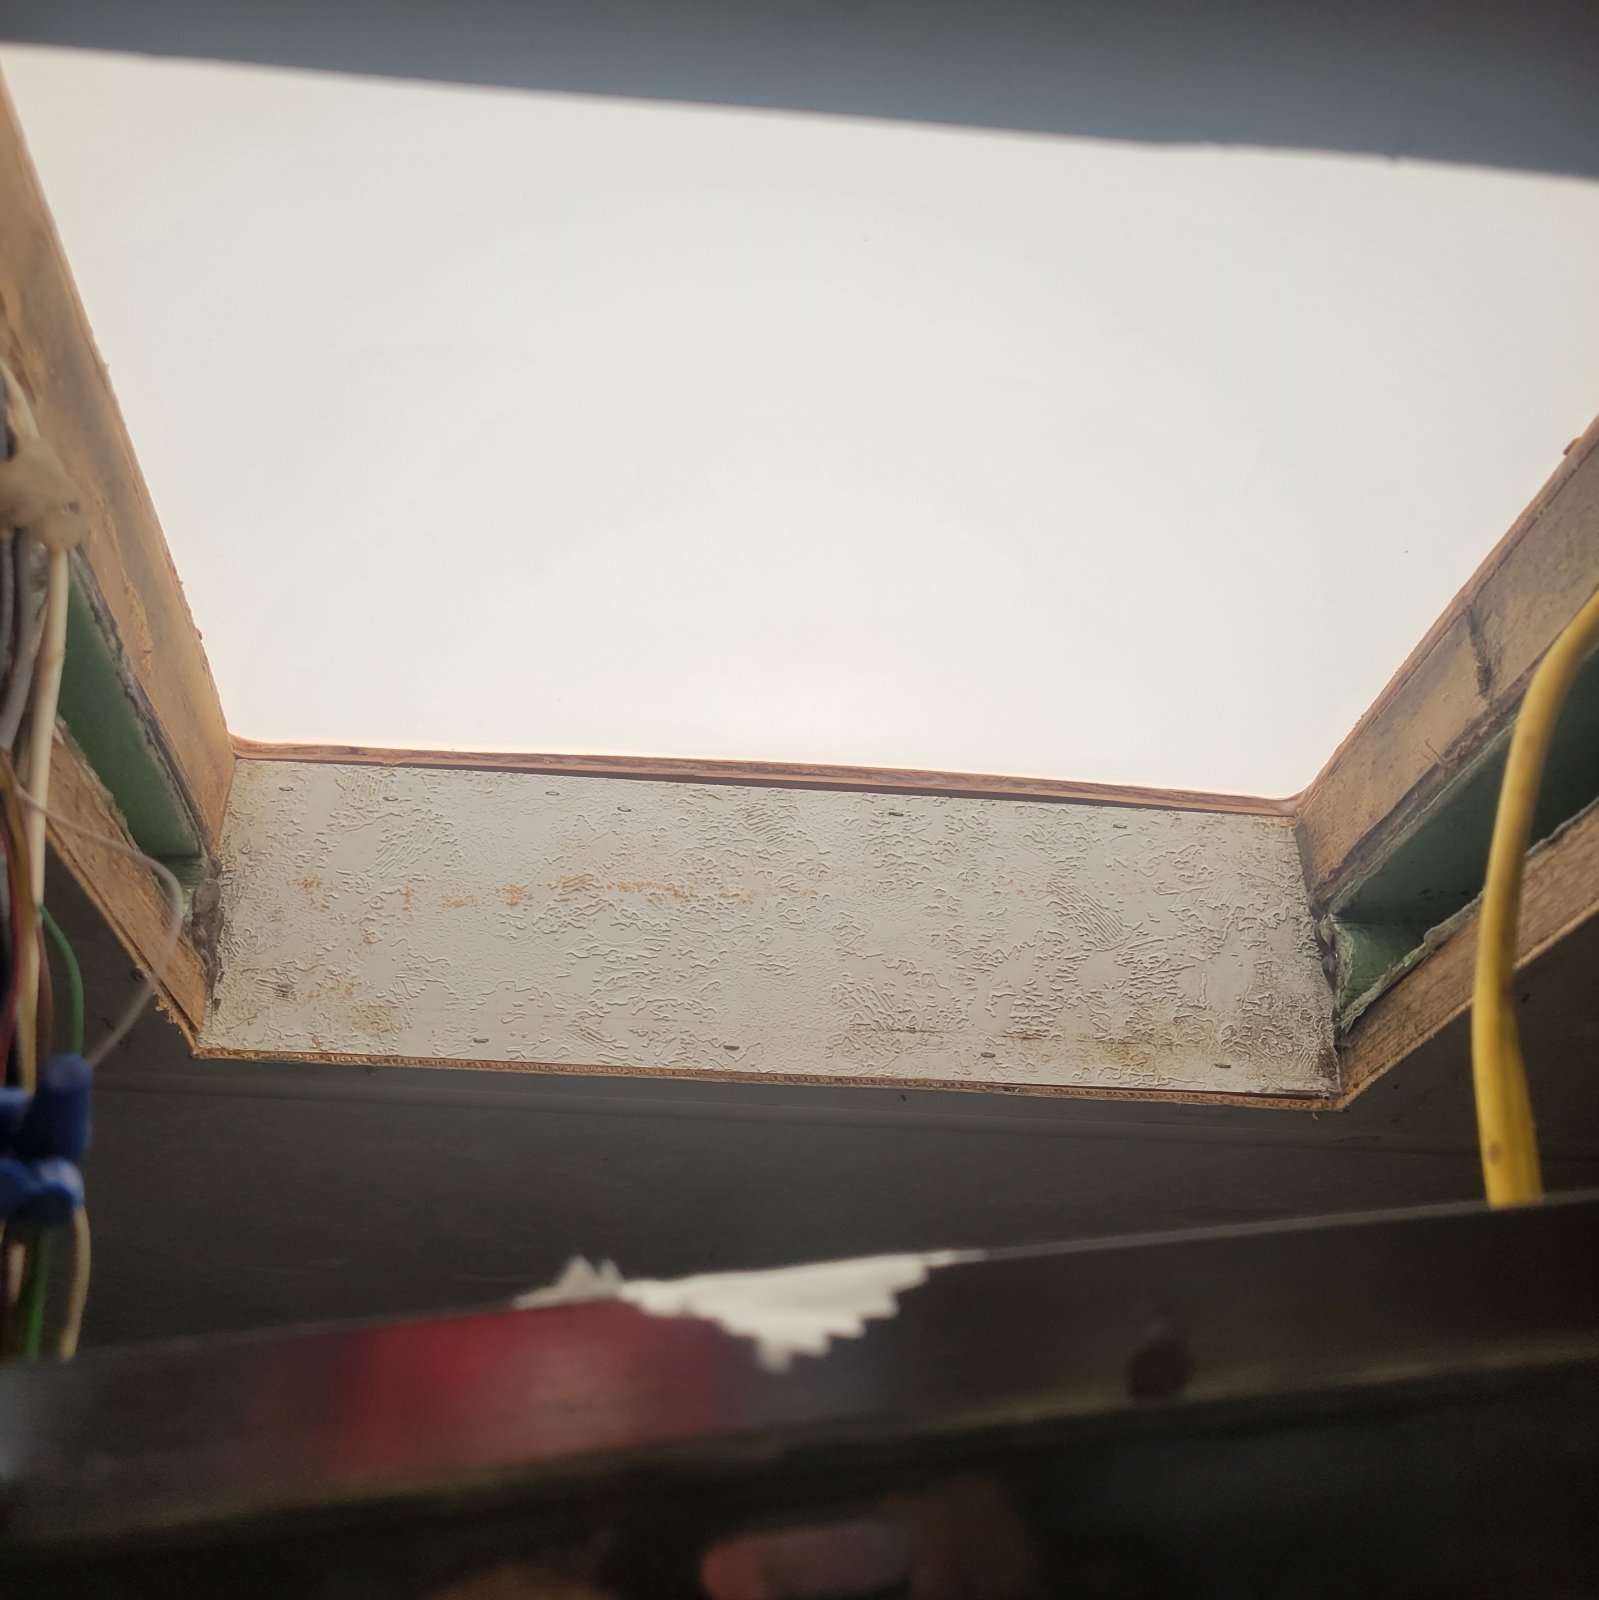
When we were putting on the decking, Chris dropped his driver into the trailer where it bounced off the ceiling. We didn't realize it then but it popped out one of the panels. Here's a picture where it's a bit hard to see.
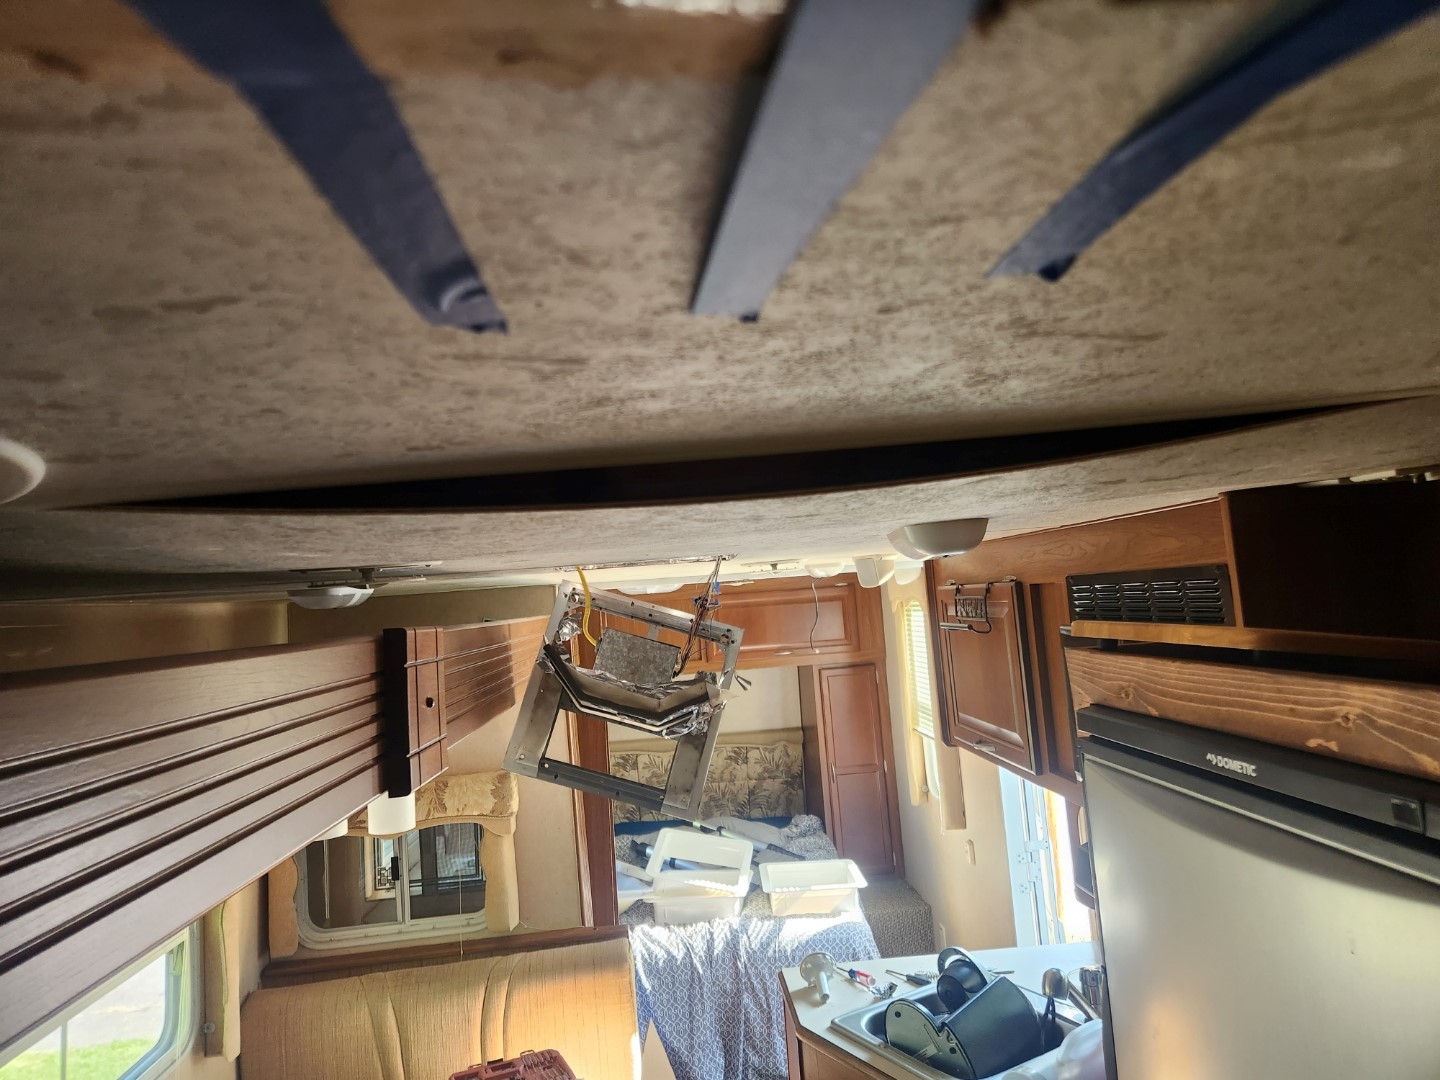
We managed to squeeze it back into place (those "tracks" between the panels are a pain) but the ceiling is sagging a little. I was thinking of screwing it into the rafter and just covering the screws with those little white button tops. But is there a better way?
Last question
When we were screwing down the decking we often had issues with the screws not tightening down. At first, we thought we were missing rafters but we had the problem along the sides, in known good wood. We're using 1.5-inch full thread pan head outdoor construction screws and even tried some high/low screws but we ran into the same problem. Even countersunk pilot holes didn't help. When we hit this situation, we put the screws in at a slight angle and they held.
I have a feeling that the wood is just very dry and brittle but did you ever run into a situation like this?
Thanks folks! More to come once we decide on what tape to use, the glue comes in, and the weather holds for at least 2 days to put the EPDM on.
__________________
|
|
|
|
|
09-05-2023, 08:13 PM
|
#23
|
|
Moderator
Join Date: Nov 2006
Location: Ohio
Posts: 12,656
SUN #89
|
Hi Bob,
Great work! You and your crew have done well in that short amount of time. Again, good job.
Quote:
Originally Posted by Rlanger
snip...
You got me thinking about this and the fact that I'm dealing with an unknown vendor. The vendor's site says to use "Seam Tape" over the joints, that's why I bought it to begin with. But they don't specify what kind of tape. I have an email to their support, we'll see what they say.
In the meantime, we're doing a little test. I cut off two, 2-inch squares of the roofing, put a strip of the seam tape and another strip of fiberglass drywall tape with a little of the acrylic roof glue down and the squares on top. I'm going to let them dry for a bit and see which one holds better. So far, it feels like the fiberglass tape will work, but the vendor's website says that their glue is not for fiberglass (they probably mean fiberglass decking)
|
They do make fiberglass RV roofs. More common on motorhomes and maybe higher-end 5th wheels. I "think" that is what they are referring to, the fiberglass roof itself.
I "sense" the glue will not stick to the strands of fiberglass in the mesh tape, or will have a weak bond to the strands. But the glue that gets through the mesh will bond to the wood and the rubber. I'm curious about how your test comes out.
Quote:
Originally Posted by Rlanger
Yep! That's the one! I was very surprised when I took that screw cover off, especially around the awning. Algee, mold, and rusty screws. Luckily most of the screw rust is just the heads. Some threads but don't see any wood damage. Would like to keep it that way.
|
On the flat head gutter screws, heads up, you will need a drill stop of sorts not to counter sink too deep. I used the drill press stop, if you have a drill press and can do the same thing, then it will help the issue I'm going to talk about. You do not want to go true dead flat with the screw head countersink or, worse, deeper than the screw head. The issue is the metal gutter rail is thin, maybe a 1/16" thick. If you go dead flat or, worse deeper when you screw in the screw, it can blow right through the gutter rail if you have too much power on the drill.
Suggest this, let the screw head stick out, about 1/64" to 1/32". Set your cordless drill chuck to be weak; screw the head to kiss, not tighten. The butyl tape will ozz anyway. After a day, go back by hand and check each screw for tightness. Most will take a 1/4 to 1/2 turn more to feel the hand tight. The butyl thins out, and there is less screw torque. One thing is for sure, if you use too much power on the drill, it will blow the flat head right through the gutter rail.
Another option, use 304 stainless pan head screws. No. 8 screw, by 1 1/4" lg. Or 1 1/2" long, square head drive. I buy them here. They are in NJ, but I am not sure how far from you. They ship them to me. https://www.albanycountyfasteners.co...-p/3290000.htm
By using the round pan head, there is no need to countersink. This eliminates the flat-head blow-through. If you are using the Eternabond tape over this area, the round smooth pan head will not cut into the Eternabond like the hex head ones Sunline used. I have done this successfully without issue. But, the stainless screw is weaker than the steel screws, do not over-torque, or you will pop the heads off.
Also heads up, do not Eternabond over fresh Dicor until 30 days have gone by. The Dicor gasses off and will blow bubbles in the Eternabond. I have posted on how to do the Eternabond, Let me know when you get to that, and we can talk and show.
Quote:
Originally Posted by Rlanger
Finally, the questions:
When we were putting on the decking, Chris dropped his driver into the trailer where it bounced off the ceiling. We didn't realize it then but it popped out one of the panels. Here's a picture where it's a bit hard to see.
We managed to squeeze it back into place (those "tracks" between the panels are a pain), but the ceiling is sagging a little. I was thinking of screwing it into the rafter and just covering the screws with those little white button tops. But is there a better way? |
Yes, that plastic joining strip between the two sheets can be a bugger to get slipped in. It is easier when you build the ceiling on the bench upside down before the ceiling board is bonded to the rafters. But, after the fact, it is hard. Surprised you did not crack the plastic molding joint strip it trying to get it back in. Good job!
Now to the drooping ceiling board. The ceiling board has construction adhesive as glue and is stapled to the rafters in spots. They use fine wire staples. I had to buy one as I use it a lot. Here is mine as FYI. A 22 gauge fine wire stapler.

The staples


They shoot them in as needed and caulk over the head. It's hard to see them unless you are hunting for them or the caulk is yellowed.
In your case, suggest this or your variation of this. Ideally, you lift up the one roof decking sheet over the area and shoot some construction adhesive in the sagging area between the rafter and the ceiling board. Then go inside, and press up well. You can go with small flat head screws like you suggested or shoot a "few" 1/4" wide staples if you have that size stapler. Just test the stapler to not blow them in too deep. Then, make a temporary 2 x 4 post with another 2 x 4 runner (4ft to 6 ft long laying flat) on the ceiling right on the rafters as a press to hold the construction adhesive tight to the rafter and let it cure clamped. When cured, take down the 2 x 4's and paint/caulk over the screws or the staples.
An area as big as you show will need a good attachment back up to the rafters to not come loose over time bouncing down the road. Right now, you have the option to lift the one plywood sheet up and add the adhesive; once the membrane is on, that will not be as easy.
Small bowed-down areas, a few fine wire staples, and you are OK. I have done that before, but your area is big. In the Sunline budboard roof system, the ceiling panels, with construction adhesive bonded and stapled to the rafters, created rigidity in the camper. The budboard has very little structural stability in holding the roof system from flexing; the ceiling panels do this. Now, you have decking screwed to the rafters, that creates a lot more rigidity in the camper. So no worries on your bowing sheet and rigidity.
Quote:
Originally Posted by Rlanger
Last question
When we were screwing down the decking we often had issues with the screws not tightening down. At first, we thought we were missing rafters but we had the problem along the sides, in known good wood. We're using 1.5-inch full thread pan head outdoor construction screws and even tried some high/low screws but we ran into the same problem. Even countersunk pilot holes didn't help. When we hit this situation, we put the screws in at a slight angle and they held.
I have a feeling that the wood is just very dry and brittle but did you ever run into a situation like this?
|
Hmm, not exactly like you are stating, but I think about what may have happened as I have had similar issues on the rafters. Not sure what size screw you are using; I suspect maybe a no 8? I thought I saw a torqs head on it, which is a positive drive. Being a no 8. the heads won't come off as fast.
Here is what I use, and I countersink with a slight pilot hole to only go through the decking. I'm not a Philips head fan, but that is all they had at the local Menards lumber yard. For the low torque, I'm using, the Philips works.

Being a no 6 screw, it can only handle so much torque, or we pop the head off. I cannot use my big 1/2" cordless Milwaukee drill motor even with the low clutch. It is too powerful. I now use a smaller drill with less power and a softer clutch and get better results. And even then, I have to watch to not over-torque, or I will pop the head or strip the rafter. I set the clutch under full tight and sometimes have to hand tighten to get the screw flat to the deck.
The rafters are softwood (SPF) and only 11/16" to maybe just under 3/4" thick. And they are dry; they strip easily. I figured it out early enough to go lower power, less torque and the problem is more controllable.
I'll post this and come back with more in the next reply.
Good job, keep up the good work.
John
__________________
Current Sunlines: 2004 T310SR, 2004 T1950, 2004 T2475, 2007 T2499, 2004 T317SR
Prior Sunlines: 2004 T2499 - Fern Blue
2005 Ford F350 Lariat, 6.8L V10 W/ 4.10 rear axle, CC, Short Bed, SRW. Reese HP trunnion bar hitch W/ HP DC
Google Custom Search For Sunline Owners Club
|
|
|
|
|
09-05-2023, 09:33 PM
|
#24
|
|
Moderator
Join Date: Nov 2006
Location: Ohio
Posts: 12,656
SUN #89
|
I noticed you are using these tank vent covers.
I like them compared to others on the market, but they need help with how they are installed. They need instructions on mounting and sealing them, and no instructions come with them. The installers and several RV manufacturers need to realize how these can leak over time into the attic due to not caulking the installation properly. Granted, I'm going after the original install, finding the leaks years later, and seeing the problem.
This post shows the problem and how to correct it when mounting them. And how to add insect screens.
https://www.sunlineclub.com/forums/f...now-19988.html
Before you mount them, check that the pipe does not hit the inside of the cap and has a gap at the top to let the air in and out. The pipe height above the roof surface has changed after taking all the roof backer wood used for the budboard roofing. I found that some of the pipes stuck up too high. I had to lower the pipe to not chock the pipe off with the cap. I had to cut off about 1/4" to 3/8" off some of them. Others were OK, so check before mounting.
By the way, if you are reusing the originals from 2006, consider changing them out to new ones to reset the UV sun issue that has baked the original set to a level of more brittle than when new. They only cost $1.30 at RV Upgrades each plus freight, or buy $99 worth of stuff and get free freight. https://www.rvupgradestore.com/Custo...-p/22-0516.htm
I hope this helps.
John
__________________
Current Sunlines: 2004 T310SR, 2004 T1950, 2004 T2475, 2007 T2499, 2004 T317SR
Prior Sunlines: 2004 T2499 - Fern Blue
2005 Ford F350 Lariat, 6.8L V10 W/ 4.10 rear axle, CC, Short Bed, SRW. Reese HP trunnion bar hitch W/ HP DC
Google Custom Search For Sunline Owners Club
|
|
|
|
|
09-07-2023, 06:56 PM
|
#25
|
|
Junior Member
Join Date: Oct 2021
Location: New Jersey
Posts: 15
SUN #12992
|
Hi John! Not much work other than scraping butal and caulk. Weather is just too darn hot but we should get a break next week.
I am doing additional testing on the fiber vs the seam tape but so far looks like the fiber tape is in the lead. More to come Oh and Class A response was
We do not have a seam tape we recommend, you will need to be sure you get a tape that is safe to use with EPDM material.
Less than useful but not surprised.
Quote:
|
Before you mount them, check that the pipe does not hit the inside of the cap and has a gap at the top to let the air in and out. The pipe height above the roof surface has changed
|
Yeah we discovered this when we put the caps on(temporarily just to keep the cover from ripping) We took off about 1/2 inch. Great info on how to properly mount them. Thanks!
The tank vents appear to be in pretty good condition and may not be that old. But you did inspire me to check out the fridge vent and I found some cracks in the base. Got a new one on order.
Good info on the ceiling too. Didn't think about how the ceiling helps with the structural integrity of the trailer. I REALLY don't want to take that decking back off. But...
Quote:
|
Another option, use 304 stainless pan head screws. No. 8 screw, by 1 1/4" lg. Or 1 1/2" long, square head drive
|
.
Ok I like these! So just use butal, non leveling caulk and replace the screw covers? Any other hints here?
Thanks so much
Bob L
__________________
|
|
|
|
|
09-15-2023, 09:48 AM
|
#26
|
|
Junior Member
Join Date: Oct 2021
Location: New Jersey
Posts: 15
SUN #12992
|
Greetings all. The weather and the hustle / bustle of fall have prevented us from putting on the EPDM. Thought we were going to get to do it this weekend since the weather will be perfect, but alas, a family "thing" came up.
I do have the results of our Seam Tape vs Fiber tape test. I'll list the test criteria for anyone who cares (or sees fault in our testing) but the results are at the end.
Test Criteria and hypothesis
We had three test cases: EPDM glued to plywood, EPDM glued to fiberglass on plywood, EPDM glued to seam tape on plywood.
We wanted to see the amount of force needed to remove each of our test cases. This would tell us which material would work best to seal the plywood seams. The EPDM glued to plywood would be our control.
I had hypothesized that the EPDM to the plywood (control) would be strongest, followed by the fiberglass and then the seam tape. My thinking was that seams would make the glue weaker.
Walt thought that the Fiberglass would actually be stronger then the EPDM to wood. Neither of us were confident in the plastic backed seam tape.
Test setup
I didn't have access any newton scales that were strong enough for the test, so we went with a bungee cord and carpenter's level. We measured the force to stretch the bungee to it's limit and managed to find one that was pretty consistent up to about 12 inches
We also discovered using some KG weights that 1.5KG pulled a hair over 3 inches. Since 1.5KG equals 3.3lbs we could deduce that 1 inch of bungee movement was just about 1 pound of force. This makes the math way easier. Since we're not exactly in a lab environment, we decided that was close enough.
We also realized that the angle of pull would be slightly off for each test. We used the level and eyeball to check that we were pulling as straight as possible.
The EPDM was cut into 3 inch squares with 1 inch overhanging the edge of the plywood. This allowed us to use a tarp clip to attach and pull the EPDM with the bungee.
Final note. It was really humid and had even rained over the past 3 days. We know that the glue wasn't fully set, but were only looking for consistency of testing between the cases. We noted that excess glue on our test surfaces was still a little tacky.
The Test
My father in law, Walt (a retired HS Math / Science supervisor) assisted. We put the plywood test platform on 4x4's on the ground. This gave us room to comfortable work and allowed me to stand on the platform so we wouldn't get any bend from the plywood. We attached the tarp clip to the EPDM and the bungee to the tarp clip. I held the level straight and true while Walt pulled the bungee straight and equal distance from the level. We recorded the number where the bungee came to as our starting measurement. Walt then slowly pulled the bungee straight up, watching the numbers, while I monitored the EPDM. When the rubber started to give I told him to stop and we subtracted the end and start numbers to get the amount of force required.
The results
As usual, Walt was right.
EPDM to wood took 5 pounds of force to fail
Fiberglass took 9.5 pounds of force to fail
Seam tape took 1.5 pounds of force to fail
Once Walt explained that the fiberglass holds more glue in a 3D honey comb like structure, I realize that I really geeked out over this test.
This also doesn't feel like a lot of force, but we're dealing with a very small area after only 3 days of glue drying time. The longer the glue sets, the stronger it becomes.
In the end, we will be use the fiberglass drywall tape over the plywood seams as Dicor had recommended and the seam tape will be used for packaging tape.
I really wish I had gotten pictures of this testing. 
__________________
|
|
|
|
|
09-23-2023, 08:25 AM
|
#27
|
|
Moderator
Join Date: Nov 2006
Location: Ohio
Posts: 12,656
SUN #89
|
Hi Bob,
I'm catching up on my Sunline posting. Been out camping a lot, then off to the inlaws, and just catching up.
Thanks for posting your roof glue and tape test. I'm glad the fiberglass seam tape won the test.
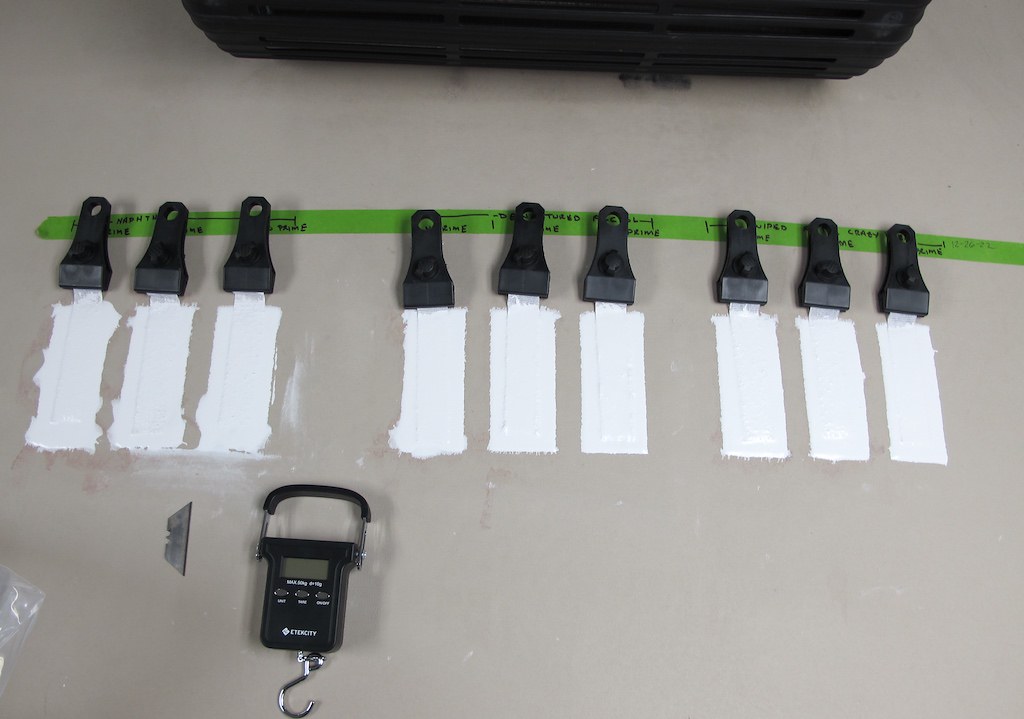
Your test method was good, I use a similar adhesion test to test whether high-solid silicone roof coating will bond to a camper roof. I did not create this test; it is a roofing industry standard test used for adhesion testing of coatings. Here are a few pics of the test.
You start with creating some 1" wide x 6" long pull strips that will be embedded in the coating. The 1" wide is important as it relates to the industry ASTM test data on pounds pull per linear inch (pli). I used to use fiberglass window screen material, but now I use a Carlisle roofing reinforcement fabric.
The test prep consists of:
1. Clean the roof and de-mold the roof. Getting the roof clean is a major step in coating bonding correctly.
2. Apply a target application of 22 mils of coating to the cleaned roof. This sample application is about 2-3" wide x 6" long. Use a wet film gauge to ensure you have the 22 mils, but not lots more, I go for 22 mils to 28 mils. Too thin is no good, and too thick can give very high readings not matched to the roof you are doing.
3. Place 4" of the test fabric on top of the coating patch and gently press it into the top layer. 2" of the strip hangs out in the open.
4. Apply 22 mils more coating over the top of the fabric test strip. Again, use the wet film gauge to ensure you added the 22 mils.
5. Wait for the cure time. Different coating brands have different cure times, so use the time stated by the coating brand. I use a lot of Henry's Tropi-Cool, and they state 72 hours. Other brands state 24 hours.
You created a 44 mil adhesion sample. 44 mils is the target thickness 2 coats of high solids silicone coating used on a camper roof.
Next is the destructive adhesion test. You are pulling the 1" wide strip out of the bonded coating. The industry target for adequate adhesion is 2 pounds per liner inch (2 pli). On a camper, I want it to be higher to confirm that you have a good bond. When things work right, you get more than 2 pli, and you have almost no adhesion when they go wrong.
For the test, use a razor blade or a utility knife blade, just the blade, not the handle as I found with the handle you cut too deep.
The test:
1. Gently slit the coating outside the test strip with the knife blade. You want to avoid cutting through the roof, just the top coating layer down to the test strip.
2. Use a fish scale attached to the test strip and slowly and evenly pull the fabric out of the coating. The best is to video the pull so you can go back and review. The direction of pull appears to change on the brand of product you are using. ASTM states to pull more parallel to the roof; Carylise and Henry talk about a 90-degree straight-up pull. I have done both and passed using both again when things are applied correctly.
Here are some pics and a video of the process.
This is a TPO roof I did on my neighbor's 5th wheel. I used different test variables for the final cleaning, with and without a primer.
Here are the samples made up of the actual camper roof
Here is one of the tests; it shows 2 tests passed (with primer) and 1 not-great test that just passed without primer.

This link is to the pull test video on my Flickr photo hosting side showing the pull test in action. This was an uncut test; the numbers are higher, and pending you talk to, you cut or not cut.
https://www.flickr.com/photos/camper...posted-friend/
Here is a different cleaner and an uncut sample on TPO with primer
https://www.flickr.com/photos/camper...posted-friend/
Here is an EPDM test pulled at 180 degrees with the test sample cut.
https://www.flickr.com/photos/camper...posted-friend/
The cut sample is more real word on pull per inch as you are only pulling on 1" of material whereas the uncut sample you are shearing the edges. Both passed the test with good safety margins, just uncut was higher.
I don't know what roof glue adhesion is supposed to be at, but using 2 pli as a low-end limit is a place to start. Your sample was larger, but you used the same basic concept and exchanged a Bungie cord for a fish or luggage scale.
Thanks
John
__________________
Current Sunlines: 2004 T310SR, 2004 T1950, 2004 T2475, 2007 T2499, 2004 T317SR
Prior Sunlines: 2004 T2499 - Fern Blue
2005 Ford F350 Lariat, 6.8L V10 W/ 4.10 rear axle, CC, Short Bed, SRW. Reese HP trunnion bar hitch W/ HP DC
Google Custom Search For Sunline Owners Club
|
|
|
|
|
10-06-2023, 12:02 PM
|
#28
|
|
Junior Member
Join Date: Oct 2021
Location: New Jersey
Posts: 15
SUN #12992
|
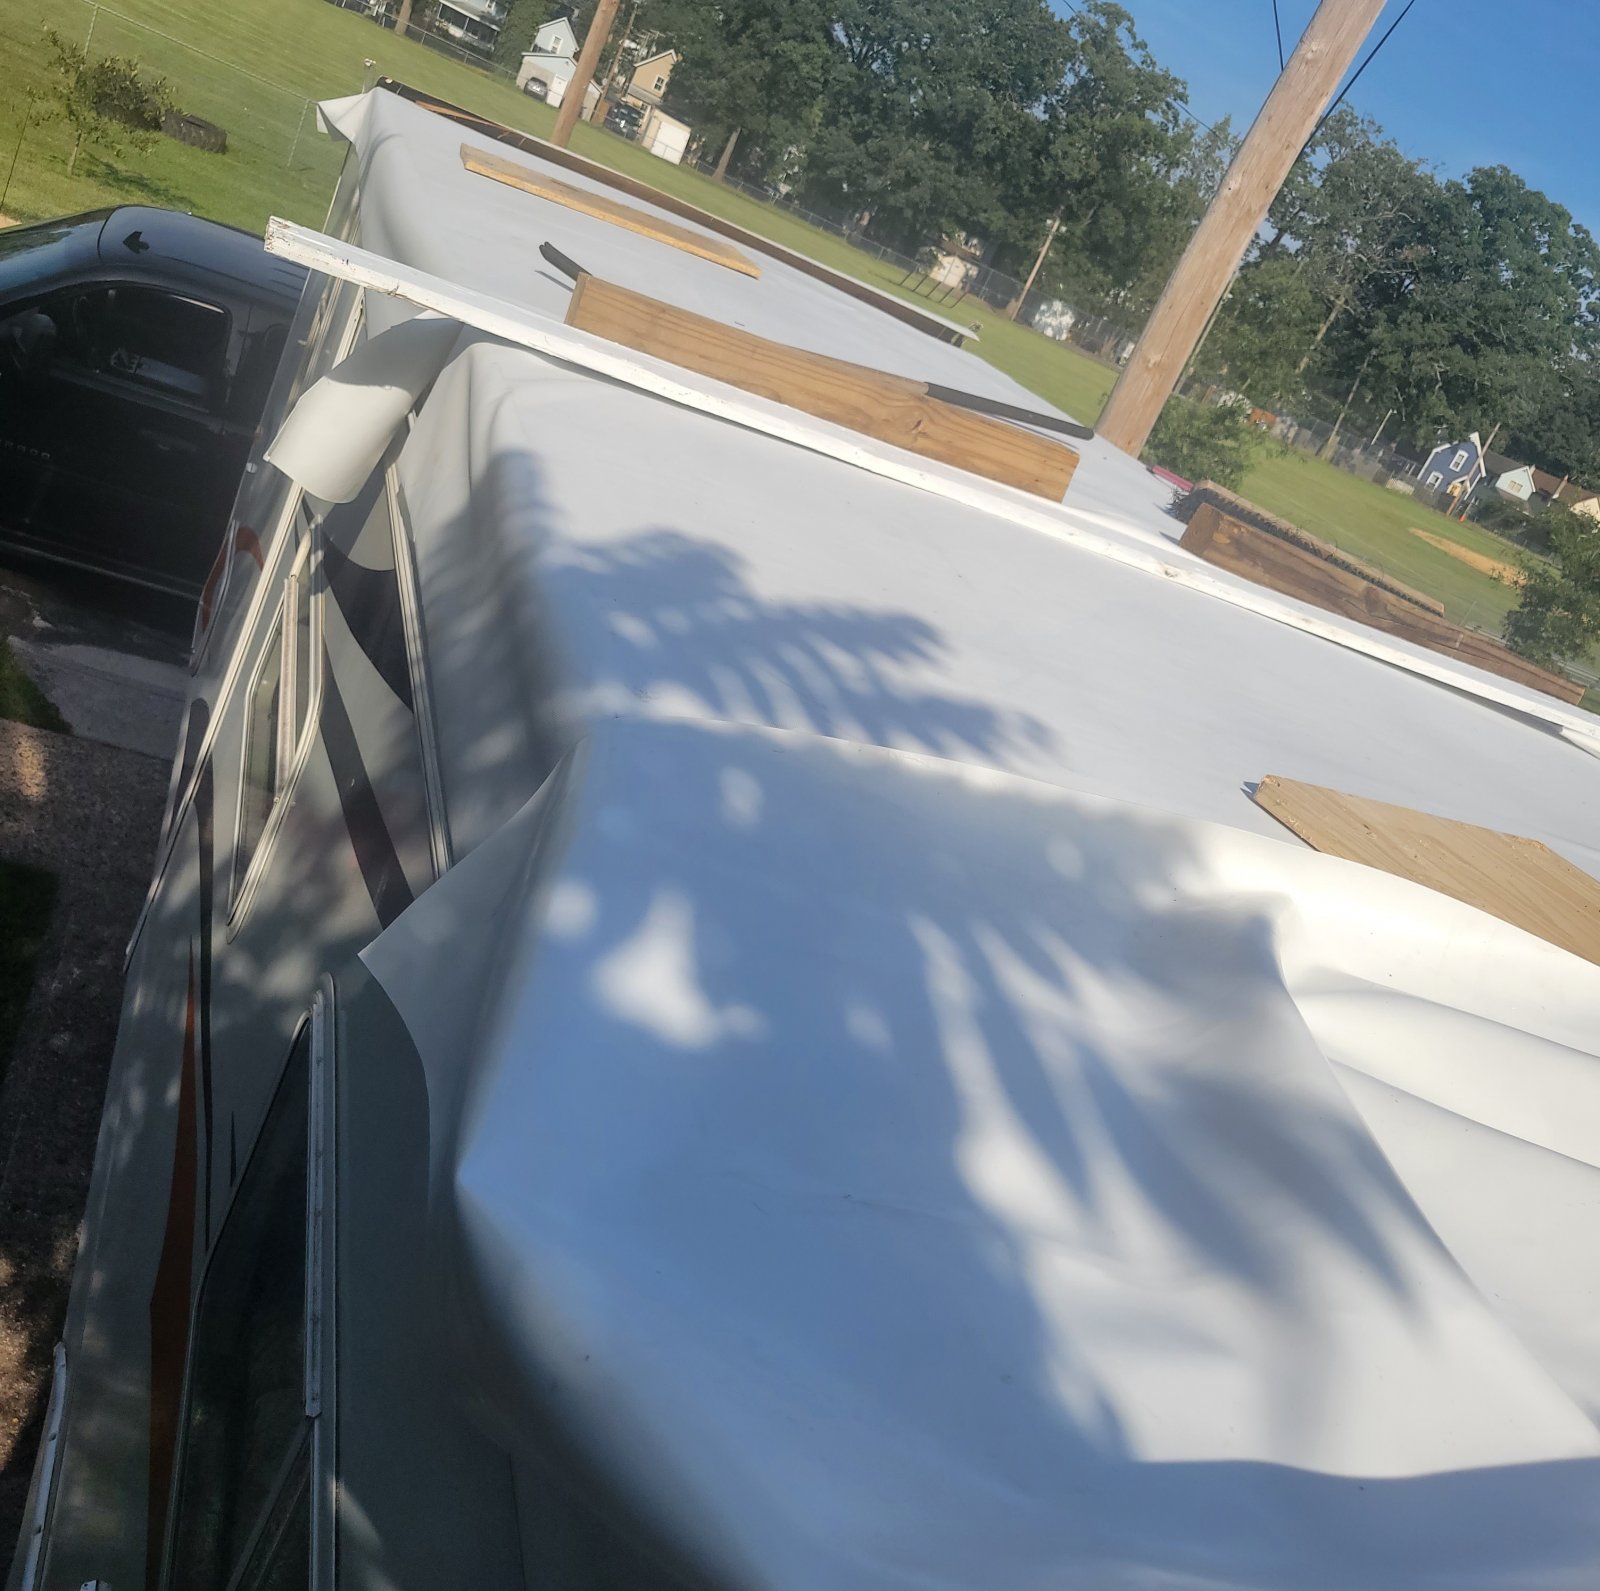
Greetings all. Sorry, it's been so long since I've sent an update. A mixture of weather, work, and life has been preventing us from working on the trailer as much as we'd liked but we have made progress.
We started laying down the EPDM back on September 19th. We don't have a lot of pictures of when we started but a few things to emphasize.
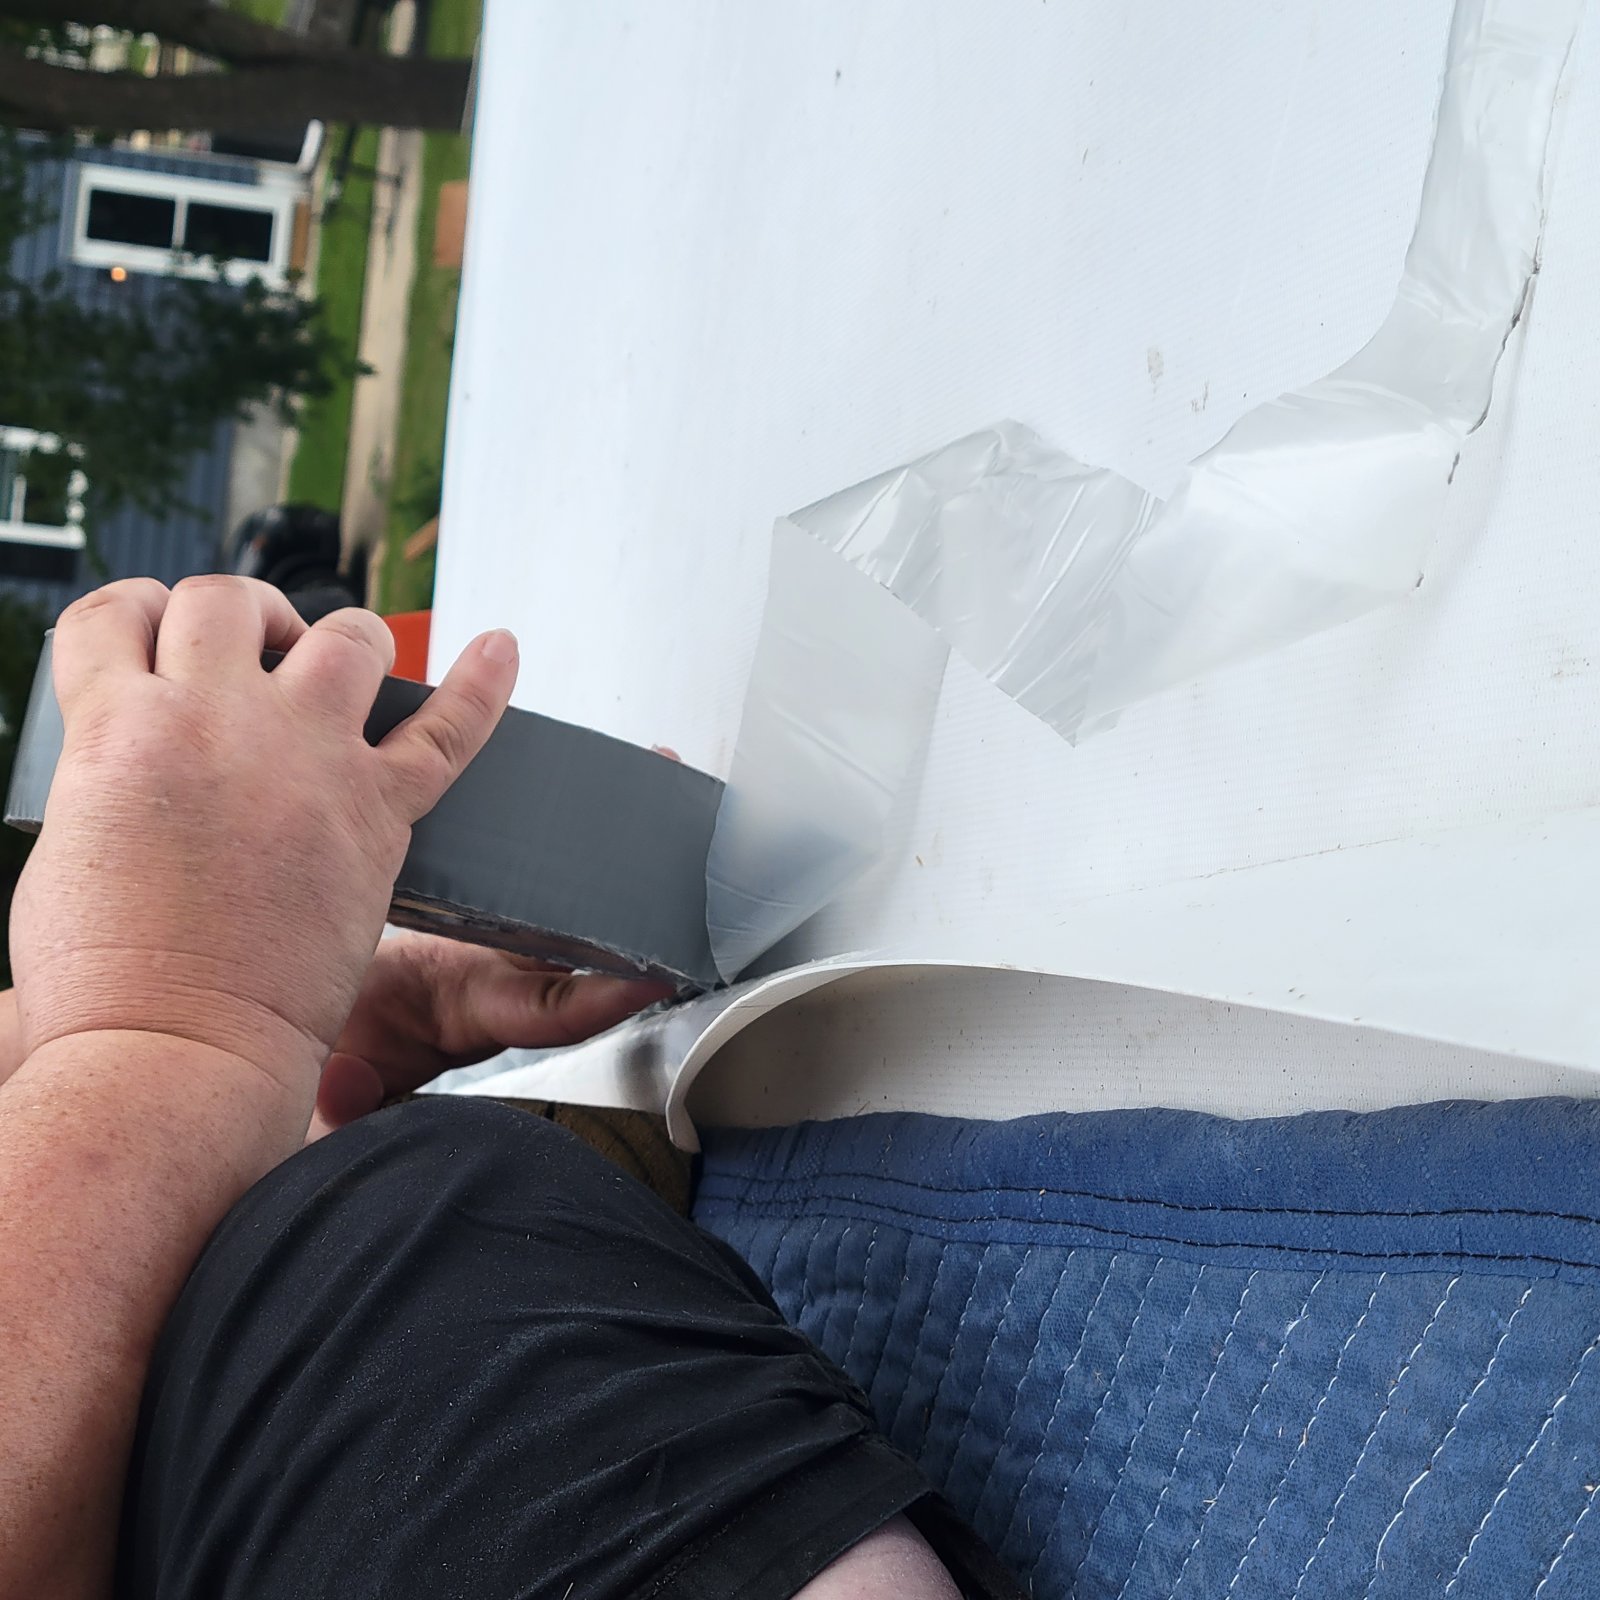
If you think you have enough glue down, you don't. If you think you have too much you might actually have enough. As John B said, this is not paint. Be SURE to do the pull-back test. The stuff we used dried really fast. There were three of us putting it on to try to keep up. The first section we did was way too large. We finally figured out that rolling out 9 to 12 inches at a time was the right rate.
By the time we got the EPDM laid down to the first vent, we had a good rhythm going. By the time we got 1/2 way to the AC, we figured out we goofed... big time.
You see no matter how many times we measured and checked, the rubber was going down crooked. We determined that the way we were going, we would run out of material on the passenger side before we got to the back of the trailer. And worse, we were too far committed to pull the roof up and try again.
A private message to John gave us the answer. While not ideal we could cut the rubber, re-adjust the remaining EDPM, and create a seam using double-sided eternabond. We ordered some tape (an expensive mistake) and decided to put the seam behind the AC.
https://www.amazon.com/dp/B004IZCRGS...roduct_details
Here are pictures of after we cut the EDPM and when we're re-aligning it. We had to make sure it was nice and clean after moving it. My buddy had access to lab-quality alcohol wipes which worked well.
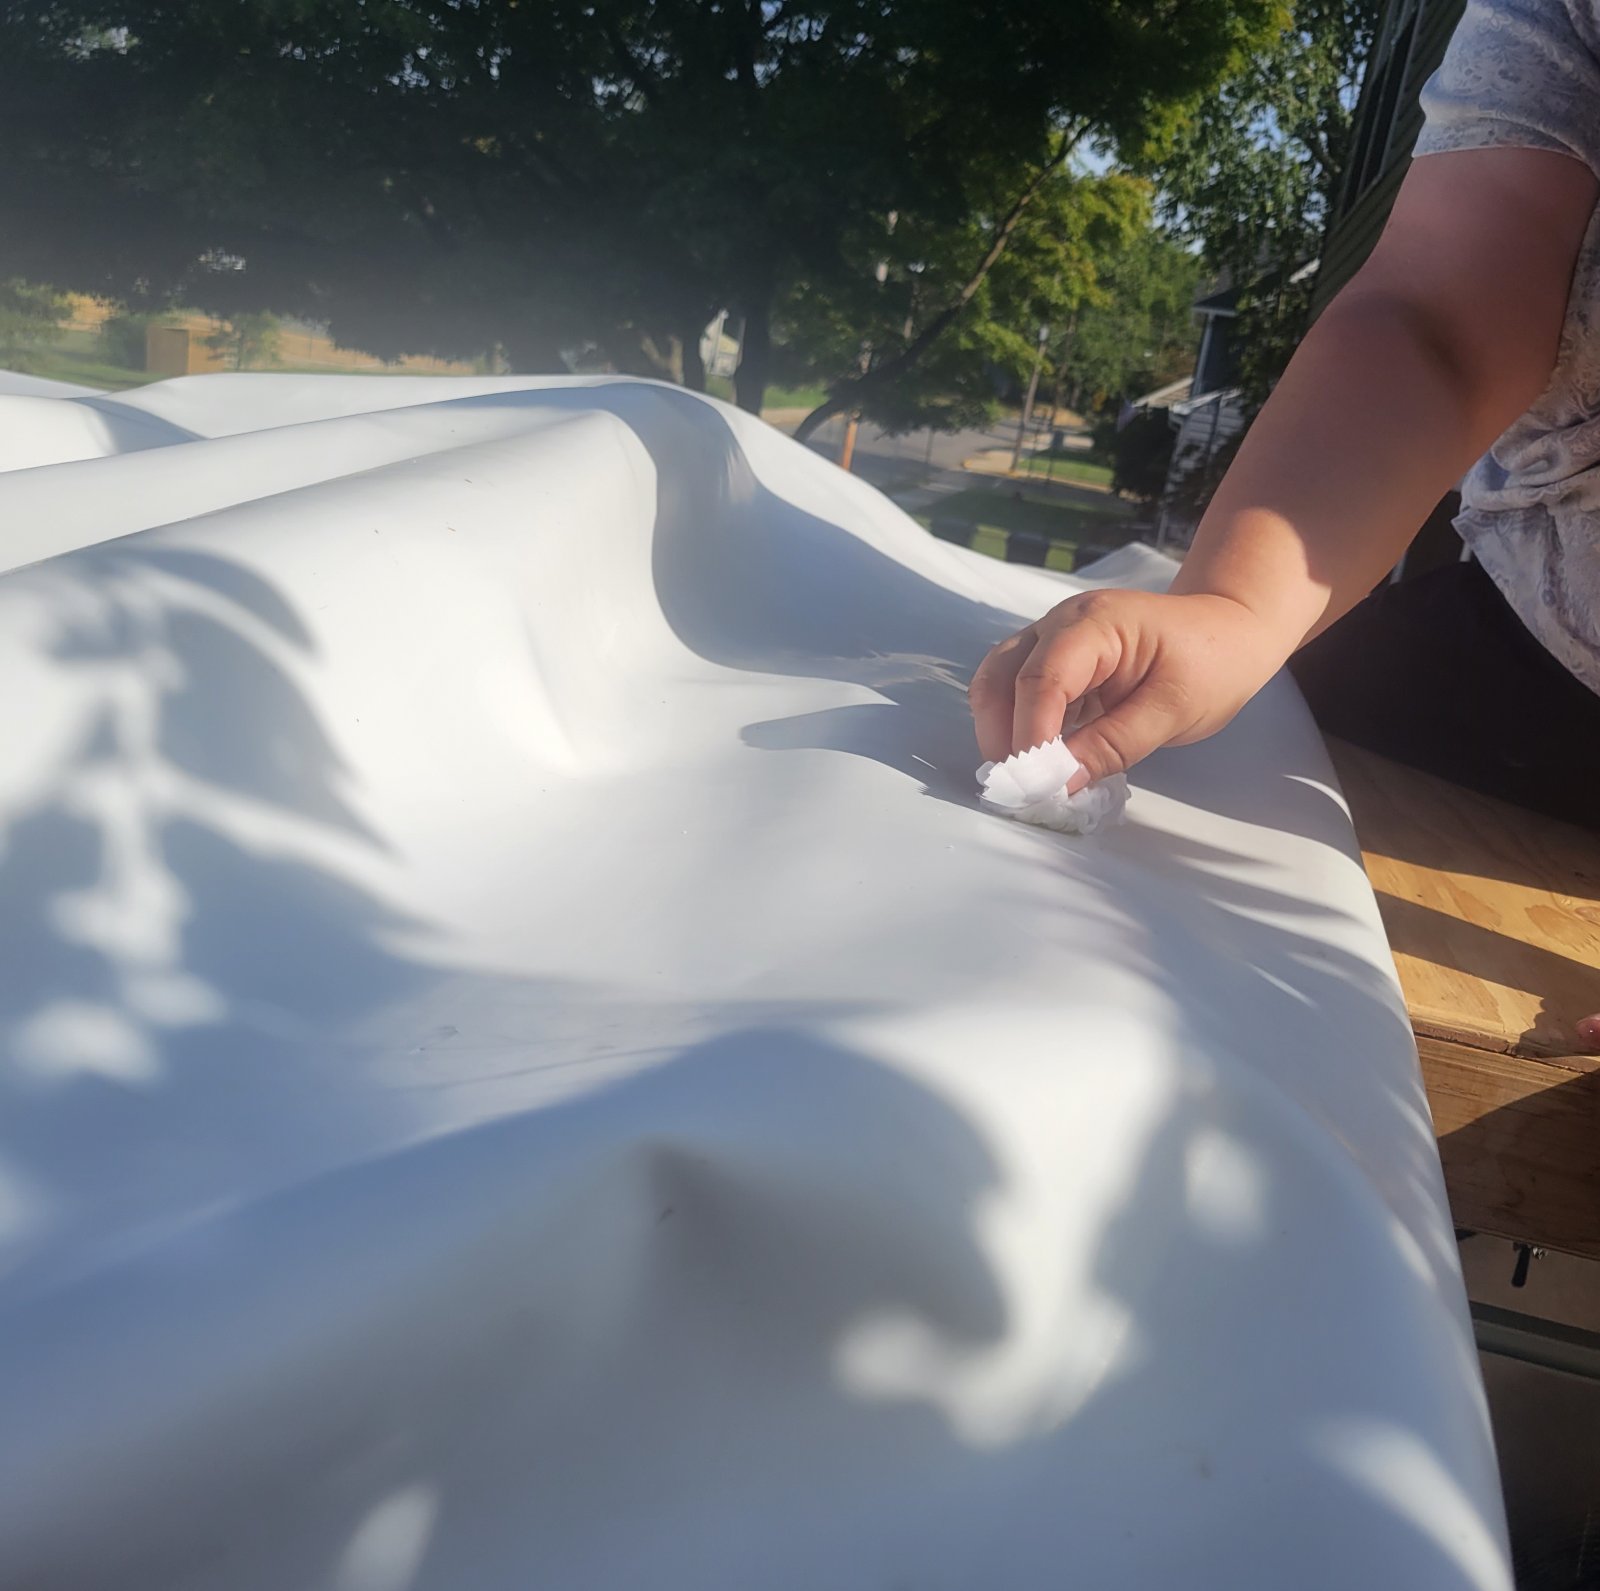
Here the EDPM is all laid down finally! We still have some wrinkles to get out.
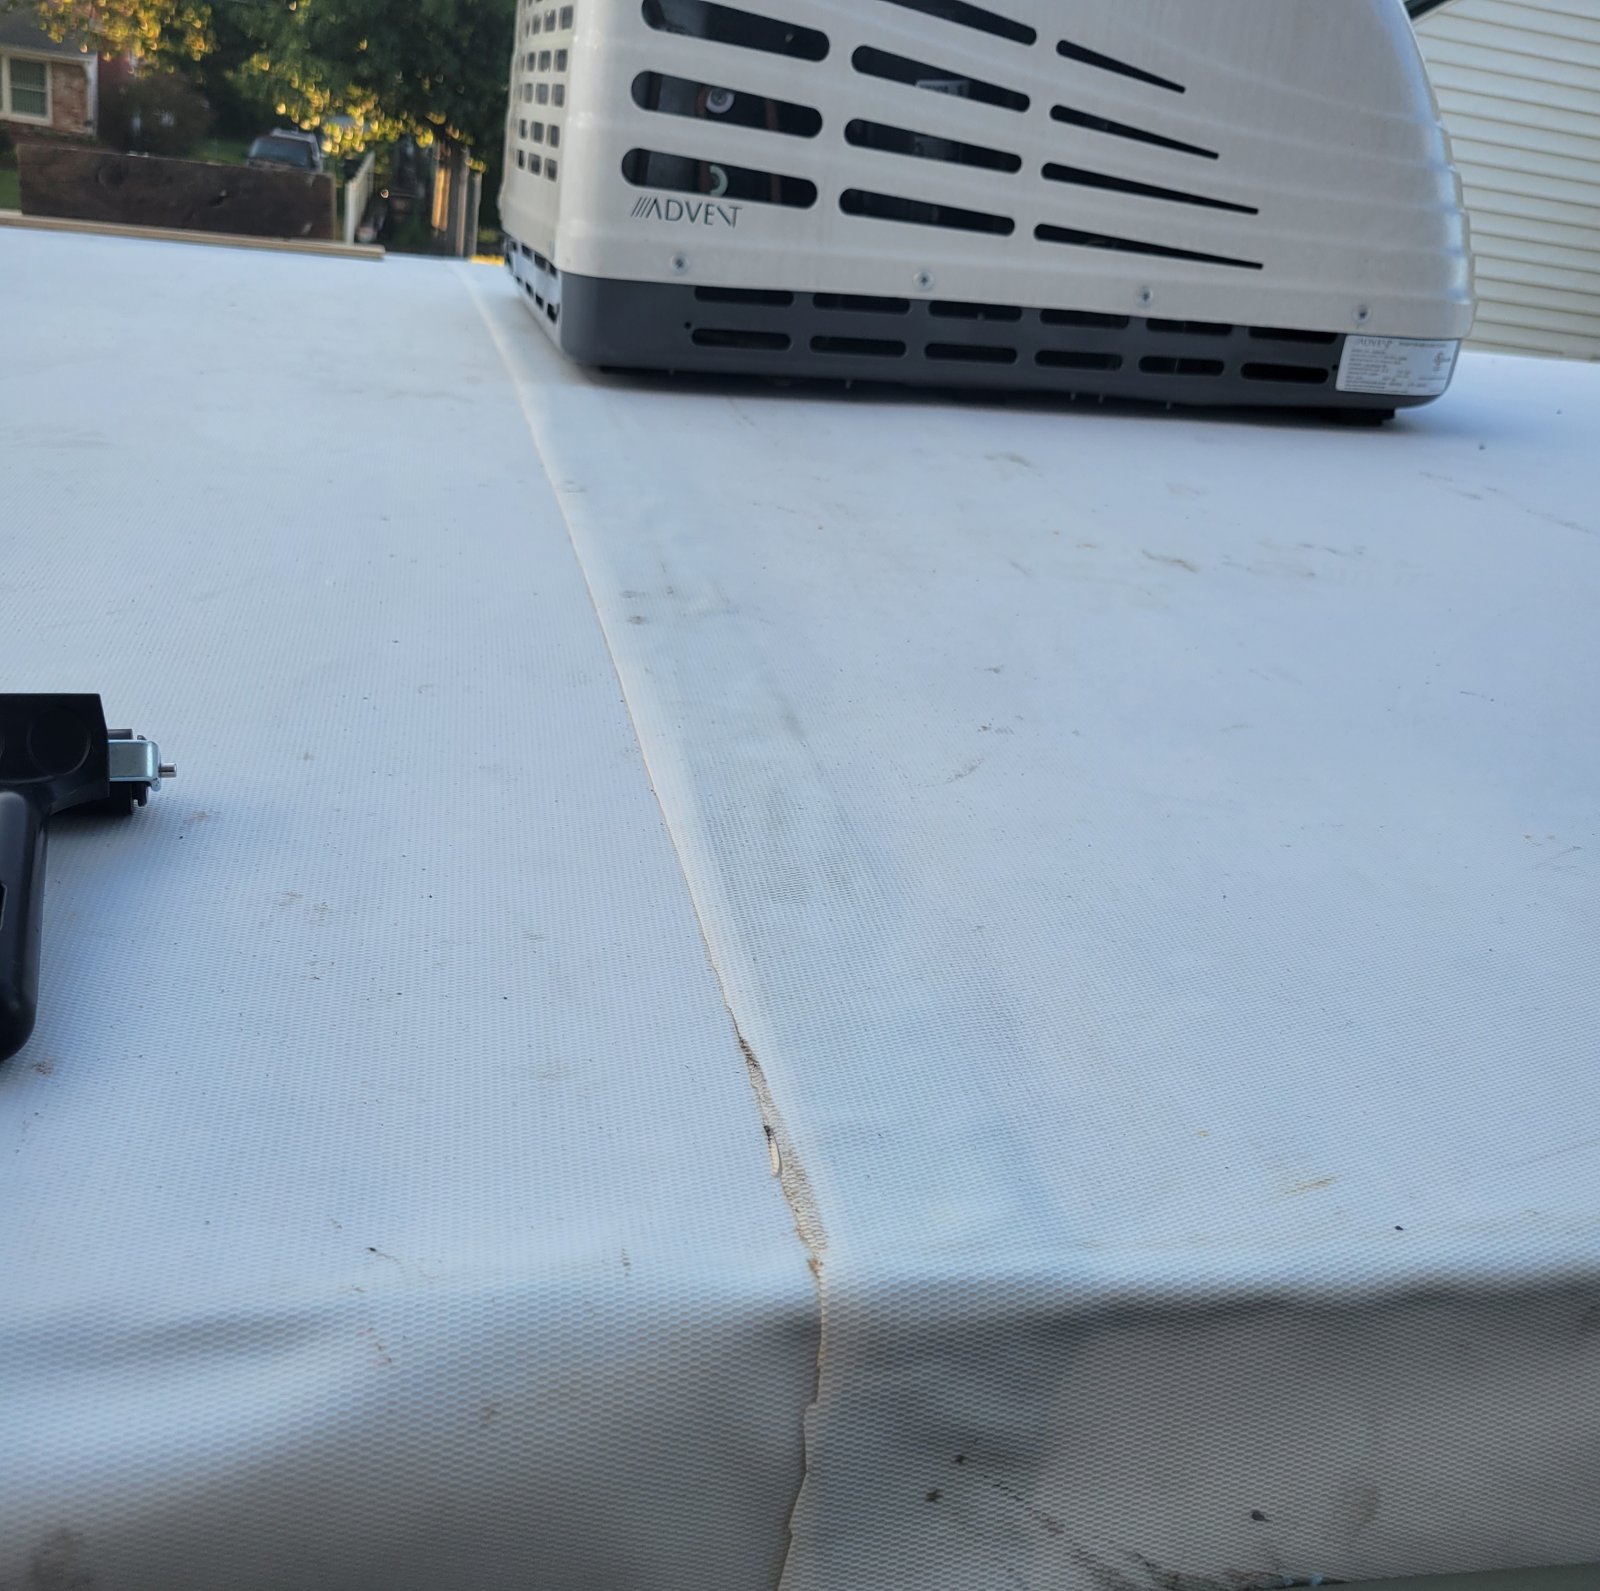
This is what the seam looks like from the driver's side. That's an inch and a half overlap which gives us 1 inch for the tape and a half inch or so for caulk.
Here are some high-angle shots. Looking pretty good!
__________________
|
|
|
|
|
10-06-2023, 12:10 PM
|
#29
|
|
Junior Member
Join Date: Oct 2021
Location: New Jersey
Posts: 15
SUN #12992
|
September 22nd we started on the seam. Working with this eternal bond isn't bad, but take it SLOW. Once it's down, it's down. You can't move it or adjust it. Our biggest challenge was the backing. It would sometimes come off faster than the tape and get "bound up". We had to cut the tape once and splice it because it got gummed up.
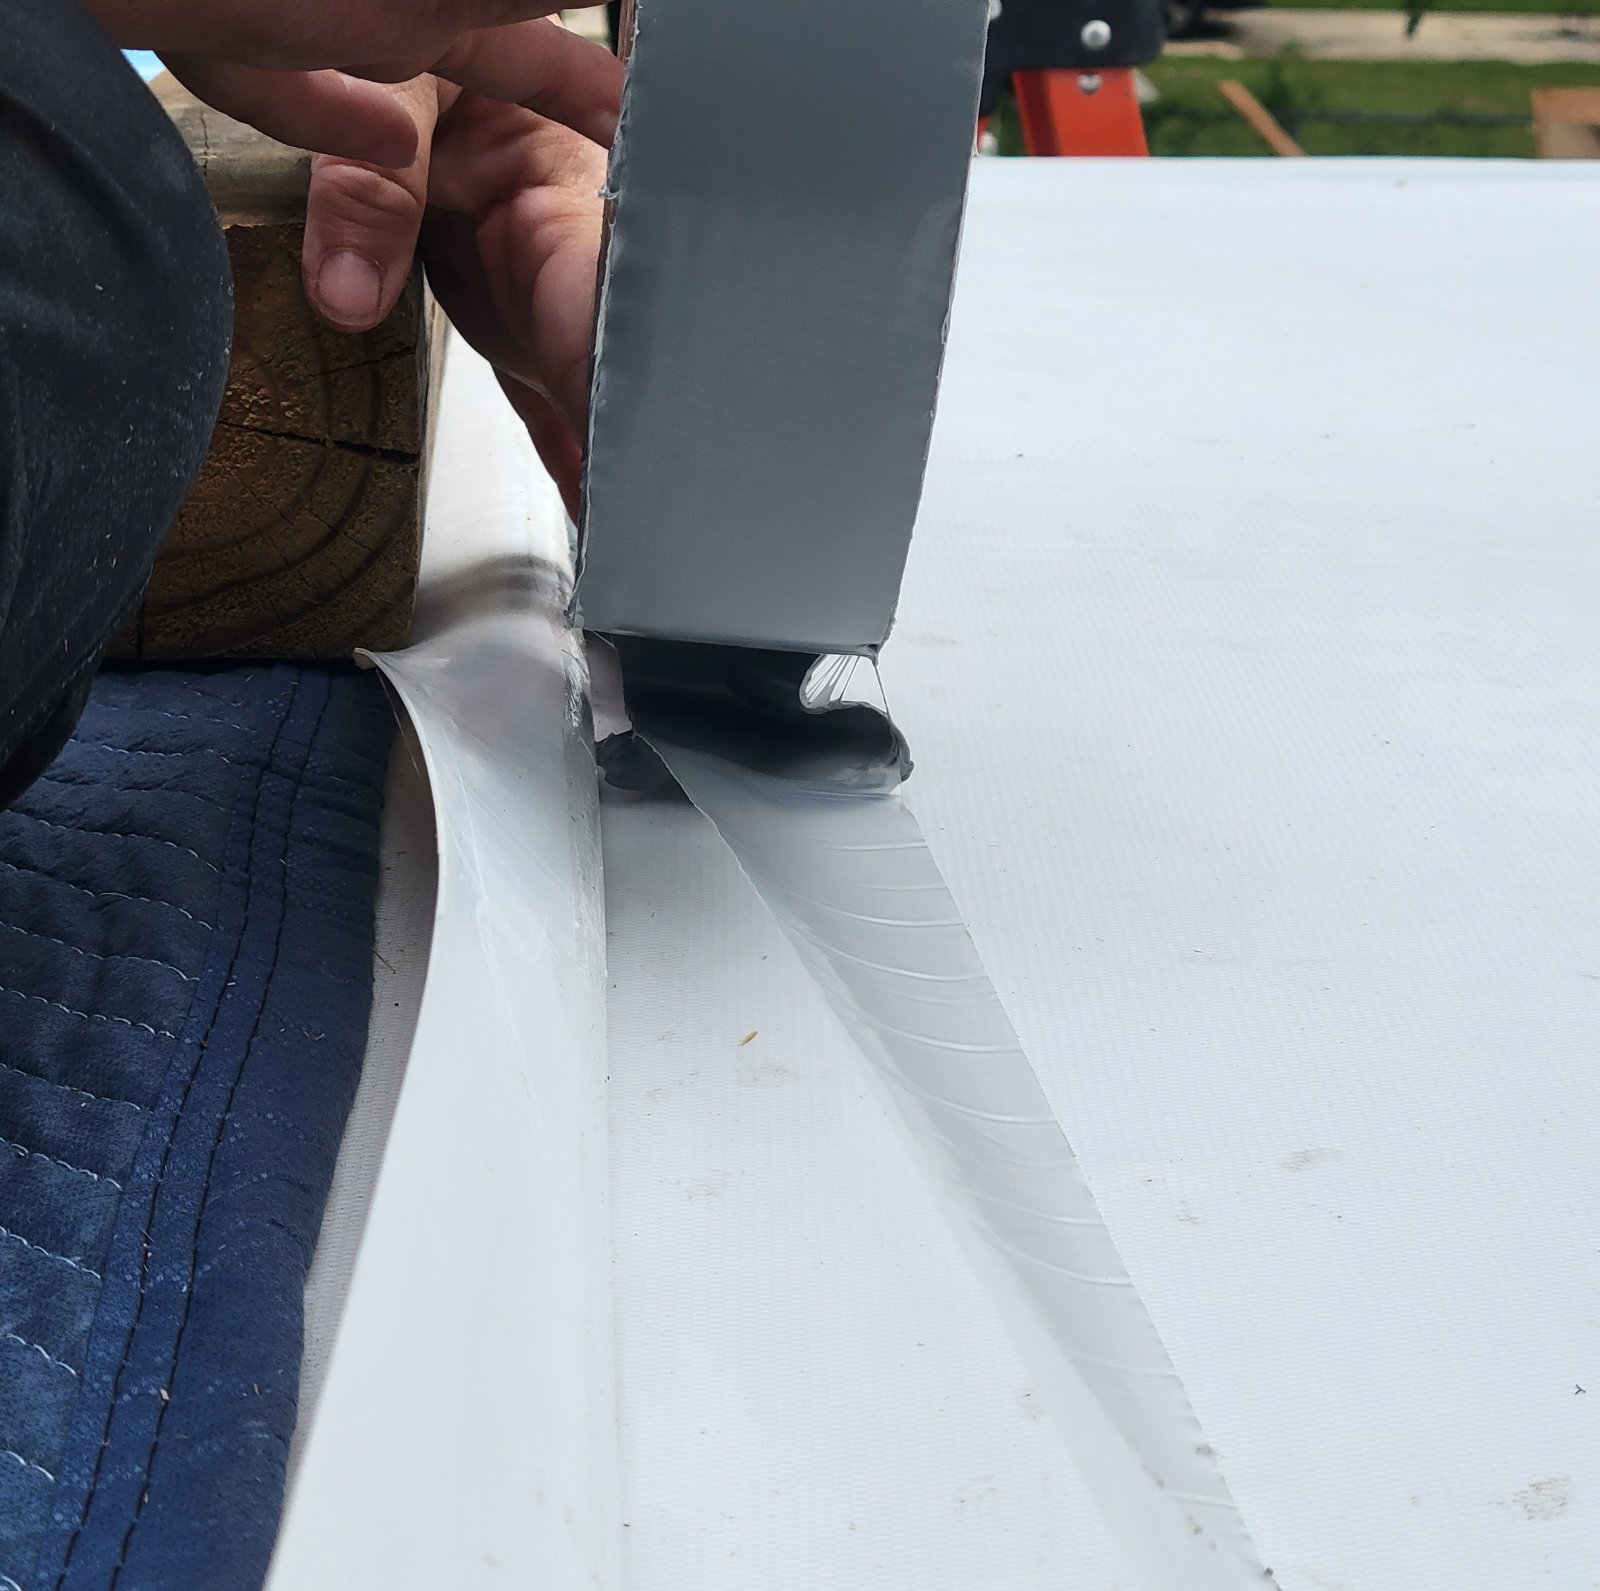
Once we got the tape down we carefully folded the seam over.
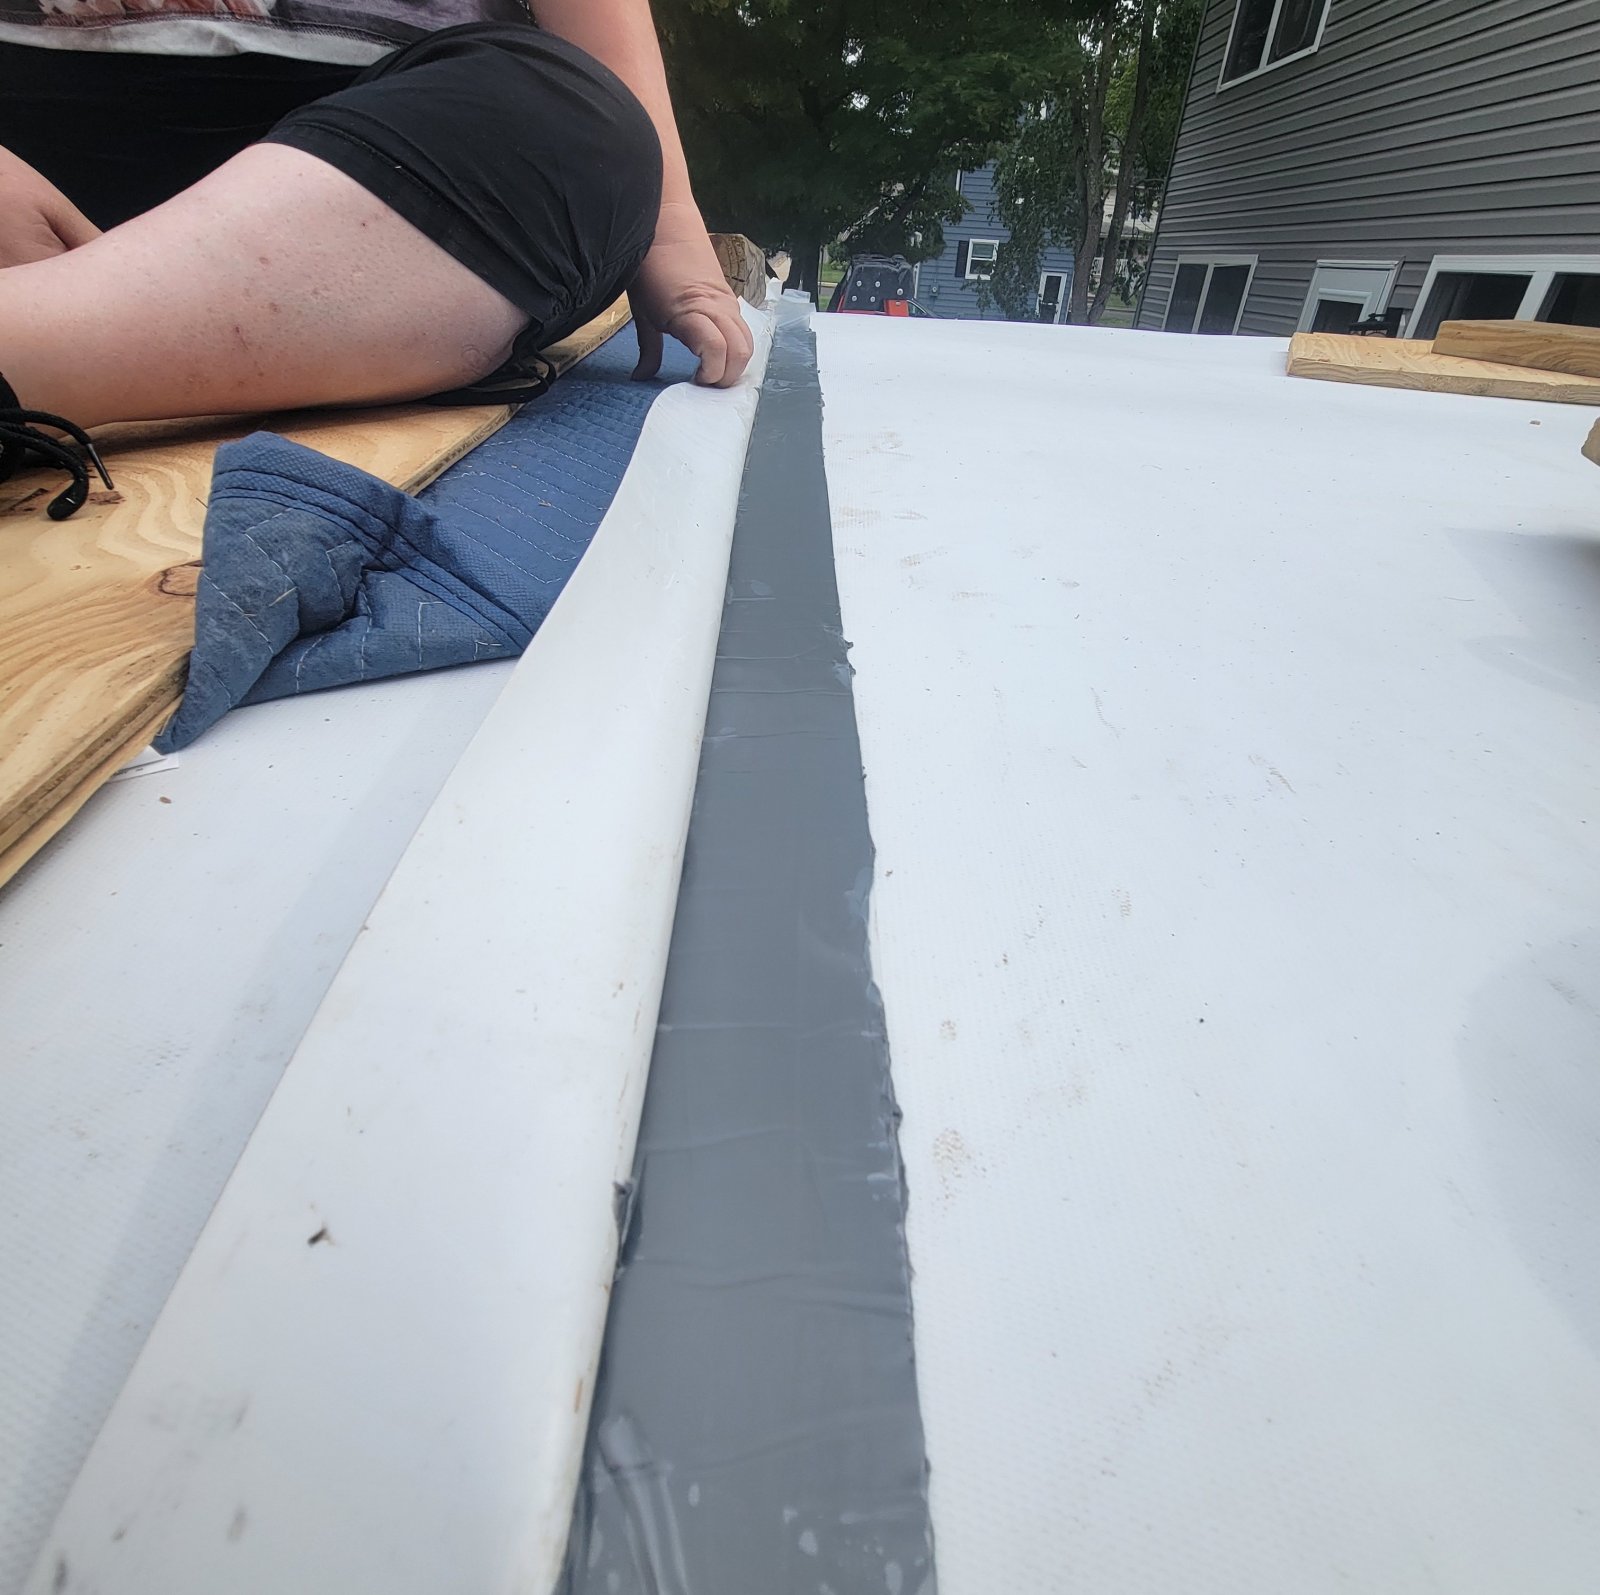

In the end, we have a little bit of overlap left that we used non-self-leveling caulk on (not shown)

Our next step was to get the AC in. Not a lot of pictures here except from the inside before we cut the opening out. A hole punch in the corners is a neat trick to ensure the cuts don't spread and lets the corners lay down nicely.
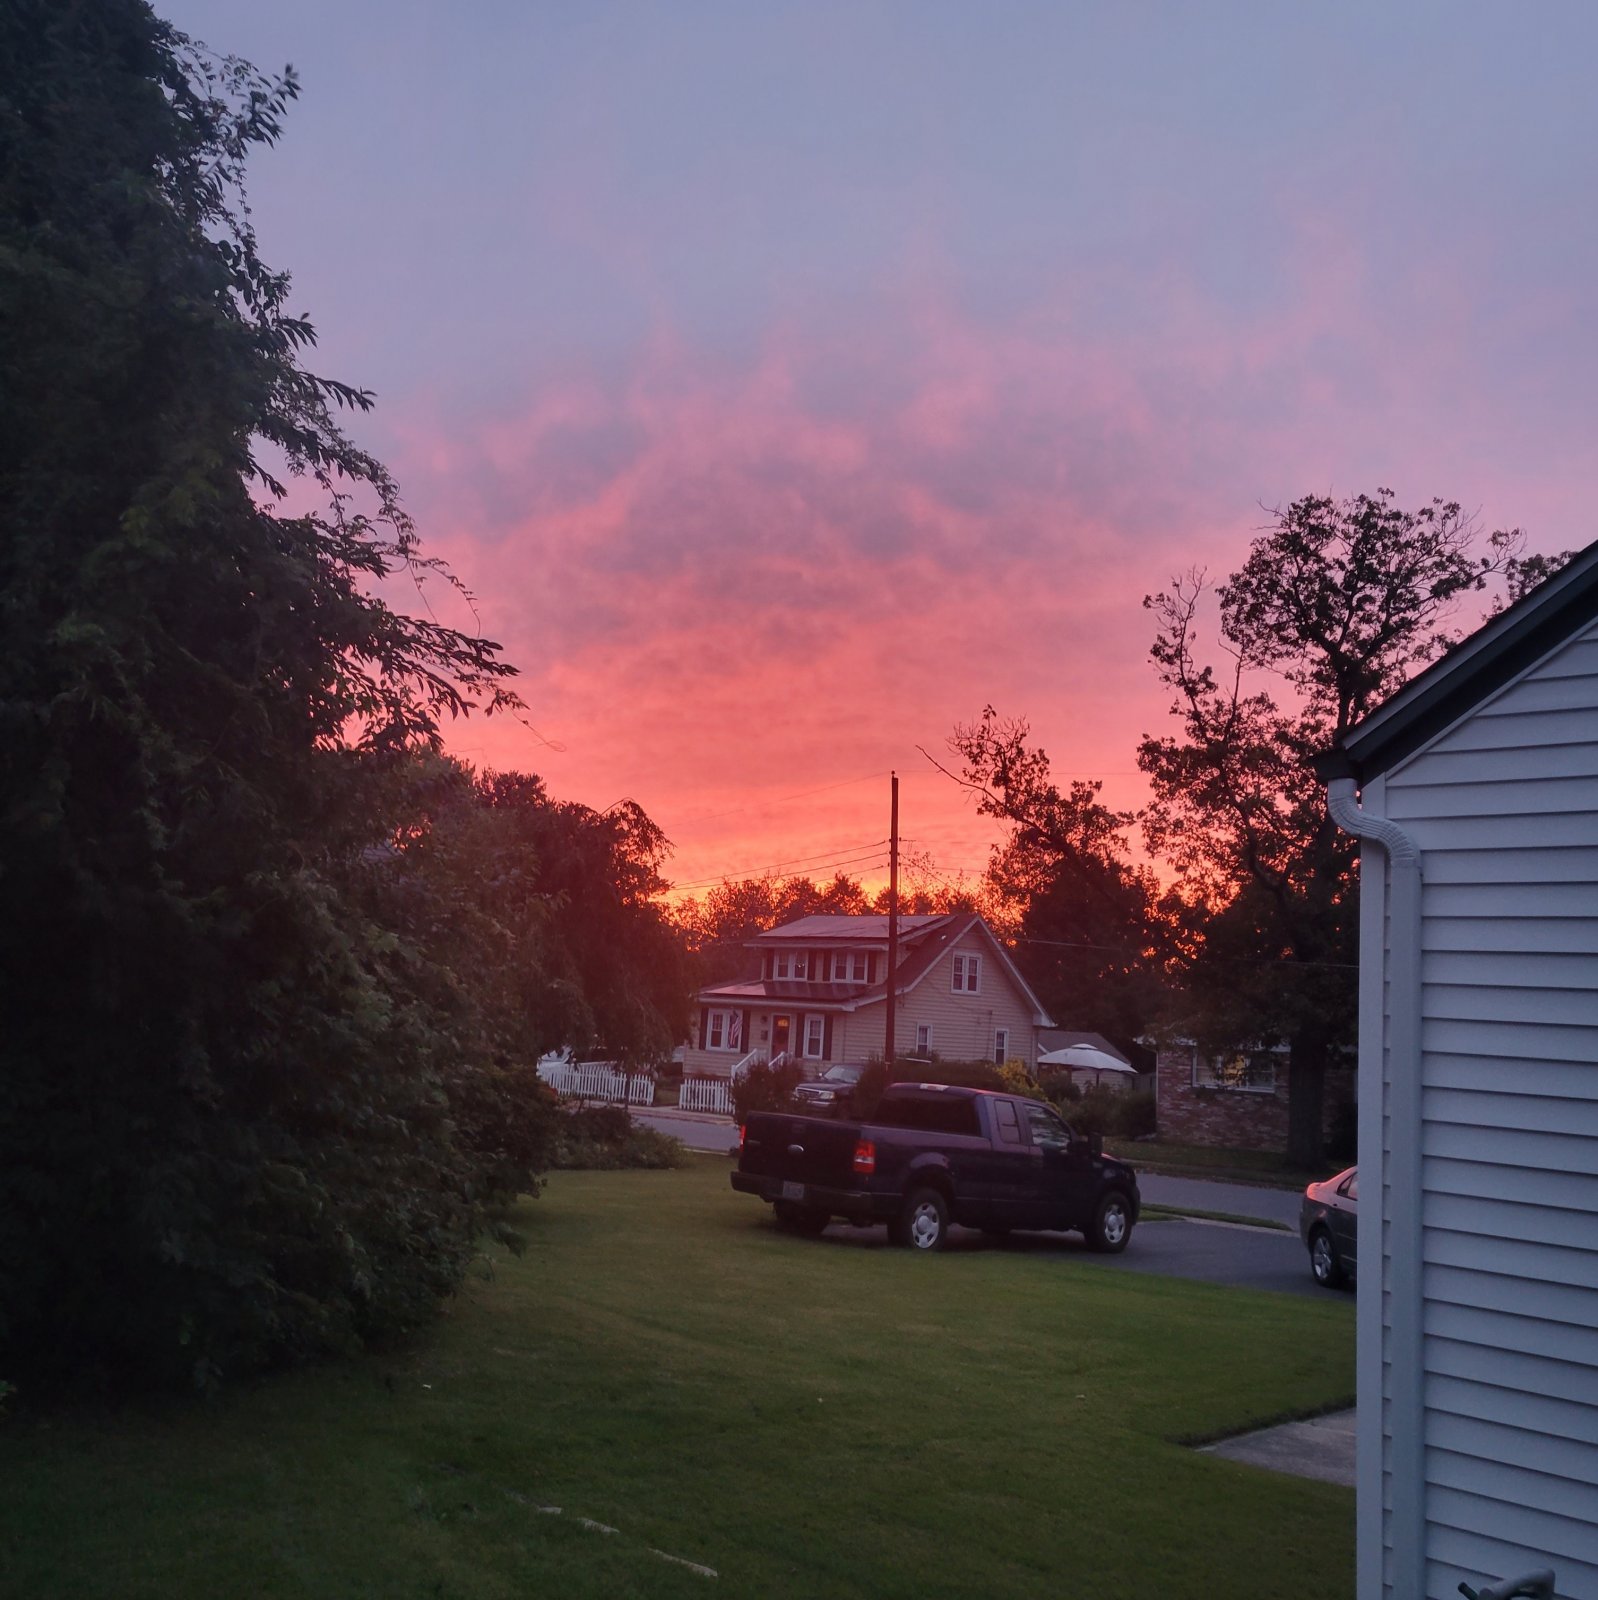
Rain and other priorities were on the way so we put the covers back on for what we hope is the last time. Beautiful sunset though.
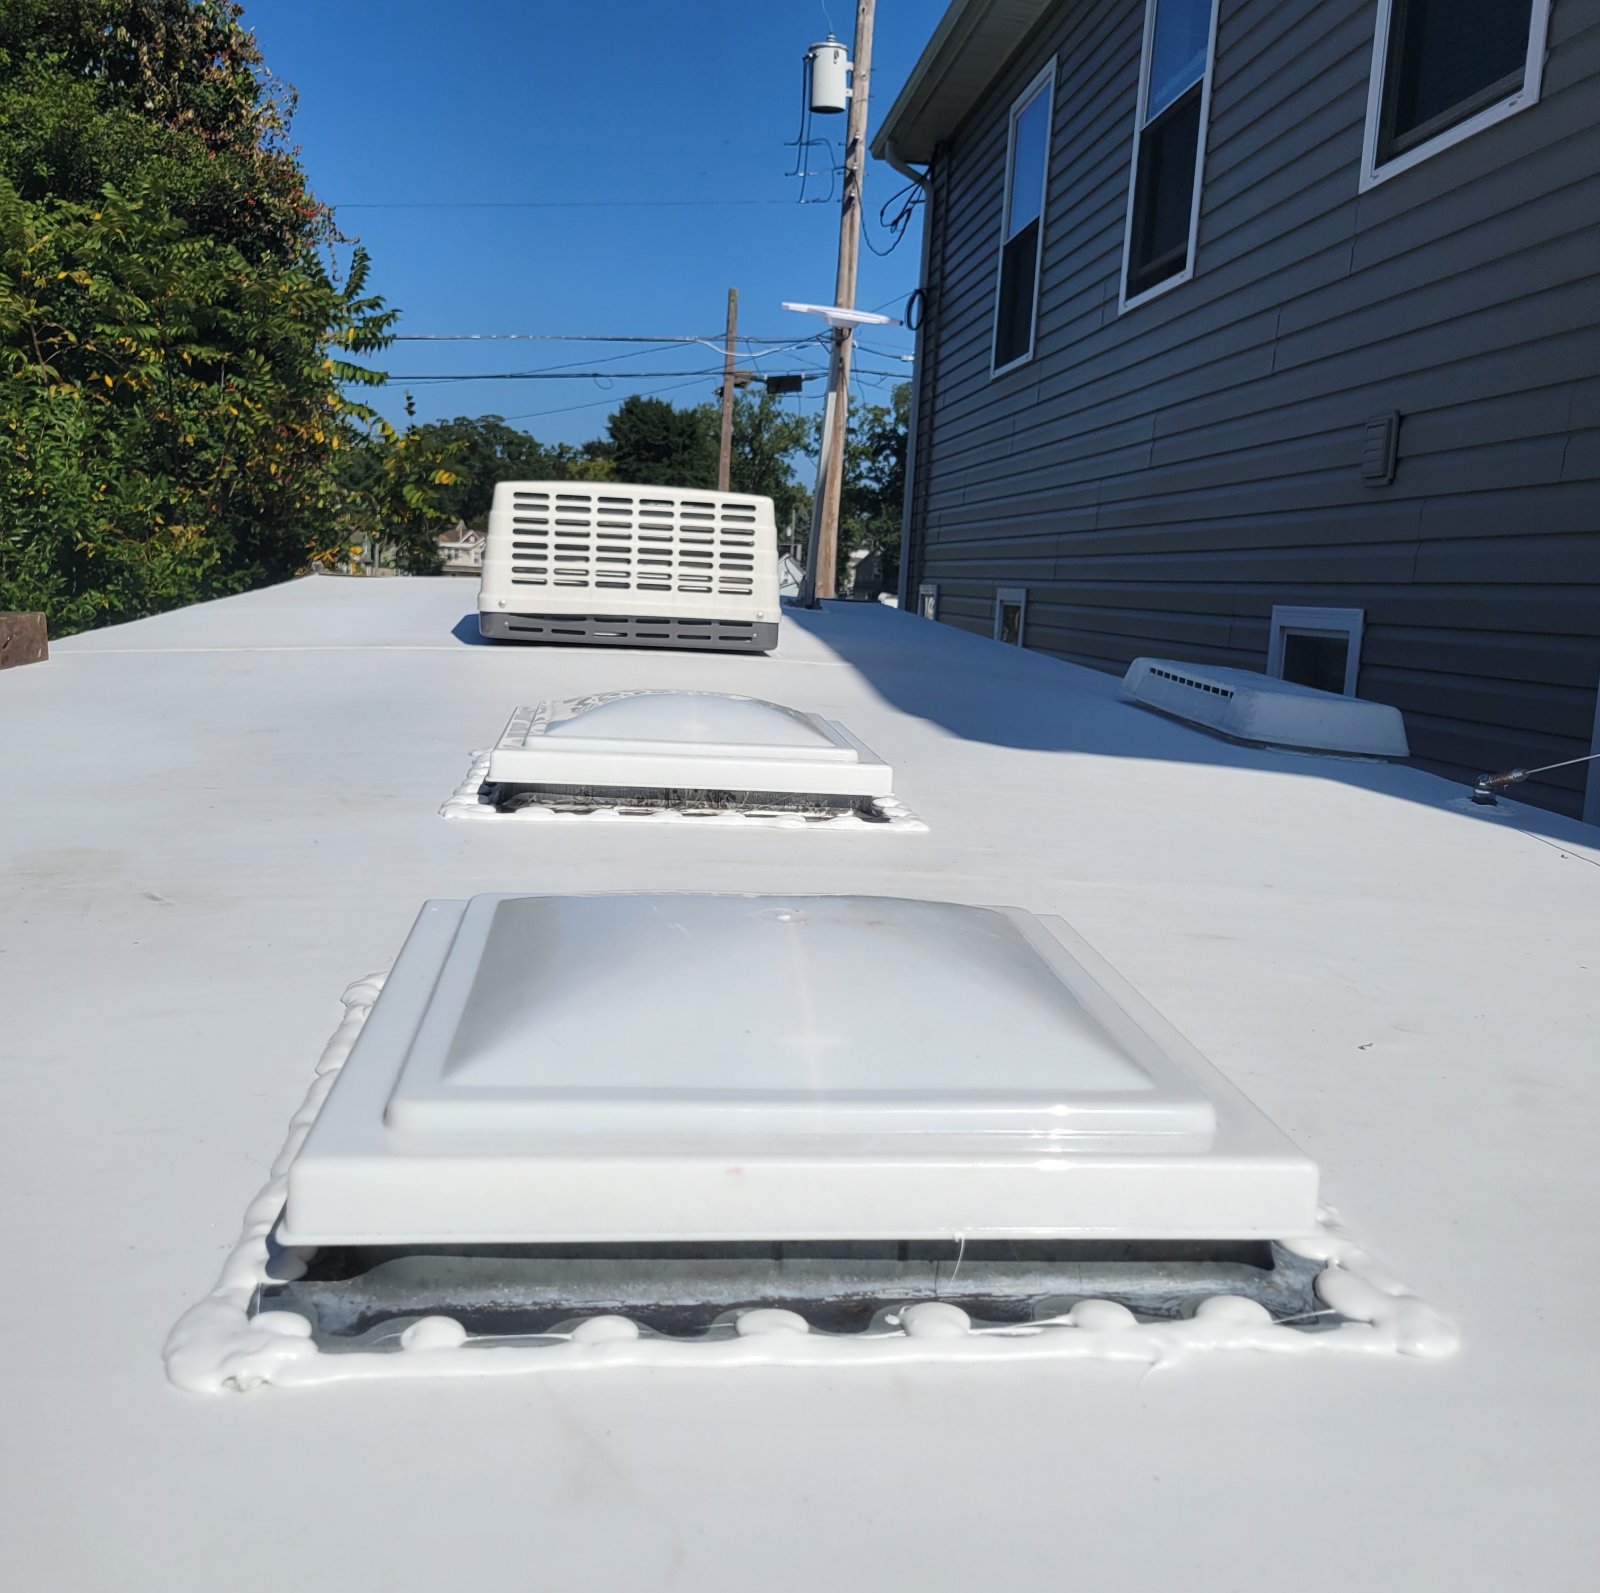
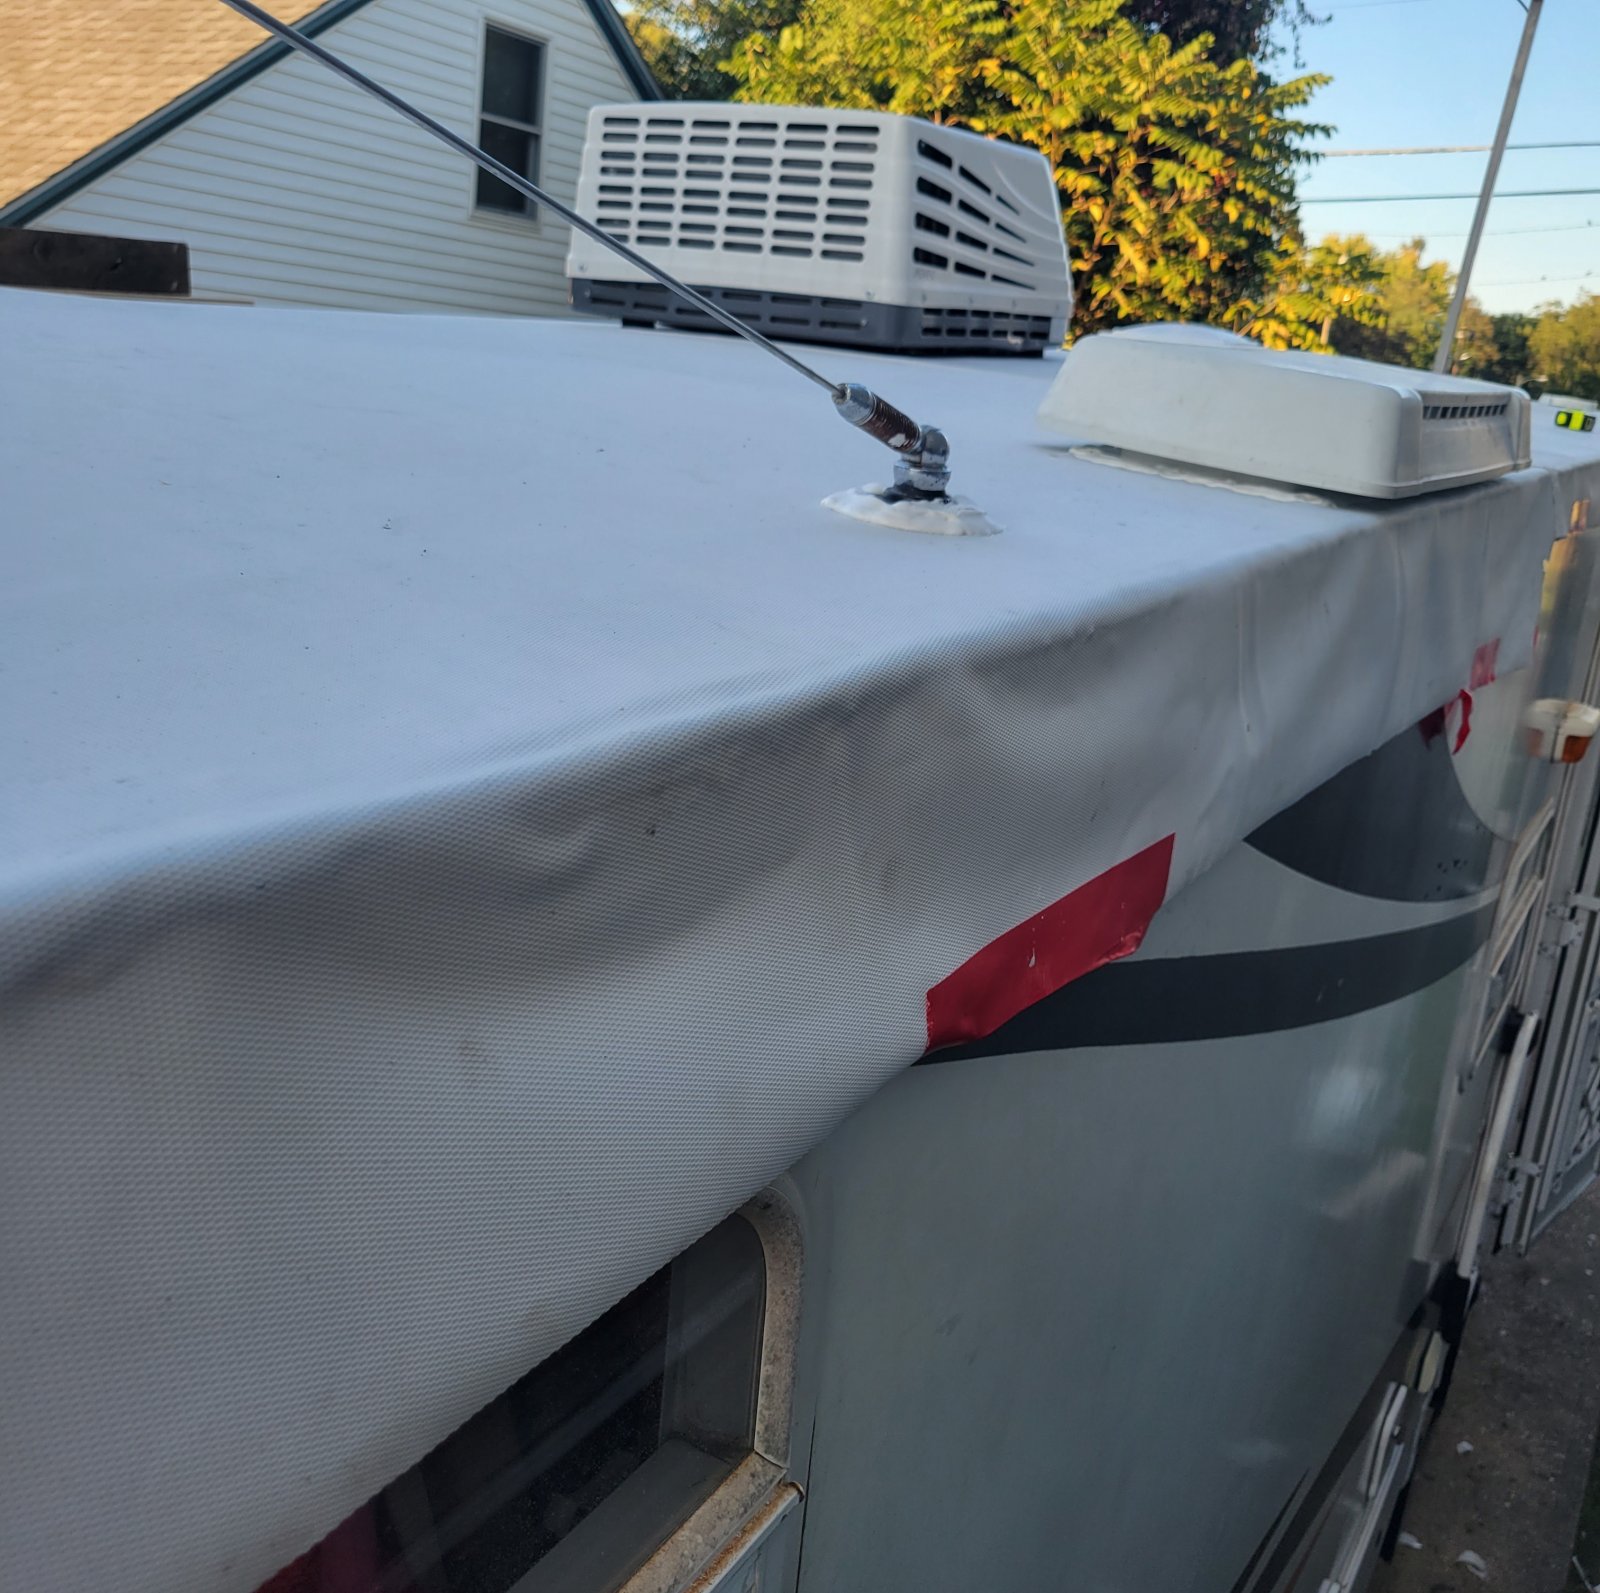
A few days later we pushed to get all the vents and covers on. These pictures span a few days as we only had time to work on them a little at a time.
You can see the hole-punched corners

Here's the skylight and the tank vents (we cut that one a little short but it will be OK)
Here's the roof all caulked up

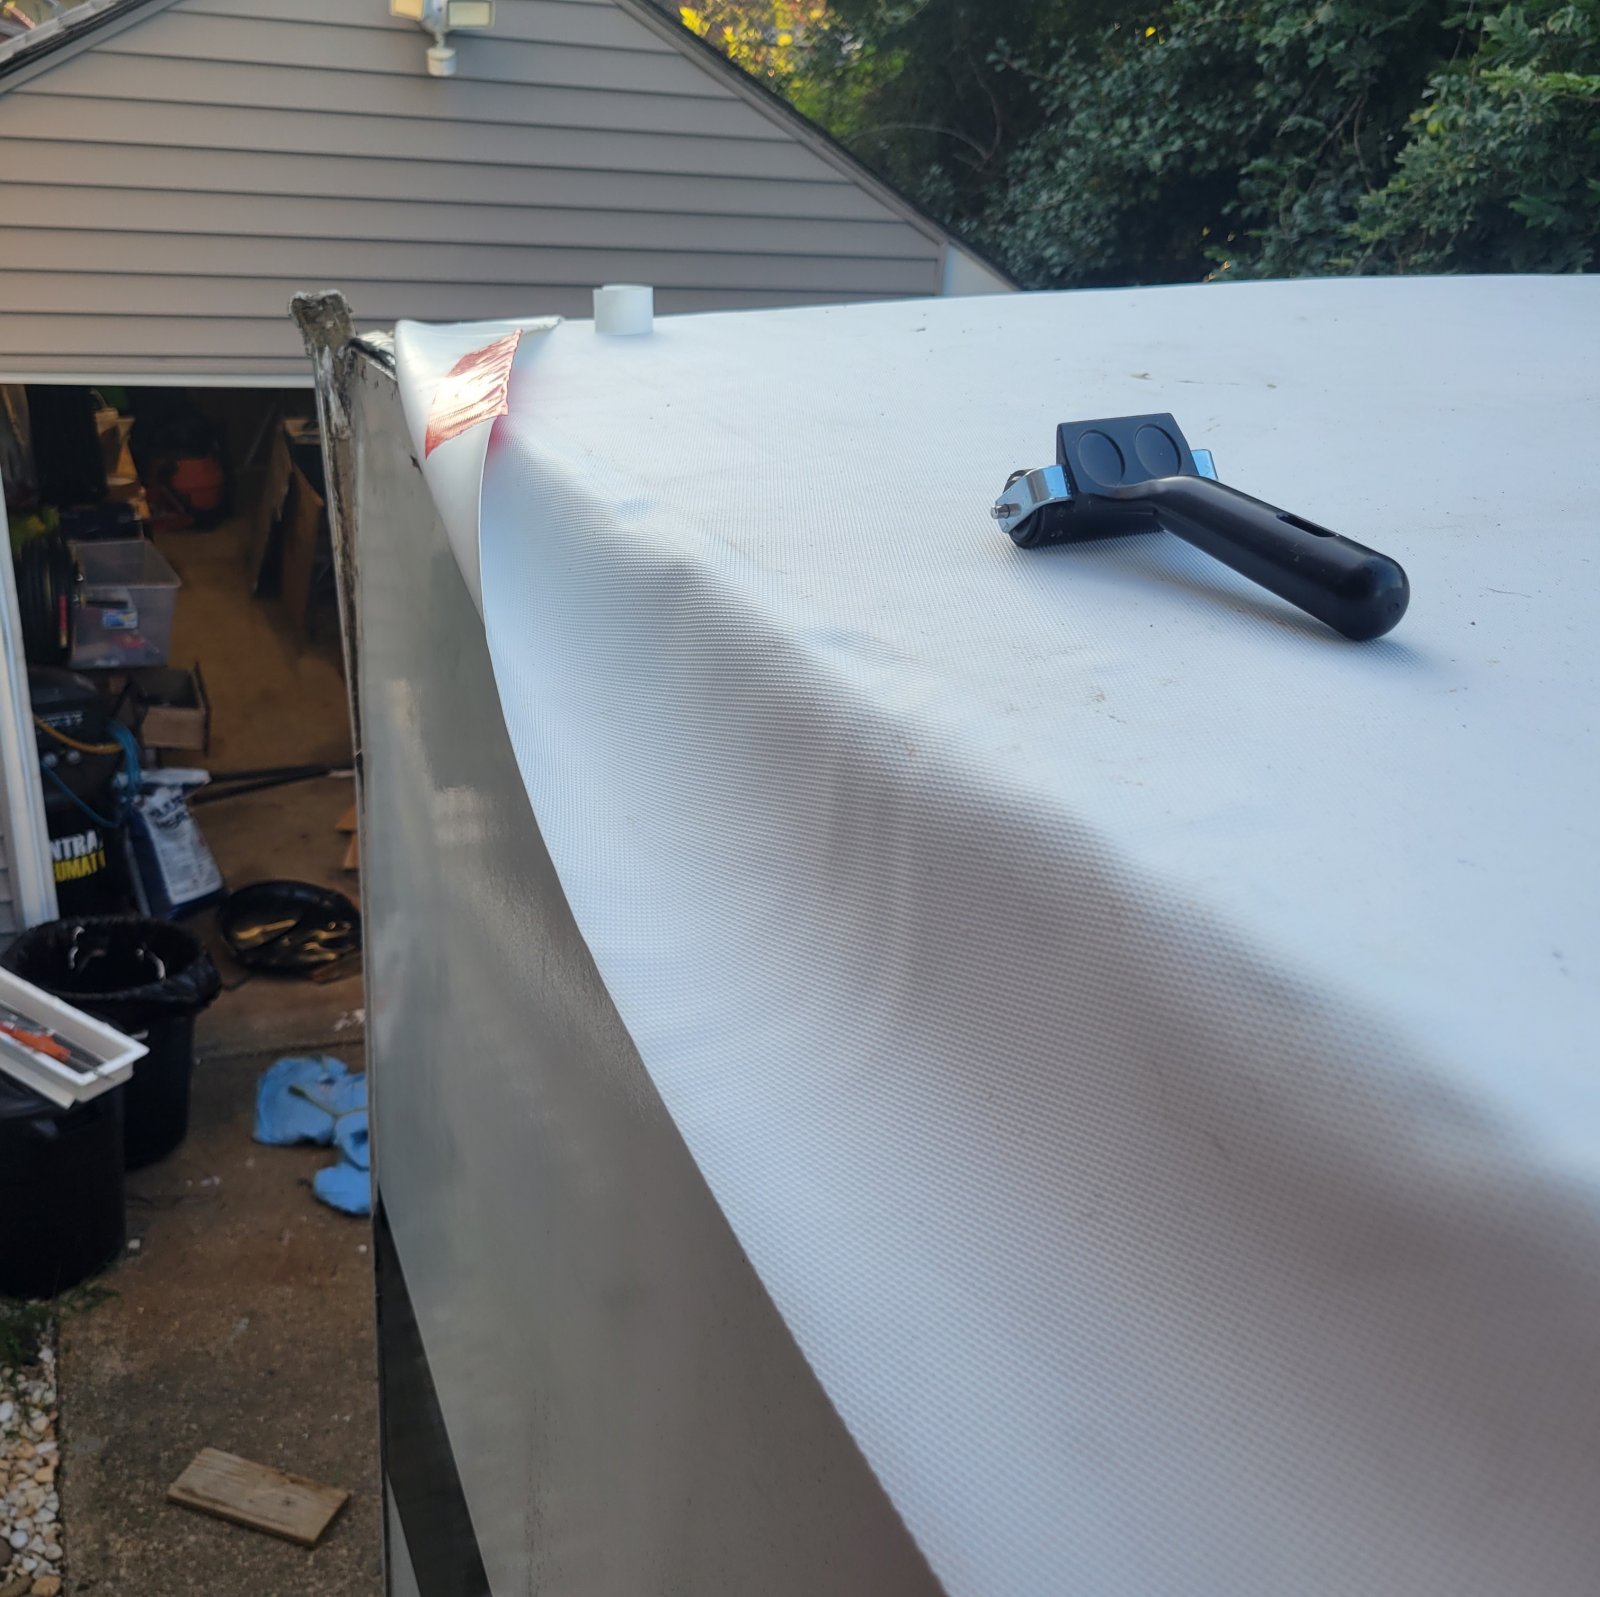
Here the passenger side is all butyl-ed up to fill in where the decking is a little short (8 foot wood isn't quite as wide as the trailer)
It's pretty easy once you get into a rhythm. For us, folding the tape in half long ways fit the gap perfectly (not too short, not to high, not too wide).
Rolling the EPDM over the butyl takes some work. Be patient and start from the top and roll over the sides.

Yesterday, we finished up the passenger side by adding the gutter and the awning and caulking it all up.
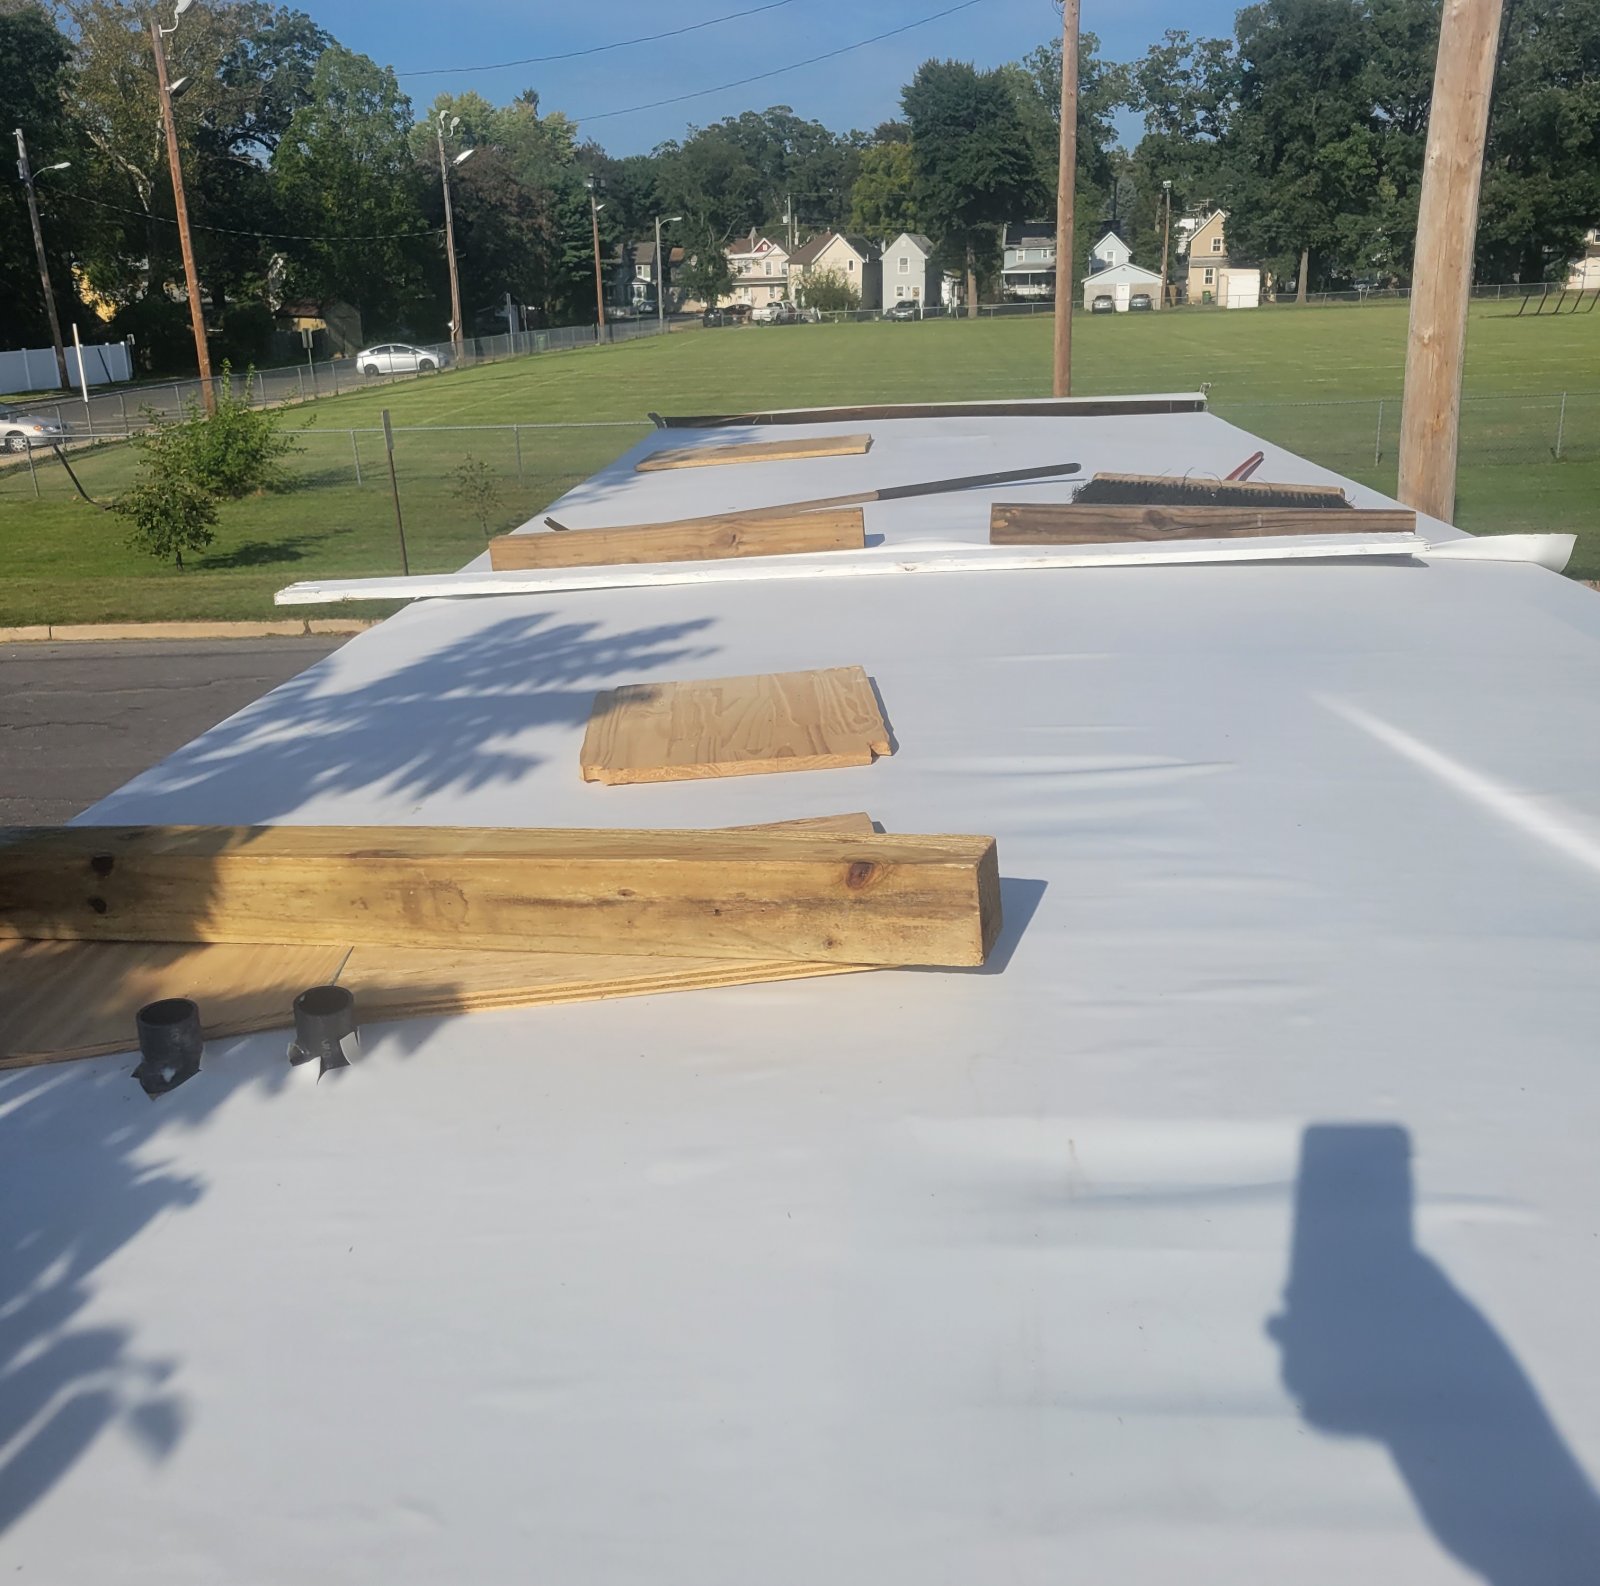
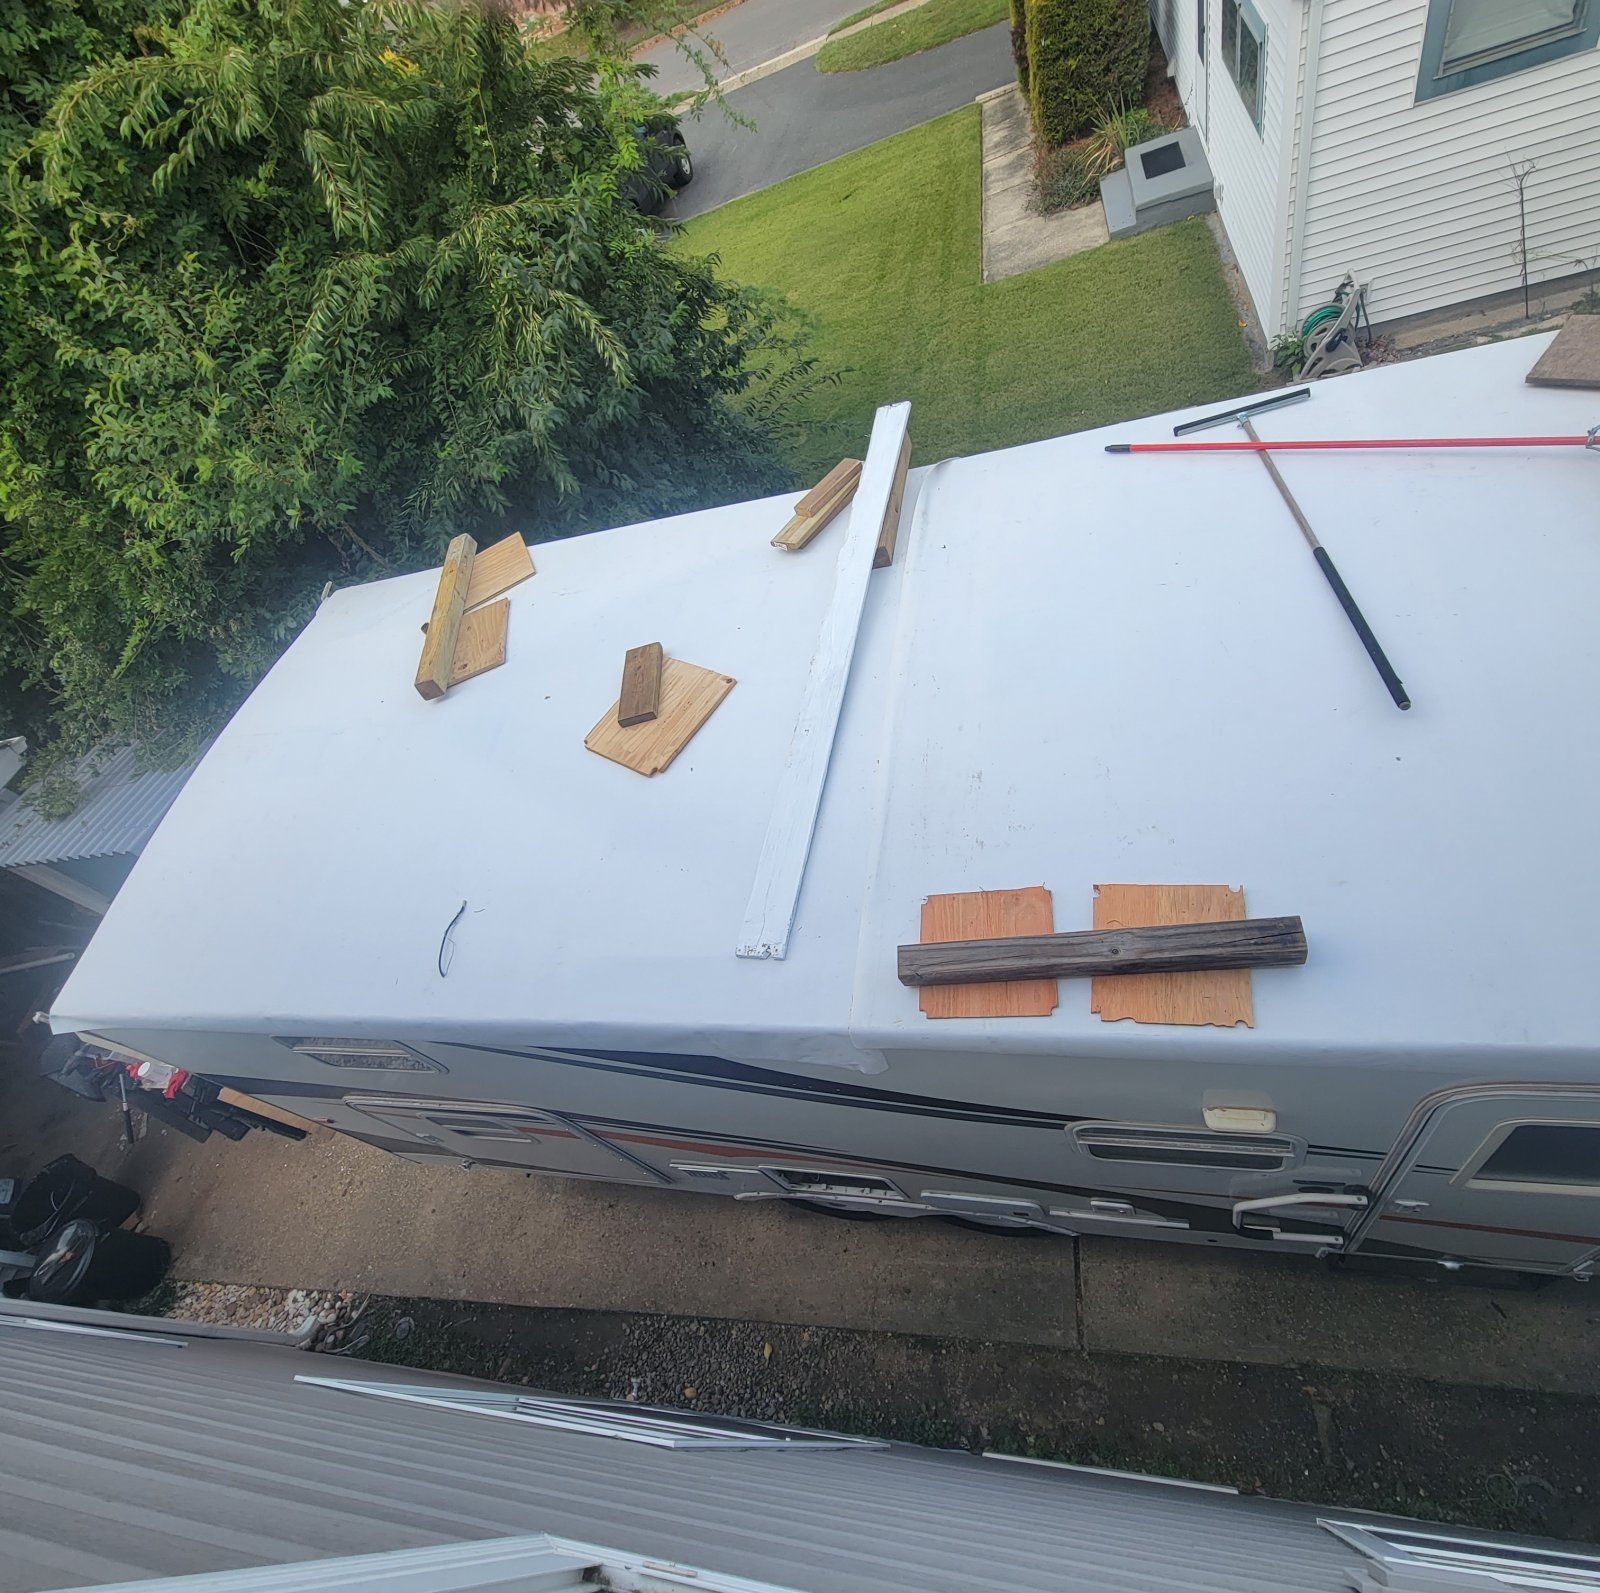
Note about the wood you see lying on the roof in some of the pictures. We noticed after some time that we either A) missed a bunch of bubbles or B) that bubbles were starting to pop up where the roof was once flat. We're really hoping it's the first one so we're using the wood to hold down strategic spots hoping that it will eventually stick (the glue is still very tacky underneath. However, sad to say, it wouldn't surprise me if this glue is just not up to snuff. I hope not but we might have to come up with a plan C. I simply can't believe that after using 1.75 times the amount of glue that was called for we didn't use enough. Time will tell
For now, we need to marry off my eldest daughter this weekend, so might be a few days before I post again.
__________________
|
|
|
|
|
10-07-2023, 08:48 AM
|
#30
|
|
Moderator
Join Date: Nov 2006
Location: Ohio
Posts: 12,656
SUN #89
|
Hi Bob,
Your team did a good job!
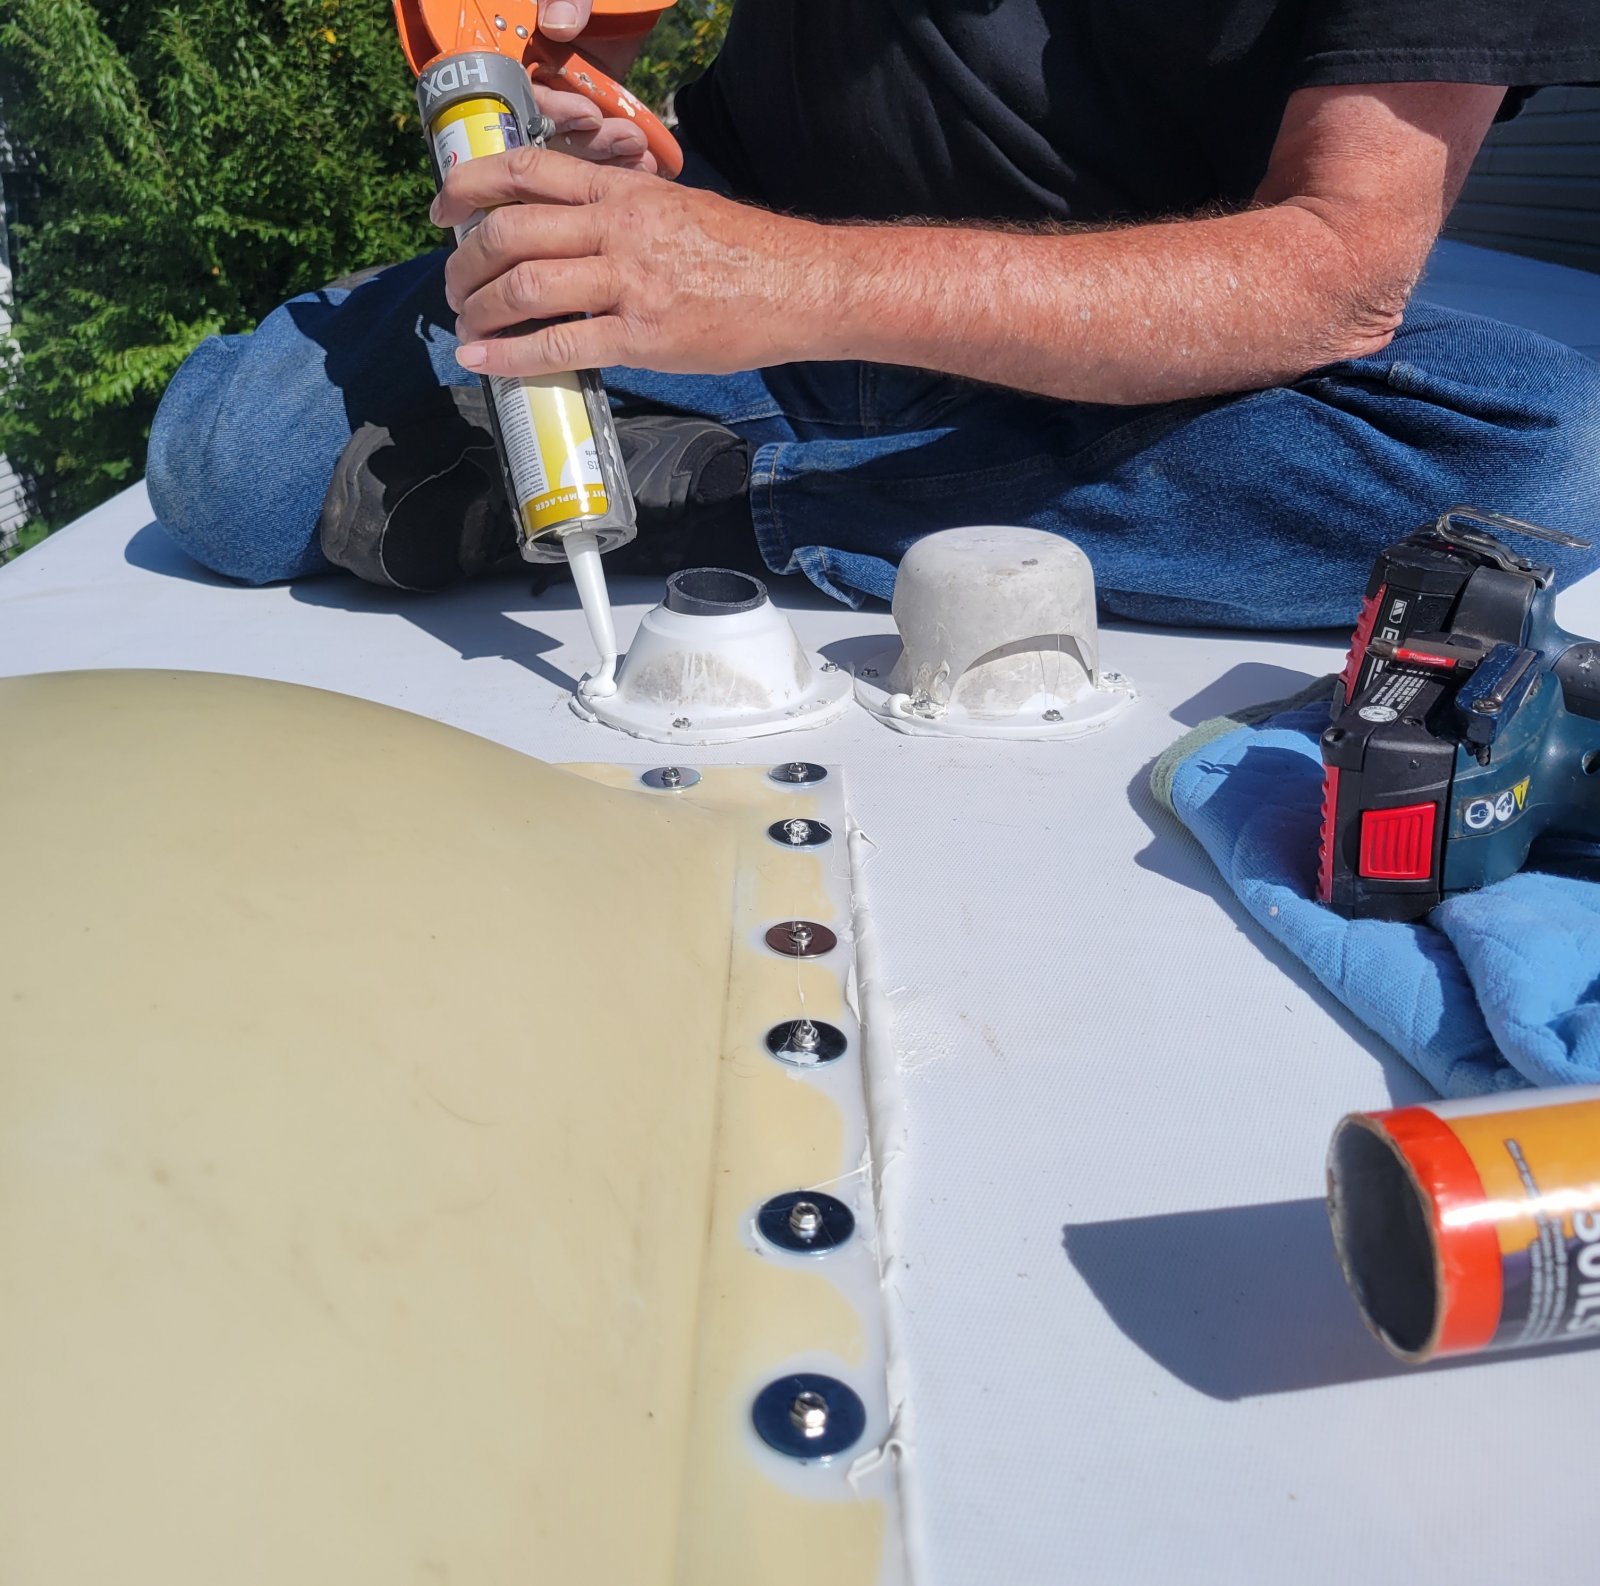
You used the large stainless fender washers on the shower dome; good for you. That will help ward off the cracks from over-torquing the screws and deforming the plastic on the installation.
If the bubbles under your boards are out in the open areas, pending the size, in time, they may disappear. When the sun starts beating down on the roof, the membrane will shrink, and in that shrinking process, the bubbles get pulled tight to the roof. They may not be stuck down, but they can be tight down. Smaller ones do not cause an issue. But if there are large ones, approx. 12" in a single bubble size and up, that may be more of the issue. Once they start getting flappy, then issues come as time goes on.
I have seen the issue on other brands straight from the factory. If the problem becomes one, plan C has some options; keep an eye on them.
The glue, I am fortunate I have a shop to do this work inside out of the sun. Doing this outdoors in the sun is a challenge. And they gave you fast set glue, which is odd as they should know this is an outside install by the average RV'er. They do sell slow-set glue to buy you time. The OEMs want the fast set as it is on a manufacturing line, and it has to be set up for the line to work.
You did well and overcame the "opportunities" that presented themselves along the way. Thanks for posting the pics; we all learn from each other sharing the good and the not-so-good.
Have a happy wedding!
John
__________________
Current Sunlines: 2004 T310SR, 2004 T1950, 2004 T2475, 2007 T2499, 2004 T317SR
Prior Sunlines: 2004 T2499 - Fern Blue
2005 Ford F350 Lariat, 6.8L V10 W/ 4.10 rear axle, CC, Short Bed, SRW. Reese HP trunnion bar hitch W/ HP DC
Google Custom Search For Sunline Owners Club
|
|
|
|
|
|
|
Currently Active Users Viewing This Thread: 3 (0 members and 3 guests)
|
|
|
 Posting Rules
|
You may not post new threads
You may not post replies
You may not post attachments
You may not edit your posts
HTML code is Off
|
|
|
|
 » Recent Sunline Discussions
 |
|
|
|
|
|
|
|
|
|
|
|
|
|
|
|
|
|
|
|
|
|
|
|
|
|
|
|


 Linear Mode

