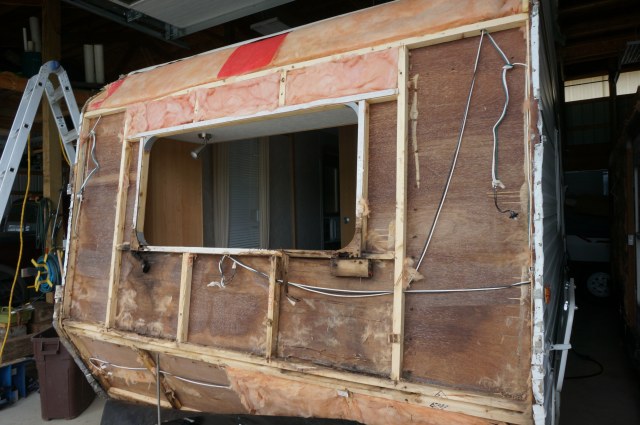
Hopefully, this post will give fellow Sunliner's options repairing a ceiling or wall in place rather then replacing the ceiling or wallboard. Campers are not built like houses from the inside out. Campers are built from the outside in, in modular sections. The screws that mount cabinets and interior walls in place are installed from the outside of the camper behind the siding, where you cannot get to them from the inside. It can often be better to create a water damage repair starting on the outside of the camper and not inside. The aluminum-sided campers allow a relatively easy way to remove the siding and reinstall. Campers with smooth fiberglass siding can be more involved but still doable depending on where the repair is needed.
Below is an explanation for ceiling or wallboard repair, what I call a "resin treatment" or "resin repair." I use this method to save/repair the existing ceiling or wallboard. It saves time, money and you do not have to tear up the inside of a camper that is in fairly good shape. I also use this method to treat water-stained or infected wood that is still mechanically sound but not yet rotted. This resin treatment helps prevent the wood from getting dry rot in the future. A resin repair can create a sound long-term fix to partially rotted walls or ceilings. The existing wall or ceiling board stays in place, keeping the inside of the camper still original looking while taking less time to repair. By repairing the camper from the outside, you do not disturb the inside.
Resin repair for me started by understanding dry rot. Dry rot in a camper comes from wet wood that was wet a long time, started the rotting process, dried out, and not treated to kill the dry rot fungus. The fungus was still in the wood, and over time, that dry rot fungus turns the wood into dust. I have seen dry rot in some of my project campers in the attic. My research took me to folks who restore wooden boats. Boat restoration folks are dealing with rotten wood all the time. Often they cannot afford to pull out an entire main beam on a boat, so they resin treat the wood and rebuild it with resin and filler. I do not do the wood rebuilding process, but I do use the same resins.
On a camper, when you have rotted wall studs, lower band boards, floor joists, or rafters, I find it is a faster long-term approach to cut out the rotten wood and install all new wood or splice in new wood. Repairing the wallboard and ceiling board needs a different plan other than tearing out the old as it is complex to match the existing patterns and colors or even get all the board out without taking cabinets apart, etc.
The research took me to a product called CPES that I used to use. It could penetrate a beam some 14 to 16" deep. Again, on a boat, they have beams that large, but we only have 1/8" thick luan plywood. The same restoration process applies, just a different application. Here is the website for Rot Doctor.
https://www.rotdoctor.com/house/Hmain.html
Here is a long list of wood preservations products they offer.
https://www.rotdoctor.com/products/product.html
The CPES is no longer available, but they now offer S-1 Clear Penetrating Epoxy Sealer.
https://www.rotdoctor.com/products/s1.html
For water-stained wood that is touched by the wetness or rot, but the wood is still sound, I treat the wood with the S-1 to seal it and encapsulate any mold spores from growing so dry rot will not start. I also use S-1 on water stained and partly rotted wall and ceiling board. When the resin cures, it also adds strength back into the luan plywood, or any wood it was treated with. The product is very thin, so it penetrates deep into the wood. It is like painting with a product that looks as thin as diesel fuel. The fumes given off by wet S-1 are not good for your health. You have to wear an organic vapor respirator when applying it. Rot Dr. sells a suitable commercial respirator made by Moldex on their website for a reasonable price, and they offer replacement filter cartridges.
https://www.rotdoctor.com/products/a...ml#respirators
Here are some pictures for show and tell on the repair process. This camper I was restoring was a large job as almost all the siding had to come off to complete the repair. This camper is shown for example only of the resin treatment. Many times you do not have to take all the siding off; it just depends on how the rot has progressed.
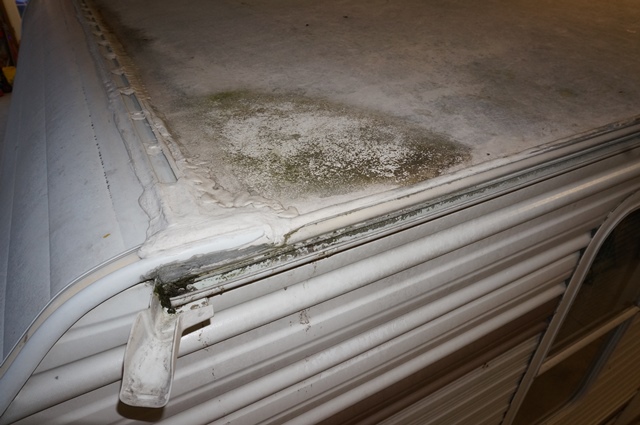
In this case, it is the left rear corner over a bedroom in a 2005 T2363.

The ceiling leak came in the left rear roof seam to the back wall, a classic leak location. The owner knew to do routine roof maintenance, and he ended up stopping the leak, sealing the attic's wetness. The roof leaked between his inspections and caulking touchups.


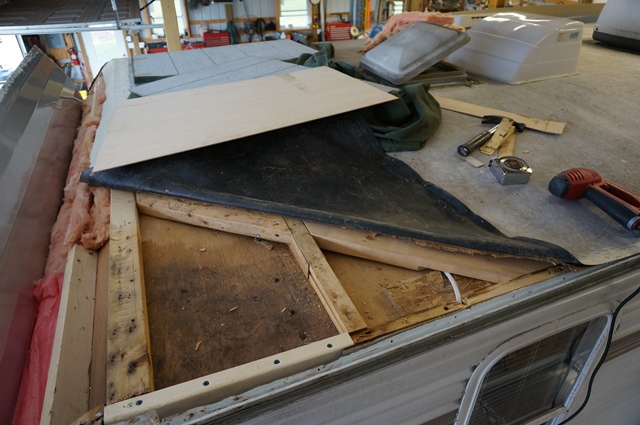
Cut out all the rotted wood to later splice in new wood. The ceiling board stays in place, and you can see it has partly deteriorated.


Create the new wood shapes to be spliced in.

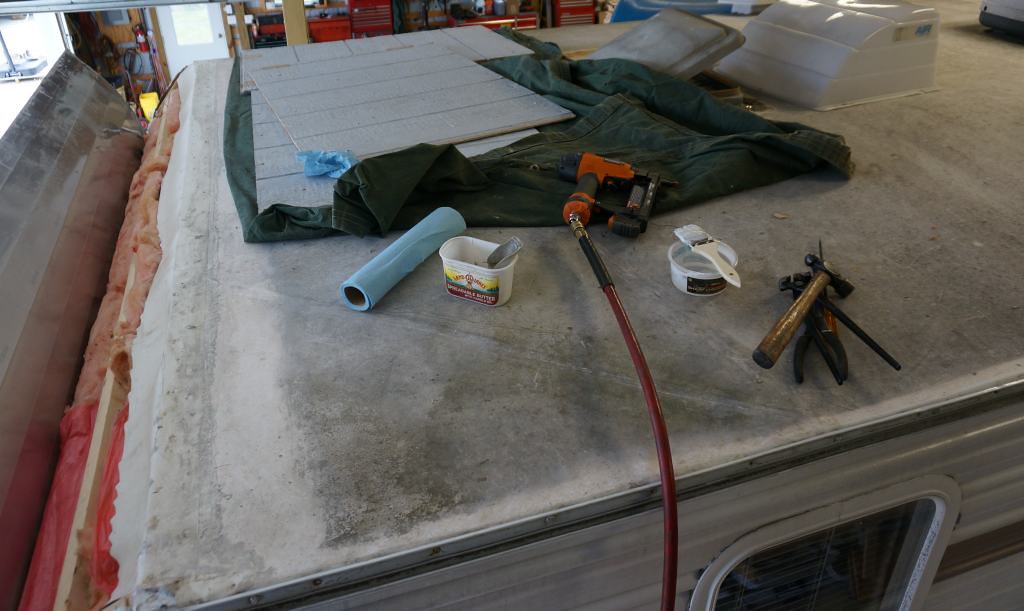
Once the camper has dried out in the area, you will repair, treat the entire water-stained area with S-1. This picture is of the prior CPES, but the application needs are the same for the S-1.

The wood will soak up the S-1, keep applying additional coats, including the wall stud wood, ceiling board, wallboard, or any water-stained wood, even where water ran over the wood on the way down the wall. It takes several coats, and you do not let it dry between coats, keep brushing it on as it absorbs into the wood. I do about 3 to 5 coats, pending the area I am doing and how rotten the wood. If the S-1 puddles and does not soak in anymore, then you stop. I never had the wood stop absorbing even when treating a 1 1/2" thick slide floor which I stopped at ten coats.
Note: If the resin ends up running or dripping inside the camper through a joint, it will stain the inside wall/ceiling surface. Take note to try and not have this happen, or go inside and wipe it off as soon as it happens. If it does make it inside and hardens up, it is paintable. It will take overnight to have the resin set up. It can take 3 to 5 days for the stink to stop, but in time it will stop.
Once the resin has set up, you can feel it is hard and dry, then install your new wood. The ceiling board will be hard, stiff, and stronger than it was when you started. You can see the CPES treated area by the discoloration of the luan board.


Here is a front left ceiling repair on a 2005 T264SR. In this case, just the corner was rotted, not the whole front or left wall. This was early in the rotting process. Again, the process is to take the rotted wood out, create new wood shapes to install, resin treat the luan plywood and other water-stained wood, put the camper back together, and save the ceiling board in place. You never touched the inside of the camper; the rotted ceiling or wallboard is still in place and the area repaired.
Failed caulk on the front seam caused the leak. The area was caulked over, but the damage inside was still there.
Open up the roof to dry out the area and get all the wet wood and insulation out.

Treat all water-stained wood and the ceiling board. Install fresh new wood when the S-1 has cured.
In this case, on a partial roof fix, put the new 1/8" luan down, clean the old rubber membrane and glue the old membrane down.


Here is the same camper with, new Dicor caulk, roof bleached and cleaned.
Pre- caulk stage, areas cleaned, ready for caulk.

The roof completed, entire roof cleaned, bleach solution treated to kill all mold and 303 UV treated. Yes, the roof can come back to life.

A 2006 T264SR with a front right corner roof leak. Repair is the same process. Remove the rot, treat the wood and ceiling with S-1, install new wood, and saved the ceiling board.


Treat all infected water areas with S-1. Notice how deteriorated the ceiling board is at the front right.

Install new wood.


The resin repair process does not correct every ceiling or wallboard rot issue. There are times the luan board is 95% gone and the area too big to save. In these cases, a new ceiling board or wallboard may be what is needed. There are other creative ways for spot repairs.
Here is a 2004 T2475, which had a heavy water leak in the front wall above the bed. I tried the resin repair, but the wallboard was too far gone. I did treat all the front wall, as most of the wall was resin treatable, just not the area directly below the window. I created a bed headboard over the affected area rather than all-new wallboard. Be creative in your repair. Just think it through before you start tearing all the walls and ceiling out from the inside first. Most times, these repairs create less work doing them from the outside in.
Front wall rot under window

I attempted a resin repair; it did not work well enough as all the luan layers were too rotten, and I did not want to do the Rot Dr. "filler" process attempting to build up the wall board. The inside vinyl paper was in rough shape. The inside just looked rough, and the wallboard not strong enough. It is right by the head of the bed, and you see it, so I cut out the old and redid the area.


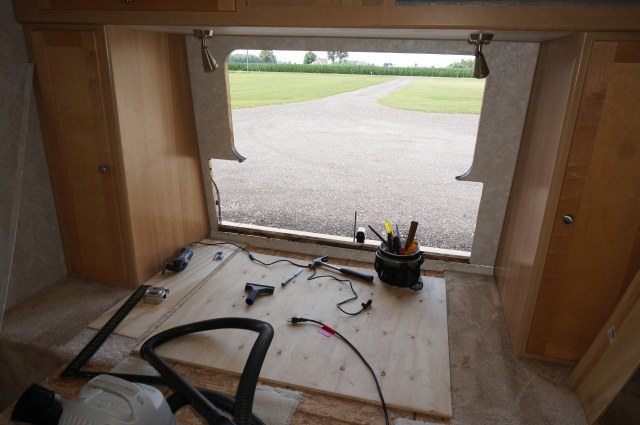

A bare 1/8" luan installed as a filler where the old wallboard came out.

I made a headboard for the bed out of 1/4" pine beadboard.

Test fit before painting.

Painted the headboard with oil-based high gloss enamel for a durable surface. The color was custom mixed to match the white window framework.

There are other creative ways to repair the wallboard short of tearing it out and replacing it. Just think through a plan and ask for ideas from the forum, as someone may have already done it.
Thanks for looking.
John


 Linear Mode


