Sunline RV Forum
Sunline User Photos

Go Back   Sunline Coach Owner's Club > Sunline Club Community Forums > Sunline Community

Join Sunline Club Forums Today


Reply
 
Thread Tools Search this Thread Display Modes
Old 08-16-2008, 07:36 PM   #15
Member
 
Join Date: Jul 2008
Posts: 79
SUN #660
rmstack
I've removed door decals on my previous Sunline with a hair dryer which worked quite well. I started at one side and pulled the old decal off as the heat caused it to let loose.

Rich

__________________
Rich & Nancy
2006 Solaris T2753
rmstack is offline   Reply With Quote
Old 09-12-2008, 04:52 PM   #16
Junior Member
 
Join Date: Sep 2008
Posts: 11
SUN #701
Thomas A
Decals

I spent my entire working life (40+ years) in graphics, signages, decals,etc. Most RV mfr's have chosen to use a 5 year vinyl, although several used to use 3M's best, which was 7 years. However, so much depended on the surface prep before applying the decal, and the thoroughness of the application...squeegeeing it tight, preventing air bubbles and being sure of tight edges. I can't begin to say which vinyl Sunline chose, but I would have guessed it was a 5 yr. product. I replaced 2 of the side decals on my 2553 within 3 yrs. of purchase. They appeared to me to be application issues, since they must follow the contour of the aluminum on the sides...it's not the easiest application.

When decals are applied in a production atmosphere, there is bound to be some which do not get applied as thoroughly as they should.

As far as removing decals, there are some gentle spray solutions out now....citrus-based, that really remove the decal and the adhesive. So in case the heat doesn't do what you would like it to, this is a suitable and safe "plan B".

Sorry this is a little late...hope it can help someone.

__________________
Thomas A is offline   Reply With Quote
Old 09-15-2008, 09:48 PM   #17
Moderator
 
JohnB's Avatar
 
Join Date: Nov 2006
Location: Ohio
Posts: 4,579
SUN #89
JohnB is an unknown quantity at this point
Thomas

You’re not too late and thank you.

Do you have any tips on how to stall out the peeling process once started? Sealing some how from spreading? At the rate of my fading sun.... Some where in the next year I may have to pull it off before it looks so messed up I can't stand it.

The TT was built in Oct of 2003. The front Sunline on the rock guard is still perfect, but the back one is heading down hill fast. I was not the original owner so I suspect it never had any type of UV protectant applied over it until I acquired this unit last fall. I can tell by all the other outside plastic parts.

Thanks

John
__________________
2004 Sunline T310SR
2005 Ford F350 Lariat, V10 with 4.10
CC, Short Bed. Integrated Brake Controller
Reese HP trunnion bar hitch with HP DC
JohnB is offline   Reply With Quote
Old 09-05-2010, 08:11 PM   #18
Moderator
 
JohnB's Avatar
 
Join Date: Nov 2006
Location: Ohio
Posts: 4,579
SUN #89
JohnB is an unknown quantity at this point
New Rear Decal

Hi Fellow Sunliner’s

Some time has past since this post trying to save my rear decal. There was no saving it, I took it off about a year and a ˝ ago. Today I installed a new one. I reviewed this post as it had some good info in it about what to do on a new decal to create a long lasting setup. More on that in a moment.

Learned some new things today. First was putting the decal on. I have never done one this big before. I looked up my old pic on how Sunline placed the decal. They centered the entire width on the camper. So I followed that same pattern, centering the entire width on the camper. I measured and put 2 vertical plumb marks on the camper and on the decal so I could line it up straight before applying.

OK taking a step back here is the camper and the decal.

The camper, no decal.


The decal itself. I bought this off a fellow forum member who bought them from Stoltzfus in Adamstown PA. Adamstown, Pennsylvania, Cedar Creek, Salem, Surveyor, RV, Fifth Wheel, Class A, Park Model, Dealer, Used, Parts, Travel trailer,camping trailer He bought a new 5er and sold his Sunline and I acquired both decals. YEH.


For those that have never seen how these go on, it has 2 paper coverings with the decal in the middle. The top peels off and so does the backer and when the backer is exposed the adhesive is exposed.


I started off on the top. Lined up the marks vertically and determined the starting height so the ending height would end up where I wanted it, This decal “just” fit. It was a little bigger then the original. You peel back a small amount of the backer paper. And then stick it and wipe it evenly on.


You work your way down while slowly peeling more backer paper off and wiping firmly from the top down to get all the air out and it be stuck to each crease line on the camper siding.


Peel off more backer and keep going


Here you can see it is going to end up overlapping onto the window frame. There is a fix for that. Stay tuned.


Now that I am close to the end, I used a body putty applicator that is smooth & flexible and thick enough and made of like a vinyl. I saw this at a Jayco factory tour or something that looked real similar.


You start at the top and work it all down and crease the lines of the siding. Goal is no air bubbles and I did good, have none.


I worked it close to the bottom. Then trimmed the decal with a new sharp utility knife blade just above the window frame. I did this in case I ever have to pull the widow out and so no water would ever get in behind the decal trying to jump over the window frame. Then smoothed it with the body putty knife


Now you peel the top paper off the decal. I started at the top and peel slowly to not raise the edge of the decal stuck to the camper. And went down and off completely. And I gently and firmly wiped all edges of the exposed decal to make sure they are set.


Now we stick on the little bottom piece. Same thing, peel a small amount of backer off, stick it then pull the rest of the backer off. And then the top layer


And work it over the window frame and peel it off. It just fit exactly on the aluminum. My lucky day!!!!


Here is the entire decal on


So now I have a fresh new Sunline decal. However it is not the same as my original 2004 decal. I never knew Sunline had this color mix Maybe Sunline Fan can fill in what year decal I have. It is almost a 2004 or maybe it is a later model production 2004.

The decal is slightly larger and no silver in it. It is not the orange sun of the 2006/2007’s. Maybe it is a late 2004 or a 2005.

It seems to match closer to the Solaris decal I have


See the original on my front that I saved last year and it is holding up very well. It is silver trimmed. Not brown, gold and blue.


Oh well, it is still a Sunline and a fresh one.

Now any ideas on how to preserve it? Steve Collins was talking about the varnish. Steve what brand etc would that be?

On my prior camper I bought new I 303 Protectant treated them and they held up well. However it too lived indoors.

I’m cautious on doing the same trick I have done on the front Sun as that is filon smooth siding. The back has corrugations and I have found on the sides of the camper with large corrugations the Helicopter tape does not hold well over all the bends. But this back one is not as harsh a bend as the sides.

Anyone with thoughts?

Thanks

John
__________________
2004 Sunline T310SR
2005 Ford F350 Lariat, V10 with 4.10
CC, Short Bed. Integrated Brake Controller
Reese HP trunnion bar hitch with HP DC
JohnB is offline   Reply With Quote
Old 09-05-2010, 09:43 PM   #19
Moderator
 
Sunline Fan's Avatar
 
Join Date: Dec 2006
Location: Michigan
Posts: 3,227
SUN #123
Sunline Fan is an unknown quantity at this point
John, I believe that decal is the side/rear decal from the Fifth Wheels. I got one too from Stoltzfus because I heard they were a little different. It seems to be a smaller version of the really large front FW logo. When looking at the FW side/rear logo in the original application, it does look more oblong/tall than the normal trailer logo.

BTW, I really like what you did with the bottom swoosh, by putting the remainder on the window frame. It looks so much better than just leaving it off.

Jon
__________________
Have you submitted your VIN to the Sunline Registry?
'07 286SR, #6236
'08 286SR SE, #5001
'05 Excursion V10 soon converted to PSD
SUNLINECLUB CUSTOM GOOGLE SEARCH FEATURE- Better than the site's search function
Sunline Fan is offline   Reply With Quote
Old 09-05-2010, 10:00 PM   #20
Senior Member
 
Join Date: Jan 2009
Location: Rhode Island
Posts: 545
SUN #768
Gene is an unknown quantity at this point
That looks real good, I am jealous. As Jon said, nice touch adding that bottom piece of the decal on the window frame.

I wish I had taken a big picture of just the decal when mine started to go bad so I could attempt to have it replicated. I did find a site that will make anything from a high quality jpeg or gif image.
__________________
Gene & DW Ginny
2002 Sunline T-2363
2008 Toyota 4-runner 4wd 4.7L V-8
Reese Dual Cam straightline - P3 Brake controller
Gene is offline   Reply With Quote
Old 09-06-2010, 06:22 AM   #21
Senior Member
 
Join Date: Apr 2007
Location: New York
Posts: 1,507
SUN #264
Steve Collins is an unknown quantity at this point
Quote:
Originally Posted by JohnB View Post
Now any ideas on how to preserve it? Steve Collins was talking about the varnish. Steve what brand etc would that be?
John,

I have a can of Krylon UV-Resistant Clear Acrylic Coating sitting on my desk. I bought it because I have to re-do our Sunline camp sign as our address changed.

I was unhappy with the yellowing of the marine spar varnish that I used on the first version of the sign. It was pretty yellowed when you saw it last year and has gotten worse.

The Krylon is available in matte and gloss finishes. I think it may be the way to go on irregular surfaces like aluminum siding on our TT's. If it was me applying it, I'd get a 1/2" or so coverage on the siding itself all around the sign, and apply at least 3 coats on the whole sign, and perhaps several extra coats around the edges.

There is also a wet method of applying large vinyl signs that allows re-positioning until you have it just right. Short version: lightly soapy water (Ivory Snow is real good for this) applied to whole area. Strip both backings off the sign and place it where you want it. While it's still really wet, you should be able to slide the sign around and get it exactly where you want it. The pro sign guys use a 4" soft rubber brayer (Brayer - Wikipedia, the free encyclopedia) to work out the water from under the sign starting at the center and rolling to the edges in all directions. The soft plastic putty knife that John used is good for this, too, but the brayer is probably safer to use on silk screened surfaces.

One trick you can do with sign application: To make sure you have the sign where you really want it, temporarily place it with masking tape or something, and then walk away and look at it from a distance. Your eyes will tell you if it is right. Another reason for the wet application method.

The sign guy who taught me this also said that if you end up with an air bubble, not to worry. If you are going to clear coat the sign, use a pin to pop it and work it down with your fingers. If you dry apply the sign, the air bubbles can even be left if they are very small and they will go away. If you wet apply, you have to pop them to get the water out. But with wet application, it is very easy to move the bubbles across the sign with the brayer, so ending up with any bubbles is unlikely.
__________________
Steve Collins is offline   Reply With Quote
Old 09-06-2010, 07:30 AM   #22
Senior Member
 
Poppy & Nana's Avatar
 
Join Date: Nov 2006
Location: New York
Posts: 1,618
SUN #93
Poppy & Nana is an unknown quantity at this point
Quote:
Originally Posted by Steve Collins View Post
John,


There is also a wet method of applying large vinyl signs that allows re-positioning until you have it just right. Short version: lightly soapy water (Ivory Snow is real good for this) applied to whole area. Strip both backings off the sign and place it where you want it. While it's still really wet, you should be able to slide the sign around and get it exactly where you want it. The pro sign guys use a 4" soft rubber brayer (Brayer - Wikipedia, the free encyclopedia) to work out the water from under the sign starting at the center and rolling to the edges in all directions. The soft plastic putty knife that John used is good for this, too, but the brayer is probably safer to use on silk screened surfaces.


The sign guy who taught me this also said that if you end up with an air bubble, not to worry. If you are going to clear coat the sign, use a pin to pop it and work it down with your fingers. If you dry apply the sign, the air bubbles can even be left if they are very small and they will go away. If you wet apply, you have to pop them to get the water out. But with wet application, it is very easy to move the bubbles across the sign with the brayer, so ending up with any bubbles is unlikely.

Steve, as I was reading John B's post "decal installation 101" popped into my head.....when Leo owned his body shop that is exactly HOW he put decals on......when he had the contract for the local cable company....which changed its name almost twice a year......we (yes we) would have to remove the old decals and place the new ones on an entire fleet of trucks.....Leo used the wet method for years!!!!!
__________________
Kathy & Leo
Central Adirondacks of New York

2007 T-2499
2008 Ford F-250 4x4 Crew Cab Diesel
Poppy & Nana is offline   Reply With Quote
Old 09-06-2010, 07:31 PM   #23
Moderator
 
JohnB's Avatar
 
Join Date: Nov 2006
Location: Ohio
Posts: 4,579
SUN #89
JohnB is an unknown quantity at this point
Sunline Fan

H'mm the 5er's. May be. I'll be right next to a Sunline 5er this Saturday and I'll look at Trailblazers.

Steve Collins, Steve thanks for the tip on the Krylon UV-Resistant Clear Acrylic Coating that sounds like it may just work. And I may be able to use it on the decals on the corrugated siding. On the flat filon sticker the Helicopter clear tap is working great now for over a year. I saved my front one and it is holding up very well.

Poppy and Nana. So Leo is a decal wizard. I sense at least 1 topic of discussion at the M & G this weekend. Thanks!!

John
__________________
2004 Sunline T310SR
2005 Ford F350 Lariat, V10 with 4.10
CC, Short Bed. Integrated Brake Controller
Reese HP trunnion bar hitch with HP DC
JohnB is offline   Reply With Quote
Old 09-07-2010, 05:10 AM   #24
Senior Member
 
Join Date: Apr 2007
Location: New York
Posts: 1,507
SUN #264
Steve Collins is an unknown quantity at this point
Quote:
Originally Posted by JohnB View Post
Steve thanks for the tip on the Krylon UV-Resistant Clear Acrylic Coating that sounds like it may just work. And I may be able to use it on the decals on the corrugated siding. On the flat filon sticker the Helicopter clear tap is working great now for over a year. I saved my front one and it is holding up very well.
John, when you look for the Krylon, "UV-Resistant Clear" is in large letters on the can, and "Acrylic Coating" is in much smaller letters. I had to stop and read the labels on several different cans to figure out which to buy. They also make a regular Clear Acrylic Coating for use indoors with no UV additives.

The helicopter tape would be my first choice on any smooth surface. I sure wish it was available years ago when I did a bunch of graphic work on ambulances and other emergency vehicles.
__________________
Steve Collins is offline   Reply With Quote
Old 09-09-2010, 08:02 PM   #25
Senior Member
 
Join Date: Aug 2006
Location: Maryland
Posts: 220
SUN #37
vcrt
This is something that was on my mind back a few years ago when I was re-doing the exterior of my '92 Solaris to the '97 appearance. I had a hard time finding anyone who had decals (forget '92 altogether) and Sunline had just closed down (couldn't make the auction). I finally took a ride to Stoltzfus and picked them up there, but I figured with such a following for Sunline products, it wouldn't be long before everyone needed some sort of decal. My thought is this; The fact that so many Sunliners communicate on this forum and will be needing these decals at some time, is a plus, b/c the more popular ones can be made by a sign shop for a bunch of customers cheaper than if everyone went looking to have their own done. The first one would be the most expensive and then subsequent decals would be less. Maybe the thing to do now is to take a poll on which decals from which years are anticipated to be needed based on the age. Maybe the ones that are about 5+ years old (like John's) would be the best first candidate since there is probably an immediate need. Later, the 2005-07 orange ones could be done. Maybe enough of the 10 year old decals would be wanted. If a few members who are in need right now could pool their resources, they could get this started.
Rich
__________________
1992 Solaris 2470
2002 Silverado ext cab Z71
http://i121.photobucket.com/albums/o...gnaturepic.jpg
vcrt is offline   Reply With Quote
Old 09-27-2010, 07:16 PM   #26
Moderator
 
JohnB's Avatar
 
Join Date: Nov 2006
Location: Ohio
Posts: 4,579
SUN #89
JohnB is an unknown quantity at this point
Quote:
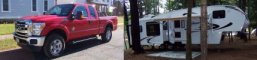
Originally Posted by Sunline Fan View Post
John, I believe that decal is the side/rear decal from the Fifth Wheels. I got one too from Stoltzfus because I heard they were a little different. It seems to be a smaller version of the really large front FW logo. When looking at the FW side/rear logo in the original application, it does look more oblong/tall than the normal trailer logo.

Jon
Jon

Yup, I do believe my new decal is the 5er decal. Or at least it is the same as the one on the side of Trailblazers 5er.

__________________
2004 Sunline T310SR
2005 Ford F350 Lariat, V10 with 4.10
CC, Short Bed. Integrated Brake Controller
Reese HP trunnion bar hitch with HP DC
JohnB is offline   Reply With Quote
Reply


Currently Active Users Viewing This Thread: 1 (0 members and 1 guests)
 
Thread Tools Search this Thread
Search this Thread:

Advanced Search
Display Modes

Posting Rules
You may not post new threads
You may not post replies
You may not post attachments
You may not edit your posts

BB code is On
Smilies are On
[IMG] code is On
HTML code is Off
Trackbacks are Off
Pingbacks are Off
Refbacks are Off


Similar Threads
Thread Thread Starter Forum Replies Last Post
High mounted stop lamp dennisb Sunline Que 6 08-28-2009 08:03 AM
Swinging Door Stop henryj Modifications 1 06-03-2008 09:51 PM
When will this "white precipitation stop"???? Poppy & Nana Sunline Community 10 03-30-2008 07:54 PM
Western Ohio overnight stop janetpowell Great Lakes 6 03-07-2008 06:24 PM


Our Communities

Our communities encompass many different hobbies and interests, but each one is built on friendly, intelligent membership.

» More about our Communities

Automotive Communities

Our Automotive communities encompass many different makes and models. From U.S. domestics to European Saloons.

» More about our Automotive Communities

RV & Travel Trailer Communities

Our RV & Travel Trailer sites encompasses virtually all types of Recreational Vehicles, from brand-specific to general RV communities.

» More about our RV Communities

Marine Communities

Our Marine websites focus on Cruising and Sailing Vessels, including forums and the largest cruising Wiki project on the web today.

» More about our Marine Communities


Copyright 2002-2012 Social Knowledge, LLC All Rights Reserved.

All times are GMT -6. The time now is 10:13 AM.