Fellow Campers
This may be useful to some so here goes. On my T2499 layout I had a real issue when it rained while camping by my entry way door. The way the T2499 layout is with the rear door so close to the end of the awning and the end of the trailer, we would get drenched trying to get in and out of the camper when it rained. The water bailing out of the TT gutter was flying out all over and then right in the TT when we opened the door. Anyone in the middle was in the line of fire as well. Like me.

We also had a similar problem up front where the water would fly backwards coming out the gutter and spray most anything under that end of the awning.
And then there was the dreaded top to bottom black streaks down the side of the camper. I tried the close pin trick in the end of the TT gutter and it helps the streaks a little but no so much on the flying water going in and out of the TT.
So I set out to solve the problem and this is what I came up with. It works very well.
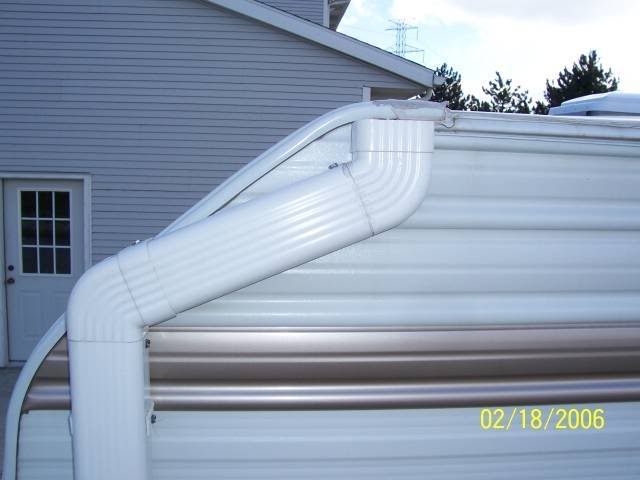
For the front I added a permanent down spout. It collects and directs all the water to where I want it to go. See here in pics.

The down spout is all screwed and sealed together. When you attach it to the camper you must seal the screw to the siding to make it water proof. Dicro roof sealant will work or in this case I used the best outdoor silicon I could get. This is not under roof load or flexing and is acceptable for silicon application on the TT.

Up top you need to bury the gutter end fitting deep into the down spout so water does not fly up over the fitting. Once carved to mate with the TT gutter, I silicon filled all the gaps.

A rear view

A side view showing the sheet metal screws and all joints sealed before I inserted the fittings.
That solved the front. I have no issue with this. Now to the rear of the TT. Here due to my clearance marker lights I could not do the same setup as the front as I did not have a clear shot down the side of the camper. So I had to make removable ones and shoot the water out the back.
Here is the assembled system.

Here is a side shot. A bungie cord holds it on.
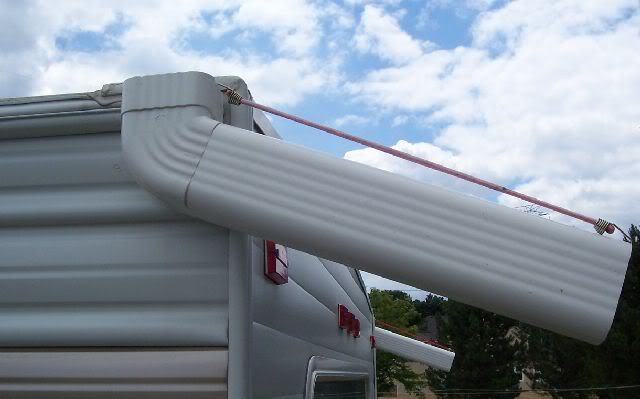
And the fitting that stays with the camper. Here I did have to add one good long screw that went into the side of the camper where there is wood structure behind it. That screw is taking the load of the fitting.

And here you can see the back end of the camper at play in the CG. Now the water no longer flys in as us when it rains. It shoots like 8 feet out the back until it hits the ground.

I have to take the rear ones off each time for travel and setup at camp. I carry a 3 step mini step ladder with me to get up there. Only take the time to walk up 3 steps then back down. If your layout will allow, mount the rear one permanent as well. Then once installed, you have nothing to take on or off.
I have a camping buddy down in VA that saw this and he reproduced the same effect on his camper using PVC conduit. Like ¾ diameter and a condulet fitting on top. Where I used is plain house all plastic down spouts. They last out in the sun a good long time on the house and so far they are doing well on the camper. The conduit is about as cheap in cost and can probably take a direct hit by something better but all are options.
I get quite a few comments on these in the campgrounds. From What will they think up next? to WOW, to Do they help with the black steaks?
I'm always thinking up new things, yes they work and yes the solve at last the 4 long black streaks. I still have streaks in the middle like the rest of us.
Hope this helps spark some others for ideas if they have a similar issue.
Happy Camping
John


 Linear Mode


