Progress has slowed, but moving forward and I learned some new things.
New Learning:
After digging some more, I ran into an RV tech who has seen similar bent frame issues. However most of them had been on fairly new campers and still under warranty. (Not Sunline, other brands) Most of these bent in the area where the slide arm came through the frame hole when the hole was behind the rear axle hanger. In my case, this is not a problem and Sunline added a reinforcing plate around both slide holes.
The RV Tech suggested I contact Lippert and see what they can offer. They have mobile field crews who do the warranty repairs. So I called LCI Tech Service in Elkhart and explained my situation.
It was a really good call and I felt the guy in chassis tech service had been around a while by the conversion. I asked about the method they would use on how they would fix this and if I can hire their mobile crew?
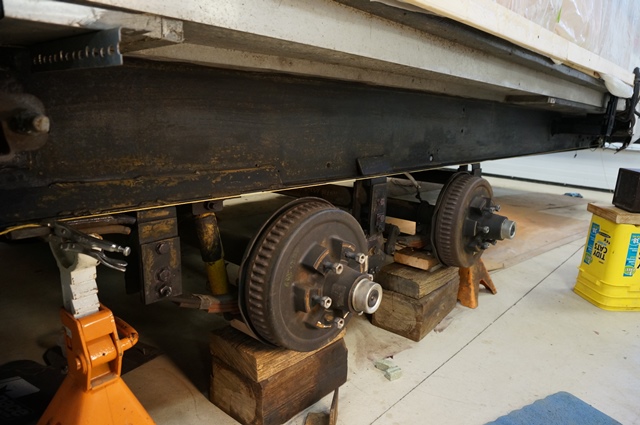
On the fix, he asked if I could jack the frame straight. I told him I could. It takes 2,300# of lift force at the back of the frame and 3" of lift to bring the frame rail back to straight. But I'm also lifting a good amount of the camper off the ground while I'm doing this as shown by the tire contact patch changing so much. I'm almost having the rear tire lift off.
He said that is part of what they would do. They would jack the frame back to straight and then weld on reinforcements on the bottom flange area to hold it in place. They may go a little higher lift to create some excess lift so when they lower the camper any frame flex will be closer to where it needs to be. I asked, what about all that beam stress built up from the original bend and now this 2,300# of up loading adds more bending stress? He said, that is a risk and they would not know if that is a problem or not. In their defense, they have not done any calculations on this and this was a quick phone call. I was glad they helped as they could.
I asked on the mobile crew cost and I understand what field service rates are. It is about 6 hours from Elkhart to my area and the field team most likely would come from there. He did not know the rates and switched me to the field service group. I was going to ask them the same questions on how they would do the repair and an estimate on the cost. I have 3 calls/voice mails into the field service person and they have not returned my call and after a week of waiting, I not expecting they are going to call.
New Method of Measuring:
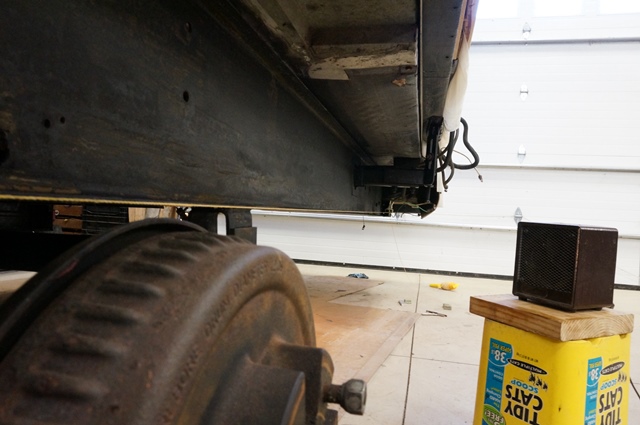
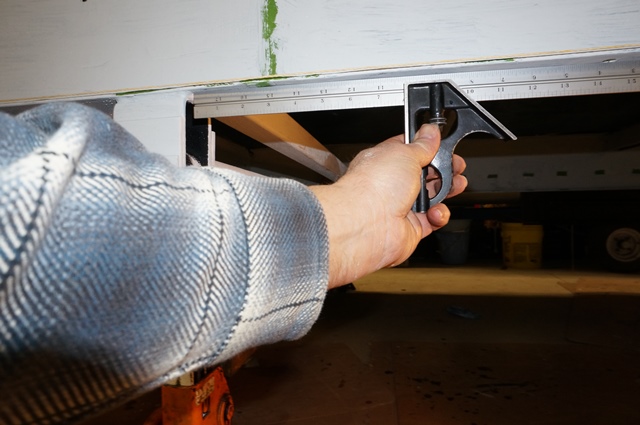
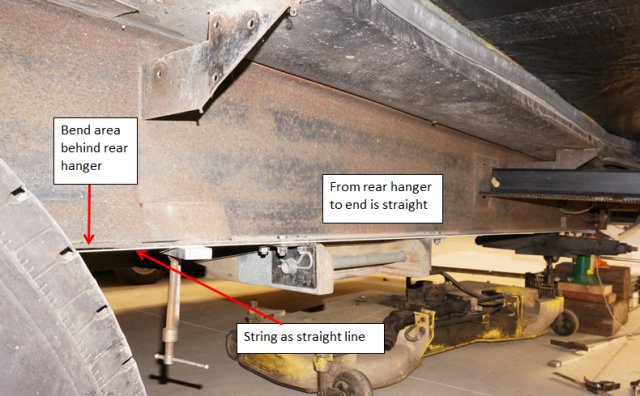
Getting ready for the Lippert call, I measured the frame differently than the 2,300# and 3” of lift to bring the frame back to straight. I pulled a long string starting 1 foot ahead of the front axle hanger and all the way to the back of the camper. The axle area of the frame is very straight and I sighted the line off this straight area and projected it to the back of the camper. Here you can see this.
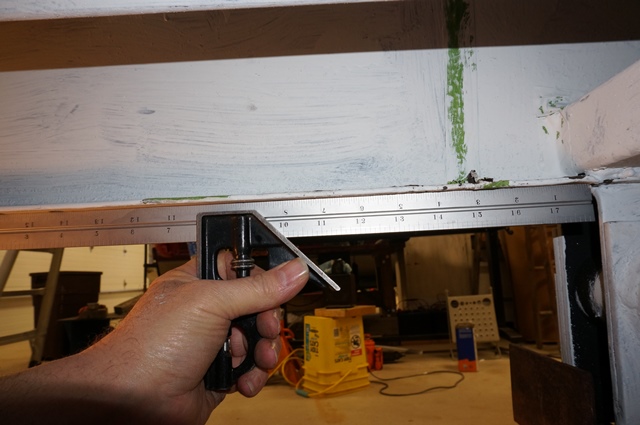
Looking down the line in relation to the frame. You can see the yellow line start to bend downhill past the rear hanger.
And at the end of the frame the distance. 1 3/16” This is the amount of downward bend.
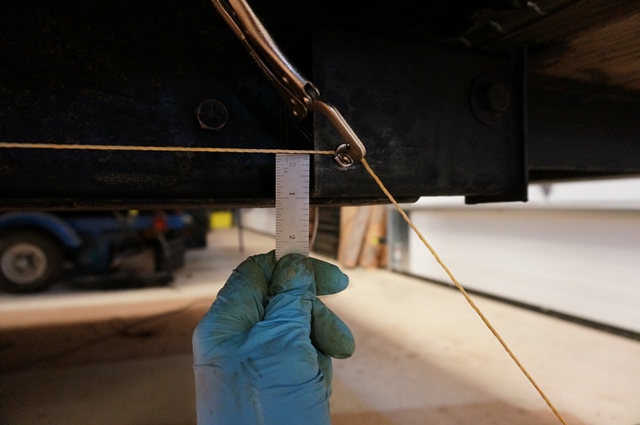
Now to, Why is it 3” when I jack up the back of the camper to get a straight frame verses a bend downhill of 1 3/16”?
The 1 3/16 is the raw amount the frame rail is bent. The 3” and 2,300# of jack force up at the back of the camper to get a straight frame takes into account the weight of the camper pushing down on the frame rail and the frame rail bending in relation to that weight. The whole side of the camper is lifting, even forward of the axles. It creates a straight frame. Learning this, it gives me a good heads up when I saw cut the frame at the bend area, I will most likely only need to lift the back end in the approx. 1 3/16 to 1 1/4” range and the bottom of the frame should come close to straight. I will not know for sure until I do it, but this is a good start.
I am moving forward with my correction method as I feel it is the best long term approach. The LCI method of jacking the frame straight and then welding on reinforcements creates more unknowns then I have now. Yes, their approach is quicker and easier, but it will leave almost 2X the amount of normal bending stress trapped in the frame from jacking the camper to create a straight frame. This stress works against the welds of the lower flange reinforcement which are there to strengthen the frame for future pothole/bump events. I cannot see long term good coming from this approach. The beam cut and straighten method relieves all the bending stress, adds some weld stress but lower flange reinforcement has full strength.
The fab shop now has the A572-50 steel plate. It was too complex to get flat bar stock so we are cutting strip from plate to create the flat bar stock for the lower flange reinforcement. A 60” wide by 120” long sheet is at that shop and this week they should be able to start shearing, water jet cutting out the splice plates and holes, bending the formed angle on the splice plates and shearing and roll straightening the sheared strips. With some luck, I might have parts late this week early next week.

In the mean time I have been dealing with the frame rust coatings and straightening out the bent flanges. First was to prime the frame after the rust conversion treatment process. I used Rust-O-leum Professional Clean Metal primer. It’s all white now.
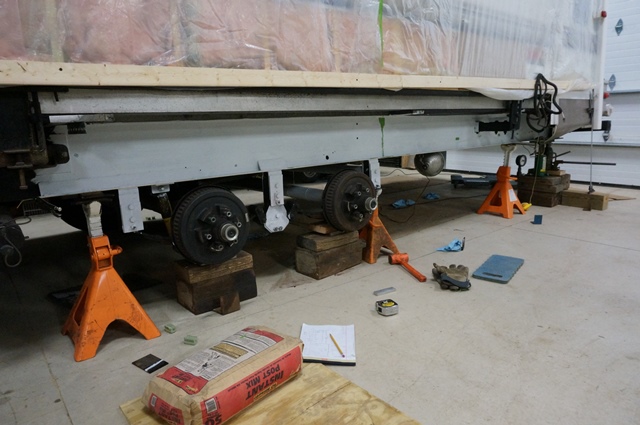
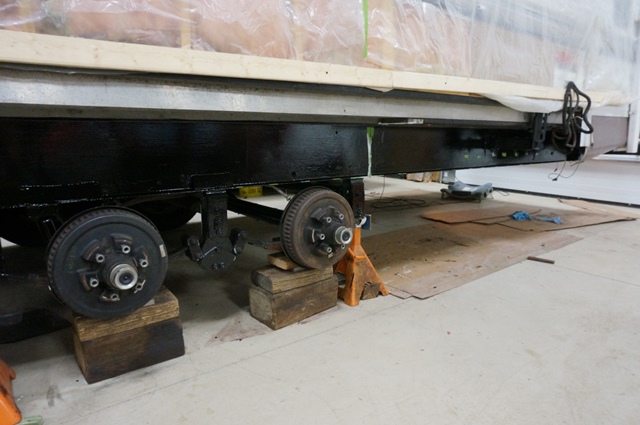
Then to straighten the bent flanges. I jacked the back of the camper up until the frame came straight and went 1” more to put the lower flange in tension. Then a 24” crescent wrench and the flanges went back to straight real easy.
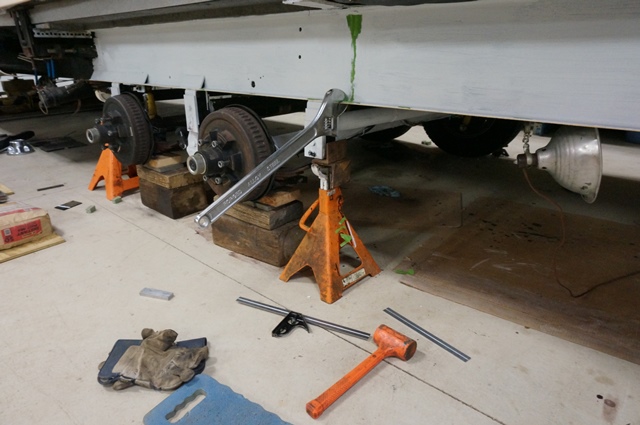
Today I finished the black top coat of Rust-O-leum Professional Black paint. The green masking tape is over the areas I will be welding to the original beam. It will be less grinding off the paint prepping for the welding when the time comes.
The inside door side.
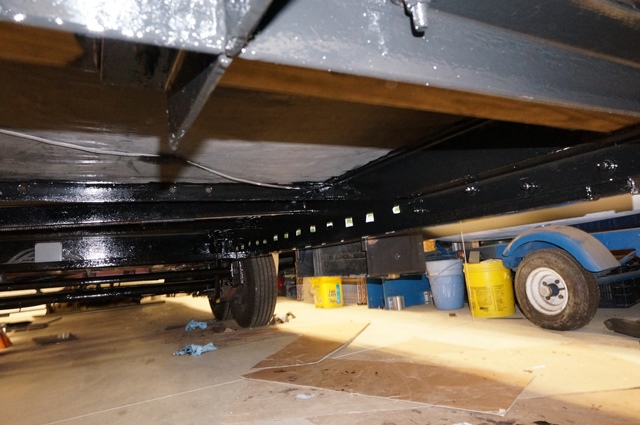
The inside slide side
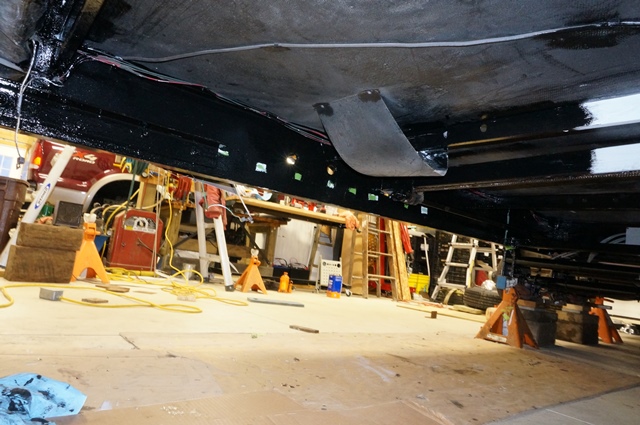
The outside slide side
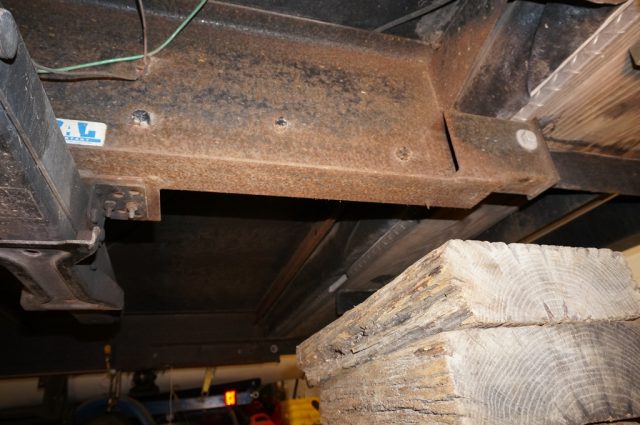
In comparison, the frame use to look like this

This 3 coat process will hopefully last a good long time. I have the front half of the camper yet to do….
All for now. Thanks for looking.
John


 Threaded Mode

