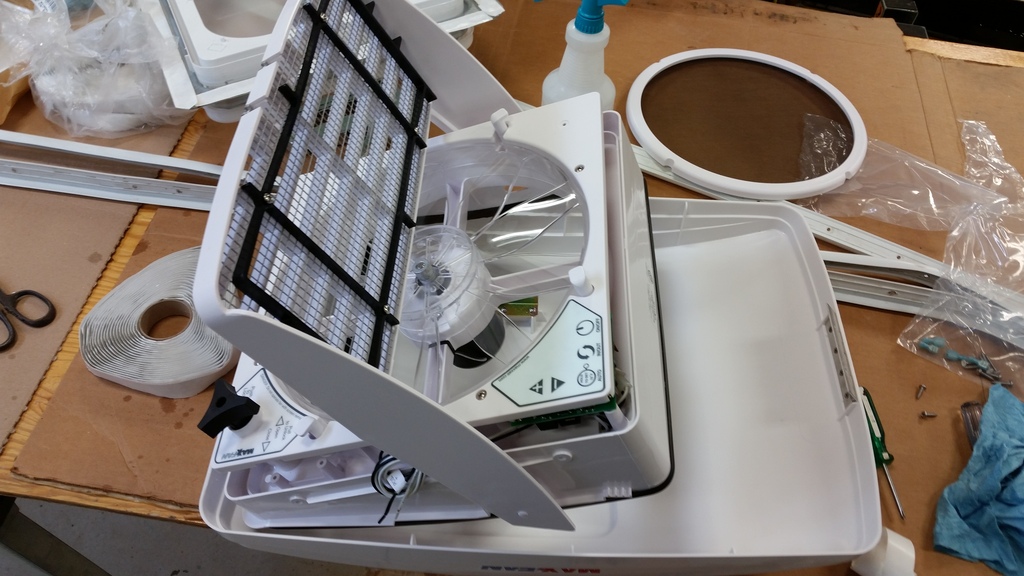
We decided that since we needed a new roof vent that it would be the perfect time to add a good roof fan to circulate air though the camper. We chose a MaxxAir MaxxFan Deluxe unit. They sell several versions of this with different fan speeds and remote control. We went with a manual opening 12 speed version with thermostat. It fits a standard 14 x 14 roof opening. This is what it looks like when it comes out of the box. Not shown is the new trim garnish for the inside.

[/URL][/IMG]

[/URL][/IMG]
To prepare for the install if replacing an existing roof vent you would need to remove the old vent and clean up all the butyl tape a have a nice clean surface to install. In my case we did this as part of the new roof so it was going to be an original install for this vent hole.

[/URL][/IMG]
First remove the mounting flange and remove any wax, dust or grease, and apply a good butyl tape, I used Dicor. I also unscrewed the hinge to gain access to the inside and applied some 303 Protectant to prolong its life in the sun. Then haul everything and tools to the roof for install.

[/URL][/IMG]
[/URL][/IMG]
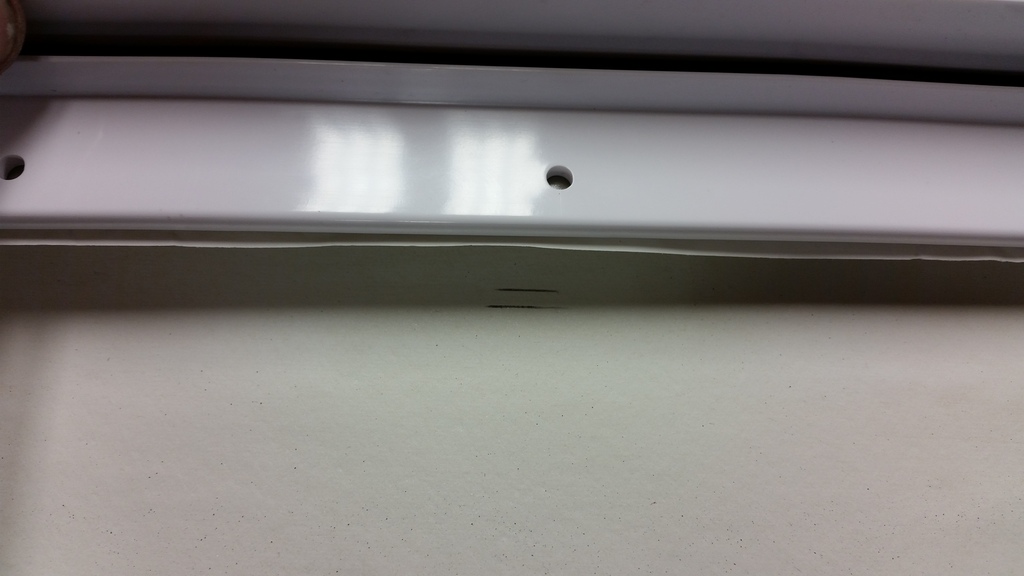
Before removing the silicone tape from the butyl tape on the flange place it in the roof opening and center it. I did this by sliding it to as far as it would go on all sides and marking the roof with a pencil. Then I centered it between the marks and made new ones to know where to stick it down.
[/URL][/IMG]
__________________
Current Camper: 2006 Sunline T-264SR
Previous Camper: 1998 Coleman Mesa
Tow Vehicle: 2002 Chevrolet Avalanche 2500, 8.1L, 4X4
DirecLink Brake Controller, Draw-Tite Ultra Frame Receiver, Reese HP Trunnion Bar Hitch W/ HP DC


 Threaded Mode

