 |
|
 10-12-2017, 03:27 AM
|
#1
|
|
Senior Member
Join Date: Sep 2017
Location: Maryland
Posts: 207
SUN #9763
|
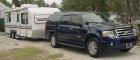
And so it begins. Off to Massey's Landing, Delaware
No more fooling around with play towing the T-1950 around the neighborhood. S**t gets real on Thursday, October 19th. Over a hundred miles and two hours away from home to The Resort at Massey's Landing in Delaware near Rehoboth, returning on Sunday, the 22nd.
It will be our first ever camping trip for us in a TT as well as the first for the 1950 for us. I'm now in countdown mode with a punchlist of things to do (one of which is to create a punchlist of things to do!  ) and I'm in a holding pattern for the next three days while I go to 'work' at my retirement part time job (I was getting fat sitting on the couch). Since this is our first TT, we had NOTHING that we needed other than a garden hose that I will be using for the black tank cleaning (more on that below) and I have been in hunter/gatherer mode for the past month getting the hitch, surge protection, city water hose/regulator, etc.
The heavy lifting is done, though (I hope) and the remaining tasks are not mission critical but I'd like to have everything buttoned up if I can.
Then there's more driver training to do. I need to practice backing and parking and so forth having never done this in my life. 
Currently, I need to:
TV- Oil and filter change.
- Add brake fluid.
- Recharge AC
- Clean and oil the air filter (K&N).
TT- Install sway control.
- Install black tank spray washer.
- Install the replacement OEM door handle.
- Install the new Lend-A-Hand® retractable hand rail.
- Get a tire inflator (or test the tiny one that's currently in the car).
- Fill the second propane tank.
- Test fire the range/water heater/fridge.
- Buy a 10 pack of Camco® leveling blocks from WalMart.
- Buy two more rubber chocks from Harbor Freight.
- Buy a metal (brass?) Y splitter for the city water bib.
- Buy a 90° brass elbow for the camper city water connection.
- Buy a 30 amp extension cord.
- Pull the 30 amp cord out to see just how long it really is.
- Organize the baggage compartments.
- Finish laying the shelf lining.
- Find a way to restrain the coffee cups from jumping over the cupboard ledge,
- Paint the Command® hooks to match the cabinetry.
 Srsly. Don't ask. Srsly. Don't ask.
- Duct tape the mini-blind wands (Thanks, Janalee!) or figure something with zip ties.
- Wash the sofa blanket (came with the camper to cover the splitting cushion seam).
- Try to melt/mend the lug nut cover that I split trying to remove it the first time I took it off so that it fits snugly again. Never saw one before and I didn't understand. I bought one from Leo's but it was too large for the nut.

- Get spare baggage keys.
- Create an Arrival/Departure punchlist to help me remember everything since it's my first time. Help here would be GREATLY appreciated. I'm using YouTube as my reference source for now.
And so, serious to silly but I will have four full days off starting from Sunday to Wednesday to get 'er done. Let's see how I do.
Feel free to ask the obvious because what's obvious to you may not be to me so I'd rather admit that I missed something than leave without it. The nearest WalMart to the campground is 20 minutes away so it shouldn't be TOO bad.
You guys have been awesome. Thanks for all of your advice and assistance.
__________________
~Dig~
2004 Solaris 280SR
Previously: 2003 Solaris Lite T-1950
"The Land of Pleasant Living!"
|

|

|
|
10-12-2017, 04:39 AM
|
#2
|
|
Senior Member
Join Date: Apr 2016
Location: Maryland
Posts: 488
SUN #8237
|
Do you have a sewer hose adapter/donut? The part that screws into the campground sewer inlet? If you dont already have one youll need it.
I have a set of the lug nut covers I dont need. PM your name and address and Ill send them to you if you like.
Have fun!
__________________
__________________
John
2000 T2370
|
|
|
|
|
10-12-2017, 07:11 AM
|
#3
|
|
Senior Member
Join Date: Jun 2011
Location: New Jersey
Posts: 544
SUN #2366
|
Just a thought. If you need to add brake fluid to the TV, it might be time for new brakes. Give them a quick inspection. Also, don't turn HW heater on without water in it. Bring extra lengths of drinking water hose and sewer hose. And spare click lighters, especially if you plan on using the oven. If's a PIA to light the pilot. I have a tank sprayer in my tt, but I still prefer the habd wand, especially for the last cleaning of the season. A least I now have a window in the bathroom I can open. Last trailer, I had to drag the hose inside the length of the trailer through the door. If you have one of those wooden sheds, you may already have spare baggage key. They were the same key in my case. Opened my neighbor's shed too, lol. Finally, look at the size of your cooler, double it, fill it with beer and ice (and some wine), and have a great time. Autumn is a great time to camp in this area. Anything you forget, you can usually get at the camp store or the local big box store.
__________________
|
|
|
|
|
10-12-2017, 08:01 AM
|
#4
|
|
Senior Member
Join Date: Sep 2017
Location: Maryland
Posts: 207
SUN #9763
|
Quote:
Originally Posted by johnnybgood

Do you have a sewer hose adapter/donut? The part that screws into the campground sewer inlet? If you dont already have one youll need it.
|
Yes on the donut. It came as part of a set along with two 10 foot sewer hoses and other assorted bits. I heard that I need to find a rock to sit on top of it though, for just in case.
Quote:
I have a set of the lug nut covers I dont need. PM your name and address and Ill send them to you if you like.
Have fun!
|
PM sent! 
Quote:
Originally Posted by j52wf
Just a thought. If you need to add brake fluid to the TV, it might be time for new brakes. Give them a quick inspection.
|
Brakes are good from a recent check.
Quote:
|
Also, don't turn HW heater on without water in it.
|
I just want to know that it lights. Should I still put water in...ya know, never mind. I'll put some in regardless just so that I know what I'm doing when I get there. Good call out!
Quote:
|
Bring extra lengths of drinking water hose and sewer hose.
|
I have 2 brand new Camco 25 foot hoses. I'll bring both.
Quote:
|
And spare click lighters, especially if you plan on using the oven. If's a PIA to light the pilot.
|
Three click lighters are already loaded up and ready to make fire.
Quote:
|
I have a tank sprayer in my tt, but I still prefer the habd wand, especially for the last cleaning of the season. A least I now have a window in the bathroom I can open. Last trailer, I had to drag the hose inside the length of the trailer through the door.
|
After much consideration, I had decided against the hand wand but I can see its value as an end of season item. I'll mull on that some more.
Quote:
|
If you have one of those wooden sheds, you may already have spare baggage key. They were the same key in my case. Opened my neighbor's shed too, lol.
|
Negative on the spare keys. I tried the one for my truck cap but no joy. I forgot to ask about them when I was in the RV store yesterday, dang it.
Quote:
|
Finally, look at the size of your cooler, double it, fill it with beer and ice (and some wine), and have a great time. Autumn is a great time to camp in this area. Anything you forget, you can usually get at the camp store or the local big box store.
|
Oddly, I just picked up an extra cooler this week. Sounds like a plan. 
Thanks, folks. Couldn't do it without you.  The list grows!
__________________
~Dig~
2004 Solaris 280SR
Previously: 2003 Solaris Lite T-1950
"The Land of Pleasant Living!"
|
|
|
|
|
10-12-2017, 08:50 AM
|
#5
|
|
Moderator
Join Date: Nov 2006
Location: Ohio
Posts: 12,654
SUN #89
|
Hi Dig,
I'll add a few things not yet mentioned.
First to clarify on the hot water heater, your 2003 camper is new enough it may have the 120 volt "electric" option to run on. Along with a gas mode. Do not turn the "electric" option on when there is no water in the heater. It can and will burn out the electric element in seconds with no water in the heater. On gas mode, a fast toggle of the burner can be survived with no water but this is not a great thing to do.
The 2003 campers vintage had a pain in the neck rocker switch on the back of the heater to turn it on and off when on electric. There is also a 15 amp circuit breaker in the converter box that needs to be on for it to work. The prior owner may have turned the breaker off instead of dealing with the pain in the neck switch. OR they got tired of the rocker switch and wired in separate easier to get to switch.
Now to things to do before heading out on the camping trip.
1. Camper tire pressure. Before leaving the house, check the tire pressure on the camper and the spare tire. It needs to be at max cold air pressure as stamped on the tire before you start towing. Going 15 minutes down the road to the gas station will change the pressure. If you have load range C tires, this should align with 50psi but check the tire side wall. This is a very important thing to do.
2. Truck tire pressure. The truck is an experiment in tire pressure pending handling, but a place to start is the front and rear tires (spare too) need to be at the door sticker tire pressure listing. If you have soggy handling of the rig after being at door sticker, then let's talk on next steps.
3. Something to add to your pile of camper "stuff", a 13/16" socket, extension and torque wrench capable going to 100 ft lb's of torque. If on the road you have to change a tire, you need the torque wrench when putting the tire back on. And then there is a 20 to 50 mile check and 100 mile check of the lug nuts once you have changed the tire. By the 3rd time, the nuts usually stop moving. The Harbor Freight 1/2" drive torque wrench works well for this need.
4. While not a mandate for your first trip, do you have a small pack of fuses to fit the size in your converter?
Most important, have fun!!! Keep your cool, something is not going to go right, but you can and will get through it. And each trip after this, you will be adding something you forgot. After a year or more, you might start taking stuff out....
Heads up, camping in the Sunny is addictive!  You will be looking forward to doing this over again and again... Have a good trip and let us know how it came out. And remember, we like pics!!
John
__________________
Current Sunlines: 2004 T310SR, 2004 T1950, 2004 T2475, 2007 T2499, 2004 T317SR
Prior Sunlines: 2004 T2499 - Fern Blue
2005 Ford F350 Lariat, 6.8L V10 W/ 4.10 rear axle, CC, Short Bed, SRW. Reese HP trunnion bar hitch W/ HP DC
 Google Custom Search For Sunline Owners Club
|
|
|
|
|
10-12-2017, 09:00 AM
|
#6
|
|
Moderator
Join Date: Dec 2006
Location: Michigan
Posts: 6,155
SUN #123
|
Quote:
Originally Posted by Digmenow
Currently, I need to:
TT- Install sway control.
- Install black tank spray washer.
- Install the replacement OEM door handle.
- Install the new Lend-A-Hand® retractable hand rail.
- Get a tire inflator (or test the tiny one that's currently in the car).
- Fill the second propane tank.
- Test fire the range/water heater/fridge.
- Buy a 10 pack of Camco® leveling blocks from WalMart.
- Buy two more rubber chocks from Harbor Freight.
- Buy a metal (brass?) Y splitter for the city water bib.
- Buy a 90° brass elbow for the camper city water connection.
- Buy a 30 amp extension cord.
- Pull the 30 amp cord out to see just how long it really is.
- Organize the baggage compartments.
- Finish laying the shelf lining.
- Find a way to restrain the coffee cups from jumping over the cupboard ledge,
- Paint the Command® hooks to match the cabinetry. Srsly. Don't ask.
- Duct tape the mini-blind wands (Thanks, Janalee!) or figure something with zip ties.
- Wash the sofa blanket (came with the camper to cover the splitting cushion seam).
- Try to melt/mend the lug nut cover that I split trying to remove it the first time I took it off so that it fits snugly again. Never saw one before and I didn't understand. I bought one from Leo's but it was too large for the nut.
- Get spare baggage keys.
- Create an Arrival/Departure punchlist to help me remember everything since it's my first time. Help here would be GREATLY appreciated. I'm using YouTube as my reference source for now.
|
Ditto on the black tank wand from others, it's very helpful to have!
Baggage door keys are CH751, or 751CH (same thing), they are readily available pre-cut at an RV dealer because they are that common. Just tell them you need that key. Double check to make sure your existing key has that number stamped on it, just in case someone changed them.
If your entry door lockset is FIC, you can order more keys for it using the code on your existing key, direct from FIC. The local dealer probably has blanks, but it'll be more expensive to do that and get them cut vs. buying them direct pre-cut.
You might want to think about a water filter too. Some campground water is quite nasty. Just watch out when you assemble, that the regulator doesn't interfere with anything. Last time I went out, the guy next to me had a water regulator just before a filter. The regulator valve protruded out of the housing and down the line of flow, by design. That valve ran into the inner parts of the filter housing at the connection, and caused it to twist inside, which then caused the water pressure to drop and the whole water pipe supply up to there to rattle. They left for the day, so I and a neighbor went over to investigate because it was really loud and annoying. Simply switched the two parts around (regulator and filter) and the valve could once again protrude into the hose normally and quietly. I never gave this a second thought until I saw this happen. He had the blue Camco plastic regulator.
Also I'd consider a clear extension piece/elbow for your sewer hose, if the kit didn't come with. Sure it's nasty to look at, luckily it flows quickly, but it really lets you know when the tank is clean, and how well the previous owner took care of the tank.
I've never measured my 30 amp cord, but it's somewhere around 20'. I've had to use my extension cord a lot- haven't needed another city water hose in a long time.
__________________
2007 T-286SR Cherry/Granola, #6236, original owner, current mileage: 9473.8 (as of 6/18/21)
1997 T-2653 Blue Denim, #5471
1979 12 1/2' MC, Beige & Avocado, #4639
Past Sunlines: '97 T-2653 #5089, '94 T-2251, '86 T-1550, '94 T-2363, '98 T-270SR

|
|
|
|
|
10-12-2017, 04:17 PM
|
#7
|
|
Senior Member
Join Date: Apr 2016
Location: Maryland
Posts: 488
SUN #8237
|
Quote:
Originally Posted by Digmenow
Yes on the donut. It came as part of a set along with two 10 foot sewer hoses and other assorted bits. I heard that I need to find a rock to sit on top of it though, for just in case.
|
You shouldnt need a rock. I believe Masseys Landing has the pvc sewer pipe with a threaded cap. Probably one of the pieces that came with your kit has that adapter and then your sewer hose elbow will fit snugly into that.
__________________
John
2000 T2370
|
|
|
|
|
10-12-2017, 08:31 PM
|
#8
|
|
Senior Member
Join Date: Jan 2011
Location: Florida
Posts: 1,279
SUN #1830
|
Dig, When I got my first camper I had spent most of my time doing tent camping. The only thing I did to go on our first camping trip was to treat it like any camping trip on the ground but loaded into the camper. Food, drinks, clothes. I had a small toolbox in the tow vehicle with simple hand tools. We had done the drive around the neighborhoods and away we went. Big adventure that turned out just fine.
As time went on I worried about 'things". First trip we used holding tanks and learned how hoses and fittings worked while in the campground. I learned that other campers were some of the nicest, friendliest people you will ever meet and moving from tents to wheeled campers was no different. If you act stranded and confused some helpful soul that has been in the same place will come by soon. By spending time camping instead of worrying about "the camper" we enjoyed trips more.
As time went on I found that small items I thought I needed were available at campground stores. Surprise, surprise! Yes it cost more but this is all part of the camping experience. Walking into a campground store, paying twice for things you could get from Amazon gives incentive to plan at home, before the trip, while in the driveway. Here comes the lists.
Things to keep in the camper so now there is the toolbox in the house, the one in the car and another one in the garage, plus the camper. Things to do before driving away from the house like filling holding tank only part way so I'm not hauling a full tank because I use campground water. Keep some water in the black water tank with chemicals and let the bouncing of the camper clean the tank. Also never travel with full holding tanks, any of them. Have refrigerator running for at least 24 hours before leaving and full of cold stuff. The fuller the better since it seemed to help the fridge. Make sure TV antenna is down when jacks go up. Find secure places for everything and never place anything on the couch, counter or bed when traveling because sooner of later it will hit the floor. Since we came from ground camping where we used sleeping bags we still do use those sleeping bags instead of trying to make the bed with sheets and spreads. A bag and a sheet for covering takes up much less room.
The hardest part of using our TT was learning to not bring everything with us. The wife could leave the cake pans home. Paper plates, red solo cups and plastic utensils with some knives, manual can opener. I could use the car toolbox instead of needing a separate one for the camper. Things that I would do if I had the tools, most times, could wait until we got home instead of taking away from the pleasure of the trip.
But then we use our camper to get away for short trips and not fulltime living so packing can be much different. Hope you enjoy your trip.
__________________
Beverly & Jim
Sebring, Florida
1991 T-2363 Solaris
|
|
|
|
|
10-13-2017, 08:03 AM
|
#9
|
|
Senior Member
Join Date: Jun 2011
Location: New Jersey
Posts: 544
SUN #2366
|
Yep. What Jim-Bev said! I wouldn't spend too much time in the campstore, though. Lots of stuff you want, but don't need. Hard to tell the difference. Lol.
__________________
|
|
|
|
|
10-16-2017, 05:09 PM
|
#10
|
|
Senior Member
Join Date: Sep 2017
Location: Maryland
Posts: 207
SUN #9763
|
Thanks for the encouragement and advice folks! I was making great progress on my list in the little time that I had over the weekend but I ran into something of a stumper, today. Maybe you can help.
On the advice of my S-I-L, I bought the Rhino sewer system, only to find out that it doesn't fit easily into the bumper thanks to the bayonet fittings and the elbow won't go at all. I saw a YouTube video where the guy bought an 8 foot vinyl fence post which is 4.5" by 4.5". Brilliant! All of the Rhino hoses and attachments fit! He capped both ends with the fence post caps with vent holes drilled into them.
I spent an hour or so choosing bits and pieces to attach it to the rear bumper but when I got everything home, the fence post was about three quarters of an inch too high and it blocked the rear cargo door from opening. Plan B was to hang it from under the camper frame but the black tank is a little lower than the frame and the stabilizer jacks blocked me from hanging it just in front of the rear bumper.
Plan C calls for it to go just ahead of the wheels in this location.
 
Is that an issue or should I just use the bumper storage for the hoses and put the (carefully washed) elbow in a zip lock bag under the bed?
__________________
~Dig~
2004 Solaris 280SR
Previously: 2003 Solaris Lite T-1950
"The Land of Pleasant Living!"
|
|
|
|
|
10-16-2017, 05:30 PM
|
#11
|
|
Senior Member
Join Date: Jun 2011
Location: New Jersey
Posts: 544
SUN #2366
|
You can get several ratchet straps and strap it to the backside of the bumper. Unless you have a spare attached.
__________________
|
|
|
|
|
10-16-2017, 07:06 PM
|
#12
|
|
Senior Member
Join Date: Apr 2016
Location: Maryland
Posts: 488
SUN #8237
|
Im beginning to believe the Rhino hoses are not the way to go. My daughter had the same problem and we were able to overcome it by grinding part of the plastic off but that shouldnt be necessary IMO.
My hose and elbow fit fine into my bumper and I imagine most others do as well.
__________________
John
2000 T2370
|
|
|
|
|
10-16-2017, 07:55 PM
|
#13
|
|
Senior Member
Join Date: Jun 2011
Location: New Jersey
Posts: 544
SUN #2366
|
That's also a way to go. Probably the easiest.
__________________
|
|
|
|
|
10-16-2017, 08:45 PM
|
#14
|
|
Senior Member
Join Date: Sep 2017
Location: Maryland
Posts: 207
SUN #9763
|
Quote:
Originally Posted by j52wf
You can get several ratchet straps and strap it to the backside of the bumper. Unless you have a spare attached.
|
Yes, there is a spare attached on the rear bumper.
Quote:
Originally Posted by johnnybgood
Im beginning to believe the Rhino hoses are not the way to go. My daughter had the same problem and we were able to overcome it by grinding part of the plastic off but that shouldnt be necessary IMO.
My hose and elbow fit fine into my bumper and I imagine most others do as well.
|
The PO included a standard brown Rhino Flex hose and some gloves (or perhaps forgot about them) in the bumper but there was no attaching hardware. Now that I have stuffed the new Rhinoflex into the bumper sans elbow, I doubt Camping World will take it back but that would be my loss, I guess.
Quote:
Originally Posted by j52wf
That's also a way to go. Probably the easiest.
|
What's a way to go? My Plan C? There's no issue with putting the tube ahead of the wheels? Just trying to clarify.
__________________
~Dig~
2004 Solaris 280SR
Previously: 2003 Solaris Lite T-1950
"The Land of Pleasant Living!"
|
|
|
|
|
10-16-2017, 09:23 PM
|
#15
|
|
Senior Member
Join Date: Jun 2011
Location: New Jersey
Posts: 544
SUN #2366
|
I meant not using the Rhinoflex was probably the easiest way to go.
__________________
|
|
|
|
|
10-16-2017, 10:31 PM
|
#16
|
|
Moderator
Join Date: Nov 2006
Location: Ohio
Posts: 12,654
SUN #89
|
Quote:
Originally Posted by Digmenow
Plan C calls for it to go just ahead of the wheels in this location.
Is that an issue or should I just use the bumper storage for the hoses and put the (carefully washed) elbow in a zip lock bag under the bed?
|
I vote to put the fence post holder in front of the wheels. Keep it away from the wheels like you have it so it will not pick up dirt etc. Just make sure it is well strapped to the frame to not come off.
I have the original Rhino hose. Back then, they only sold the hose and no fittings. So you had to buy other brands of fittings. That said, I am still using the original one I bought in 2003 and it is still going strong. I do not know if they make them from the same high quality hose as they did back then, but they where the best I found back then. The new ones have the fittings on the ends.
You can see pics of it here on our prior T2499, I just moved the holder and hose to the T310SR when it came.
http://www.sunlineclub.com/forums/f6...html#post59778
And here in use. See the red fitting on the brown hose
http://www.sunlineclub.com/forums/f6...html#post71535
Since we have steel bumpers and they are not even painted inside since day one, rust in the bumper is a real issue. If you ever take you bumper off and tip it up vertically, the pile of rust that falls out is a real surprise. The pile is amazingly high. I'm talking a 5 to 6" tall pile. It's 8 feet long and can create a lot of rust.
Storing the hose in the bumper is an option and many do it. I myself do not like to do it that way as the rust first is not great and second the rust wears on the tips of the hose and grinds the hose over time going in and out. Abrasion is the number one way a hose can leak, for any brand sewer hose. Dragging the hose on the concrete is also not good, pick it up, do not drag.
Hope this helps
John
__________________
Current Sunlines: 2004 T310SR, 2004 T1950, 2004 T2475, 2007 T2499, 2004 T317SR
Prior Sunlines: 2004 T2499 - Fern Blue
2005 Ford F350 Lariat, 6.8L V10 W/ 4.10 rear axle, CC, Short Bed, SRW. Reese HP trunnion bar hitch W/ HP DC
Google Custom Search For Sunline Owners Club
|
|
|
|
|
10-17-2017, 01:52 PM
|
#17
|
|
Senior Member
Join Date: Apr 2017
Location: New Jersey
Posts: 125
SUN #9247
|
If your short on time I like your plan D. Put the hose in bumper and fittings in a bag, figure something better after your trip. Dont stress, have fun camping!
Edit... I kept my hoses and everything sewer in a milk crate stored in the tub the whole time I had my previous camper. I just made sure to rinse it reaaal good after using.
__________________
Norm 01 T267SR
|
|
|
|
|
10-17-2017, 02:07 PM
|
#18
|
|
Member
Join Date: Aug 2017
Location: Washington, D.C.
Posts: 76
SUN #9721
|
Hi Dig....Did I miss it or did you not mention a water pressure regulator? You can get one simple style at Walmart...its like a brass fitting that is pre-factory set to protect your RV from extreme water pressure damage. I think that John mentioned a regulator in his post to you in regard to the placement of one with the water filter.
We just got back from camping at Frontier Town and the water hook up sprayed water out as hard as a power washer.
I also bought a Rubbermaid container for my sewer hose. It has snap open, and close, vents in the cover that you can put a dryer sheet in to mask any, less than pleasant, odors. Fits perfectly into my rear compartment without taking up much space.
Have Fun!
Karen
__________________
|
|
|
|
|
10-17-2017, 03:41 PM
|
#19
|
|
Senior Member
Join Date: Sep 2017
Location: Maryland
Posts: 207
SUN #9763
|
Quote:
Originally Posted by JohnB
I vote to put the fence post holder in front of the wheels. ... It's 8 feet long and can create a lot of rust.
...
Hope this helps
John
|
That's enough for me. I might not get it done by this trip but it WILL get done.
Meanwhile, I knocked some big items off the list today as well as got a little practice time in and was able to back it into the yard without damaging anything. No small feat, considering the traffic that races up and down my two lane street that connects two main thoroughfares.
The Reese friction sway control went on pretty easily even though the previously drilled holes didn't match up perfectly everywhere but they were close enough that I got all six installed.
The black tank water sprayer went well. Mostly.

Here's a view of the underside featuring the black tank and a side view to show its location on the chassis.


Before I tore into the installation, a studied it for a bit. You get an extra long, cut to length hose and I didn't want to take the shortest route and leave it flopping around freely so I planned a route that would support it. At the back of the camper, there are two holes in the metal that would accommodate the hose and keep it up and out of sight. The right hole is just above the end of the red wire. The left hole is a couple of inches to the left of the nut and bolt pointing down and is barely visible. A little farther to the right out of the picture, I drilled a small hole to run a zip tie through to support the hose before it jumped across the stabilizer assembly to the tank.

The inch and an eighth spade bit easily chewed through the tank (which I was pretty sure was empty).

The instructions called for drilling the three holes and then using ridiculous flat blade screws to attach the sprayer but self tapping quarter inch hex head screws are my answer to all things attachable. They drilled their own holes.

Gorilla poly sealant applied liberally to the business side of the sprayer flange and the screws...

With the screws pulled down tightly, the excess sealant squeezed out into a nice doughnut, which I left in place.

The hose jumped the stabilizers and hooked right up. I left some slack beyond the zip tie in case something needs to be repaired in the future. You can see the hose ducking into one hole and out the other at the far end before it rums down to the hose bib.

From there, I moved to my previously planned attachment point for the hose bib. I wanted it in a sheltered location so that it wouldn't catch on something and this looked like a good spot. Once again, self tappers vs. drilling and a flat blade driver. That's a little plastic loop that keeps the cap attached to the bib, in case anyone was wondering.

 .
Then I attached a hose and turned on the water to make sure it didn't leak. It did. I forgot that the poly sealant needed to dry before use and water was spraying out of the screw holes.

I extracted the screws, reapplied sealant and put them back in. I couldn't get the sprayer off. It was stuck tightly to the side of the tank so I hope no new channels were created. We'll see.
Oh, I remembered that I had this Slime tire inflator in the trunk of the car. The cable is short but I parked the truck close enough for it to reach. It pumped the camper tires up to the max 50 psi, so ...bonus!


__________________
~Dig~
2004 Solaris 280SR
Previously: 2003 Solaris Lite T-1950
"The Land of Pleasant Living!"
|
|
|
|
|
10-18-2017, 08:48 AM
|
#20
|
|
Moderator
Join Date: Nov 2006
Location: Ohio
Posts: 12,654
SUN #89
|
Nice tank sprayer install Dig. Thanks for sharing. You will be glad you did the upgrade. Very worth doing it.
John
__________________
__________________
Current Sunlines: 2004 T310SR, 2004 T1950, 2004 T2475, 2007 T2499, 2004 T317SR
Prior Sunlines: 2004 T2499 - Fern Blue
2005 Ford F350 Lariat, 6.8L V10 W/ 4.10 rear axle, CC, Short Bed, SRW. Reese HP trunnion bar hitch W/ HP DC
Google Custom Search For Sunline Owners Club
|
|
|
|
|
|
|
Currently Active Users Viewing This Thread: 1 (0 members and 1 guests)
|
|
|
 Posting Rules
|
You may not post new threads
You may not post replies
You may not post attachments
You may not edit your posts
HTML code is Off
|
|
|
|
 » Recent Sunline Discussions
 |
|
|
|
|
|
|
|
|
|
|
|
|
|
|
|
|
|
|
|
|
|
|
|


 Linear Mode

