I can try and help.
These pics are from a 2004 T2475 and your 2003 would be built the same.
For the front right wall area (not the door) there is a full 2 x 3 starting at the bottom of the gold siding going up. Then comes a 1/2" OSB floor on top of it and then nothing but air behind the siding. And on top of the floor OSB is a 1" thick wall sill plate. You will need to land on the 2 x 3 which is actually 2 1/2" inches tall. So the solid wood stops 2 1/2" up from the bottom of the gold siding. Going into the 1/2" thickness of the OSB floor will not hold a screw. Or up at 3" to 4" up from bottom of gold siding, the 1" wall plate board is there above the floor.
If you need to be higher up the wall, you might get lucky and there is a wall stud you can screw into, but it is only 1" wide and your holder I think may be wider. To find the stud, feel the siding where is get rock hard stiff as it passes over the 1" wide wall stud. But up that high I'm not sure the door holder will work.
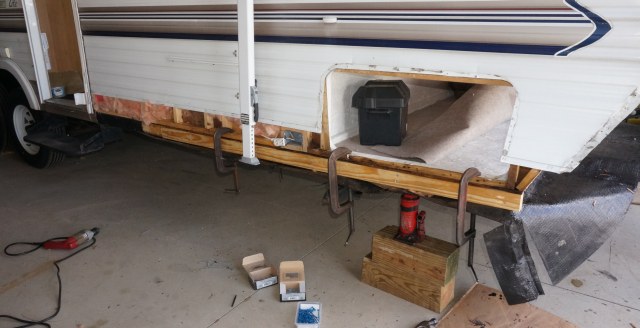
This post rebuilding mine may help with pics of the siding off at the bottom gold siding.
https://www.sunlineclub.com/forums/f...2-a-18706.html
On the door itself. I have not yet had one of the newer style doors apart. But, this may help. Your door looks like this one. This is not off my T2475 but off my 2004 T310SR but the door build should look the same even if the door is different.

The only place I know of anything solid on this style door is the bottom aluminium metal frame that you see the round door peg holder is screwed into. You would be screwing into the aluminium.
The fiberglass above the aluminium is "most likely" just Styrofoam behind it. So it will not hold a screw.
As an idea, it may or may not work, but may give you some ideas to build on. You may need to get a 1/16" to 1/8" thick steel plate, ideally stainless, the size of the 4 hole pattern on your new door holder. Sandwich the added plate between the door and your new holder. Use the bottom 2 screws of your new door holder to go through the new plate and then into the bottom aluminium frame. The plate then protrudes upward above into the fiberglass area. Then have thin head screws pointing outward from the plate into your new top door holder. The nuts on the top screws are out in the open, the heads are on top of the fiberglass and not screwed into it. In the end, there are only the 2 screws in the bottom holding the weight of the door on your holder. The top 2 screws are on the plate that is cantilevered off the bottom 2 screws in the aluminium frame but it is better then no screws on top.
These doors were not really setup for the style door holder you are looking at. Which may be why Sunline used the peg and pocket style door holders.
Hope this helps
John
PS, you need to put butyl sealing tape on either part of the door holder back side to seal the screws and holder to the door and siding from letting water get into the camper around the screw heads.
__________________
Current Sunlines: 2004 T310SR, 2004 T1950, 2004 T2475, 2007 T2499, 2004 T317SR
Prior Sunlines: 2004 T2499 - Fern Blue
2005 Ford F350 Lariat, 6.8L V10 W/ 4.10 rear axle, CC, Short Bed, SRW. Reese HP trunnion bar hitch W/ HP DC
 Google Custom Search For Sunline Owners Club


 Linear Mode


