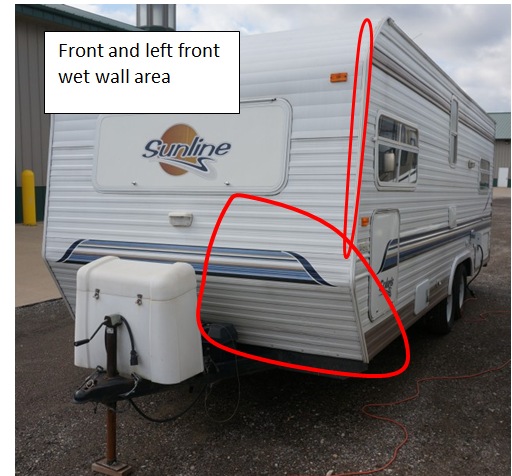
What you are describing points to failed caulking on the front roof seam and or a corner molding seal failure. This is the seal between the rubber roof and the front wall and or the seal between the corner moldings the roof or the front wall. The same issue can occur on an aluminum sided camper too.
Up on the roof, does the rubber feel bouncy like a tire inner tube/rubber band or more stiff but flexible like a normal Sunline roof? I know you may not know what a normal Sunline roof feels like, but you know what a rubber band feels like. Your camper may have a walk on roof I just do not know if it goes all the way to the front. Even walk on roofs with leaks rot out the wood decking and the rubber can still feel have a tire tube rubber band effect when pressed.
You ideally "do not" fix this from the inside of the camper. Meaning do not take the inside walls apart as your first method of fixing this. You fix this from the outside in. This way you do not damage the inside of the camper and you can repair the wall board in some cases from the outside. If the wall board inside is totally gone, then you do an outside and inside repair but only after starting on the outside in.
I am working on a post now showing how to do this on an aluminum sided camper. Sorry did not finish the job yet but will soon, so stay tuned for daily updates....
http://www.sunlineclub.com/forums/f7...2-a-18706.html
This other post will also show how to fix this but is part of a roof replacement post. It shows the front seam and the corner moldings. How they come apart and how they go back together. There are a lot of good pic's in this post that will help. This will show the magnitude of a front wall repair and if this is something you want to take on.
http://www.sunlineclub.com/forums/f7...avy-16834.html
The difference is, your camper has the fiberglass wall panels and not the aluminum siding. By your pics, Sunline created the sealing system the same between the aluminum sided campers and your fiberglass panel camper.
I "believe" they glued the thin FRP (fiberglass reinforced panel) to a thin sheet of luan plywood and use that as the outside wall board. I "believe" when you take the front corner moldings, the top room seam molding off, and in your case a bottom front molding, the entire front panel will come off. That is if they did not staple the luan on it on at the wall studs before gluing the FRP panels on. That is an unknown for me at this point as I have not yet had a SE option Sunline apart but that is how many of the RV builders of the time did this before the newer vacuum bonding process started. If you can take some pics of the side and bottom front moldings I can confirm they sealed it up just like the aluminum skinned campers.
Since you have the front window out, does the wallboard move away from the wood frame enough to see the front wall board construction? Take some pics and post. For a curved front wall they may have also used a heavy thick corrugated board to bond the FRP panel too and not luan. That method was also common in RV industry back in the mid 2,000's.
This repair is not a small one. More investigation will be needed to determine how far the water infection has spread "before" you start a repair like this. The moisture meter will work on the inside of the camper scanning into the wall and it should work on the outside of the camper scanning inwards. What brand and model meter are you using?
The meter will find metal blips in the wall that will spike the meter as it reads metal like water. But a metal blip is very small and stops and starts fast. A water infection is very large area, not a screw, wire or piece of conduit in the wall stud that comes and goes quick. Ideally you scan the wall from roof top to bottom and see how far the readings go until they get to zero or below 10%. That is if they get that low. If the camper has had a roof leak for a long time, water can find its wall all the way down under the floor. Scan the black plastic membrane on the bottom looking up and it will confirm moisture is in the basement or not. And scan the floor itself.
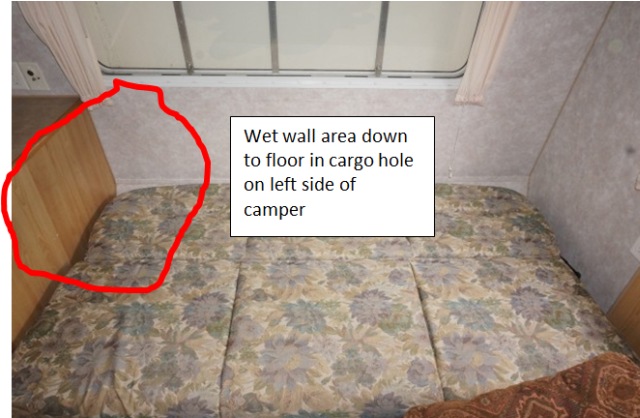
Also do the side walls starting at the corner and working towards the back of the camper. This will tell if the moisture is around the corner and partly involving the side walls. Ideally you can create a picture or diagram of the moisture readings. Something like this where the red is the wet area and everything outside it is dry. And let use know the wet moisture numbers.
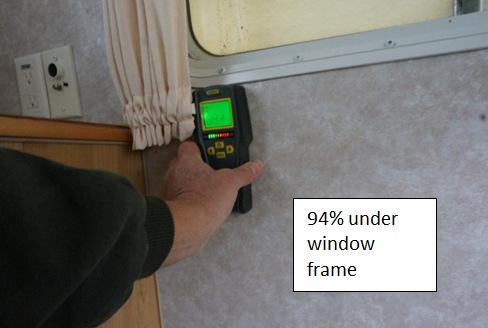
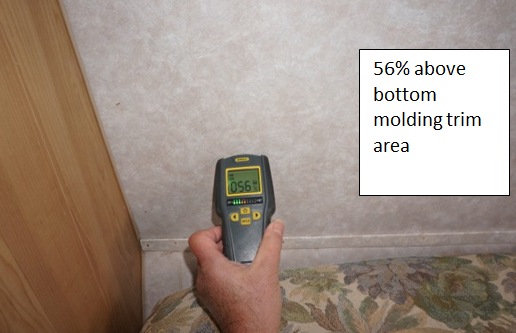
The inside problem
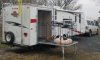
The outside problem area, all the same window leak.
We can then better tell how big or small this job may be. It really depends on how long the leak has been ongoing. If it just happened not long ago, odds are a lot better the leak is not that far spread. If it happened a few years ago, then it will be spread all that much further.
Once you know how large the water infection is, you have some decisions to think through on what to do. Repair it totally, stop the leak to buy time to later do a total repair or some other combination.
Hope this helps
John


 Linear Mode


