Hi Fellow Sunline Campers!
Since we have reached the squelchering temps of summer
. figured this would be a good time to post this in case your AC unit is not cooling so well.
Im following in the footsteps of Trailblazer and Frank. This all started here on this post about 1 ½ months ago. Im just picture documenting the process and adding my adventures.
Cleaning Air Conditioner coils I have never cleaned the coils on this camper and Im sure the prior owner may not of as well. It was due.
Chris Bryant from Bryants RVs did up this nice article
R.V. Air Conditioner Troubleshooting
Im not an AC expert by any stretch, learning by doing and then figuring out how it works.
Here is a basic AC diagram from Chris B. This helps as we go thru each area.
Chris has helped me in the past online with just pointing me where to go looking and many times that is all we need. Where to look. So here is how I cleaned my coils so you can see and look. While my amperage did not change that much, I did get a larger cooling temperature drop after the cleaning. So this was a gain in cooling for me.
Ill do this with pics as the visual aid can help with if you do this or not. First and foremost, there is a life threatening electrical hazard if the power is turned on.
 UNPLUG all 120 VAC power from the camper.
Dissconnect the battery or turn off the battery disconnect switch to kill all 12 VDC inside the camper. The AC unit uses 12 VDC to run the controls system.
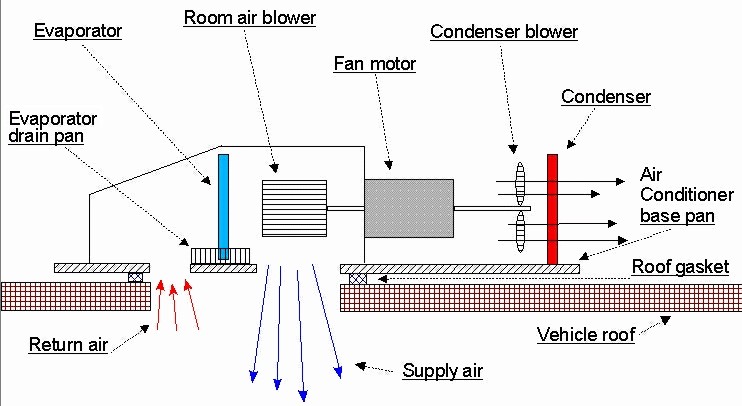
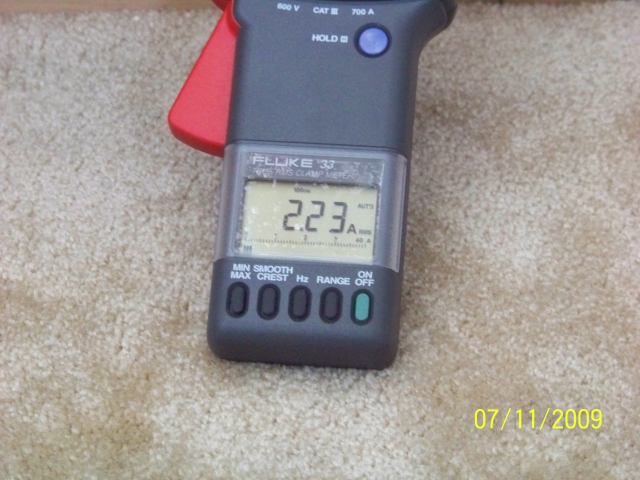
Ill add some techy things I did to measure the effectiveness of what I have done. First was to determine how the AC unit was working. Here is the duct temp before cleaning. It was 77 inside the camper and the cool duct air was 58. Or a 19 degree temperature drop from in to out.
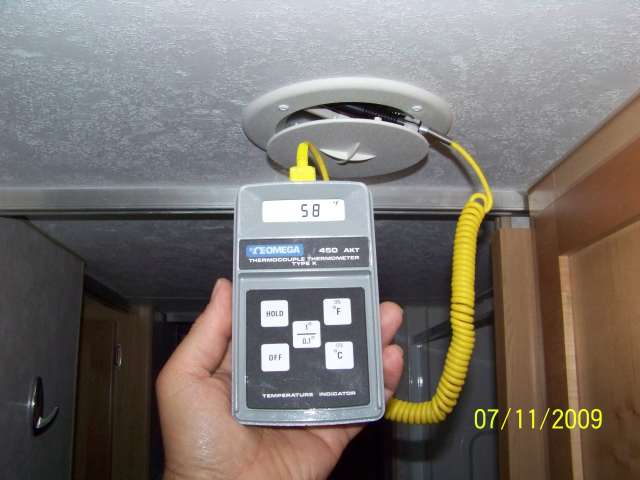
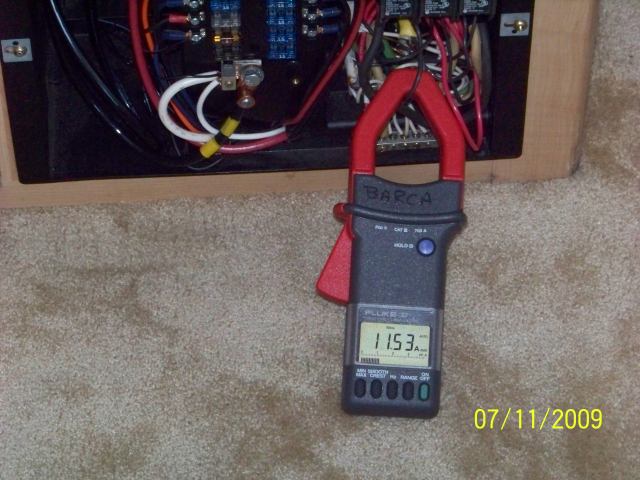
And here was the constant running amperage of the compressor and fan.
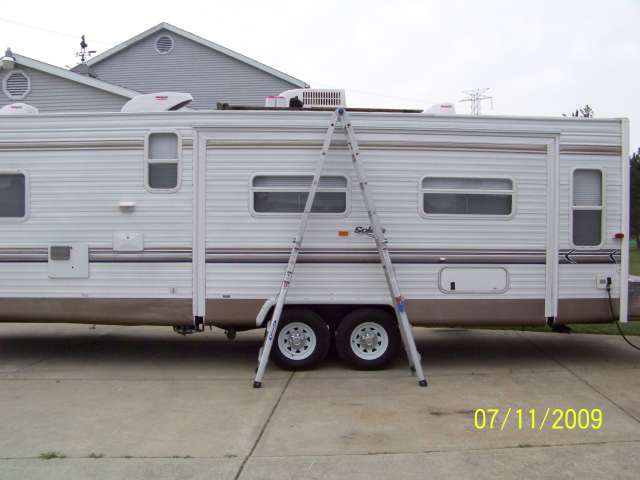
The power is then pulled and next is how to get up there. Here I previously bought a high quality stable ladder a while ago just for the camper roof maintenance. If you do not have one, this type of work is a great way to justify and early birthday.
Then to prep the roof. I lay down canvas then 5/8 plywood pieces across the rafters. I do not have a walk on roof.
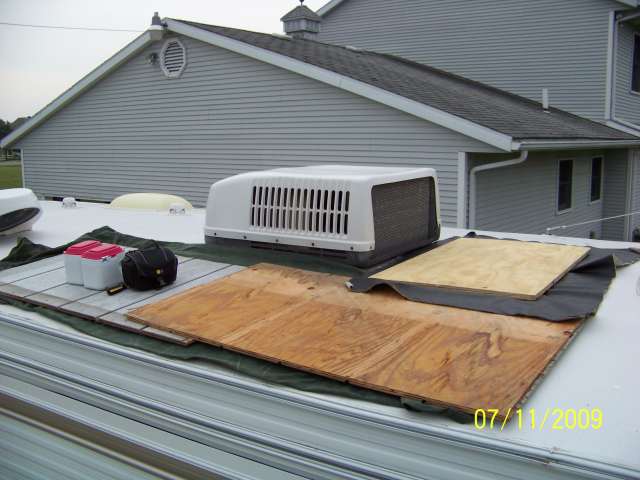
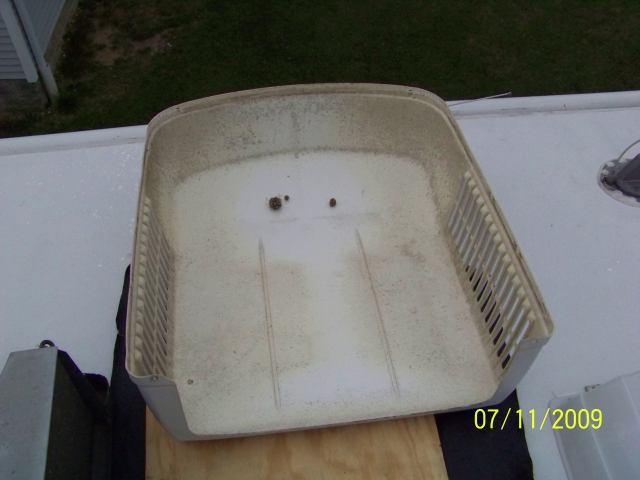
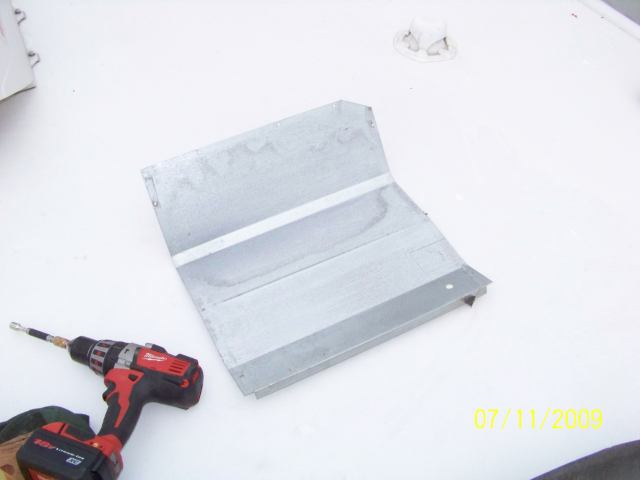
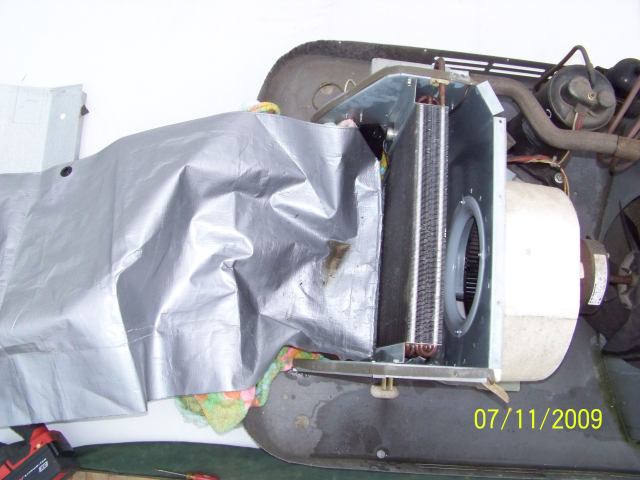
Then take off the AC shroud. Be careful bees and hornets like to next in these things. I found a few nests, but they where old ones. I also learned I need a new AC shroud. This one is brittle and cracks have started in a few places, especially around the screws.
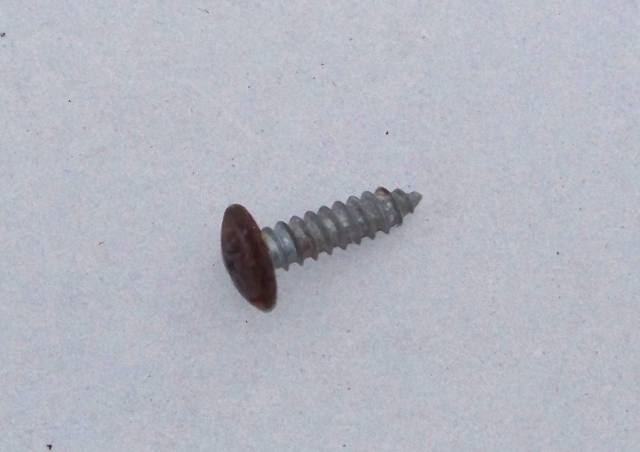
The shroud screws, on mine they where all the same length. But all may not be. So keep track as you take them out. I have the Dometic Brisk Air. Sunline on many have used the Brisk Air. However if you have the Coleman Mach unit, they may have different lengths in different places on purpose.
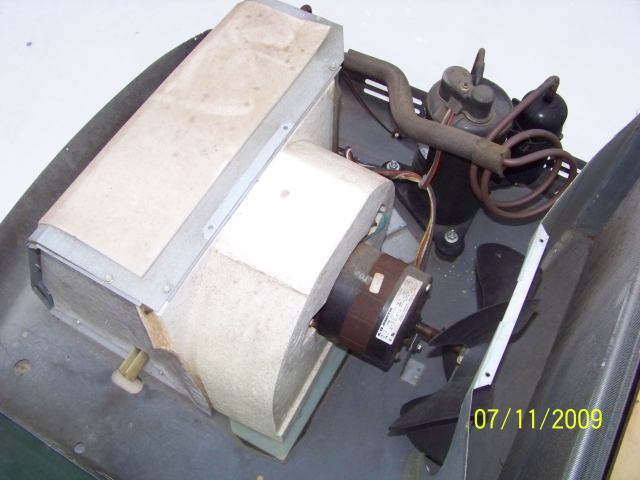
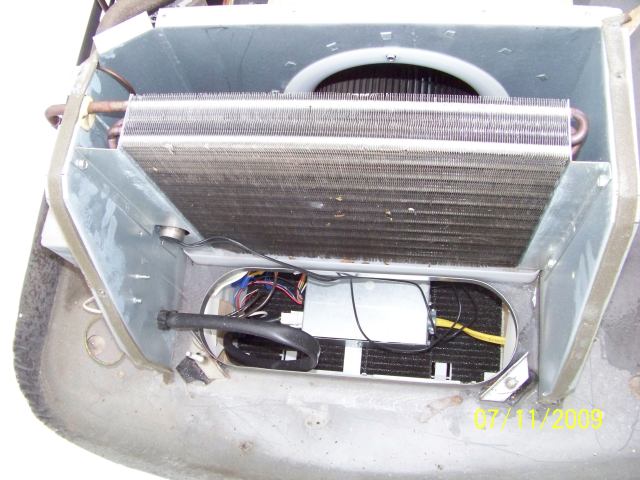
Here is what it looks like underneath on the condenser coil end.

Here is the evaporators section end.
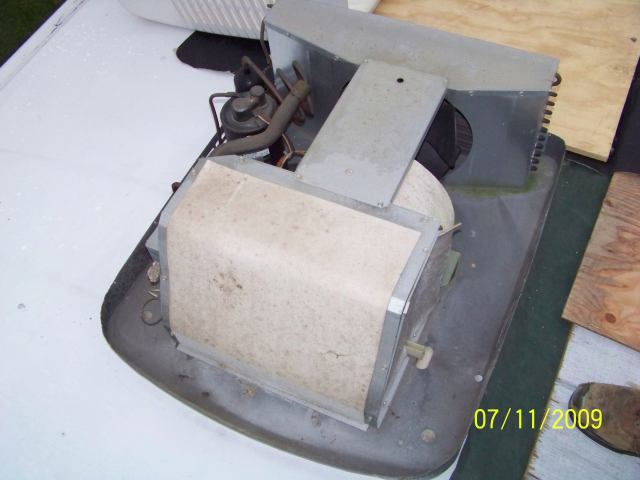
Here is the compressor side view. And another hornets nest.
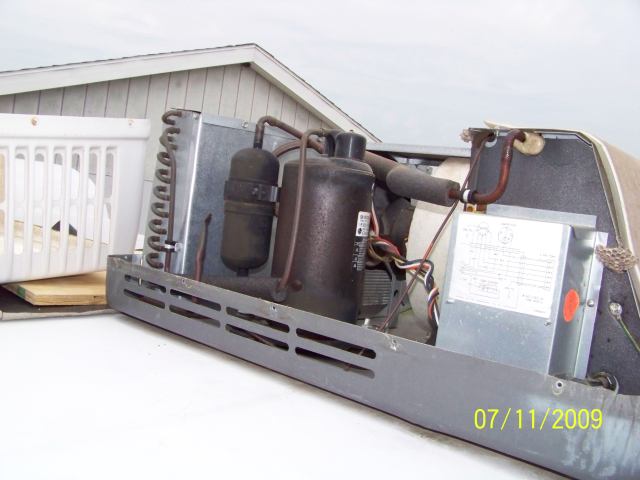
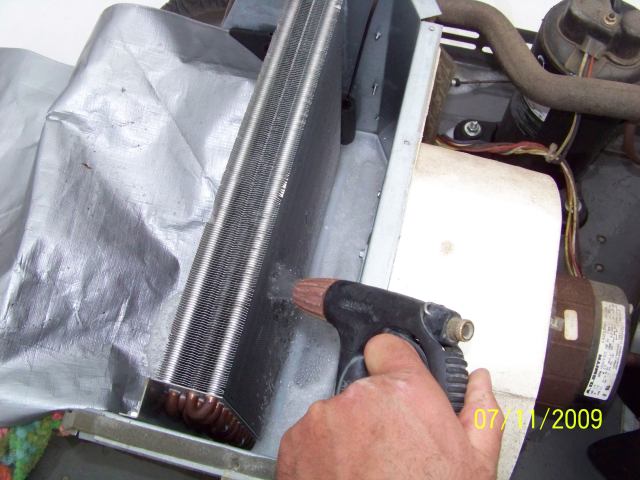
I started with taking off the top condenser coil sheet metal top support to get to the inside of the coil
And here is what I found. The inside of more dirty then the outside you can easily see. Condenser coil dirt and creased coil fins. Must have been from day 1.

A close up
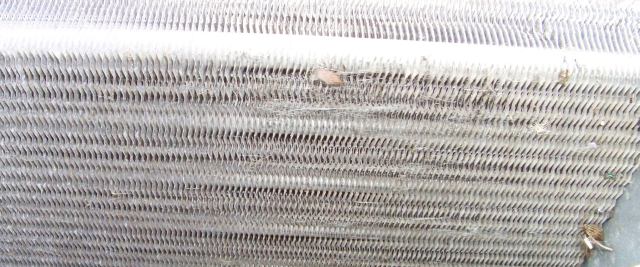
The outside you normally see along with more creased coil fins.
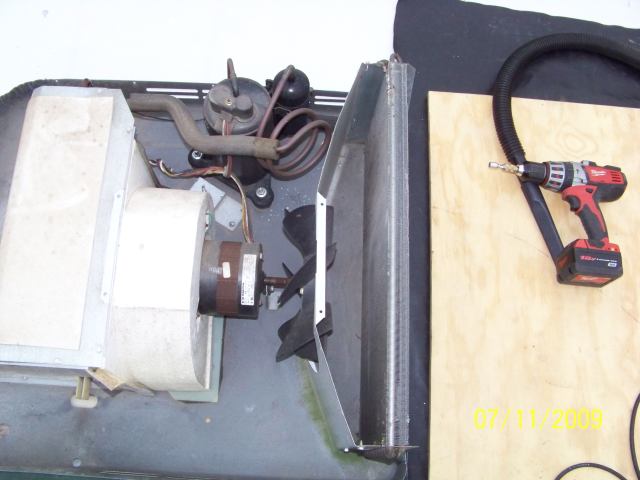
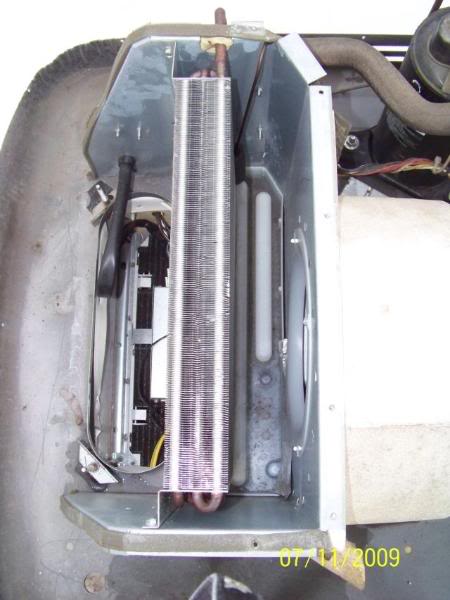
Then I moved to the evaporator end.
And you take the cover off. Take care to the gasket that is there. It needs to be intact and if not replace it as it seals out the outside world.
Then you can look down right inside the camper. This is what is up above the AC air intake filter.
And here. Notice the black dirt down in the water collection pan between the coil and the fan housing.
I used a small thin screw driver and slowly straightened out all the coil fins.
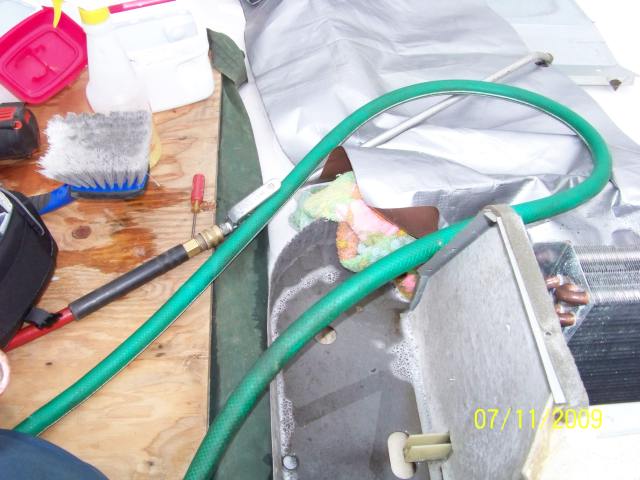
Then I followed Franks tip and did a dry cleaning first. A soft bristle brush and a shop vac. This cleaned up a lot and did not make a mess. Did both coils and everything laying loose in the bottom of the AC unit was vac'ed up.
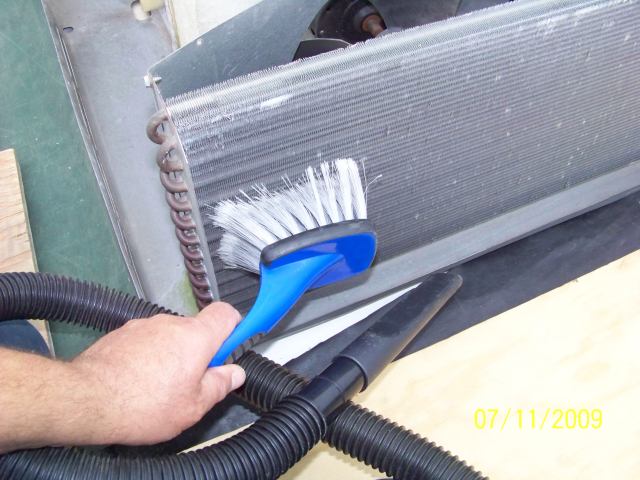
Then I followed Trailblazers tip and squirted the condenser coil down real well with Awesome and let is soak. Before I did the squirt job, I covered the roof with a plastic tarp at the condenser coil end and put a large towel down the evaporator air intake hole and tarp over the old beach towel. The evaporator end is the most critical as water can go right down in the camper with that hole open.
After the awesome soak, I lowered the tongue jack down to put an intentional down hill pitch to the camper. I was worried about which way the water was going to run when I flushed the coils so I created a direction.
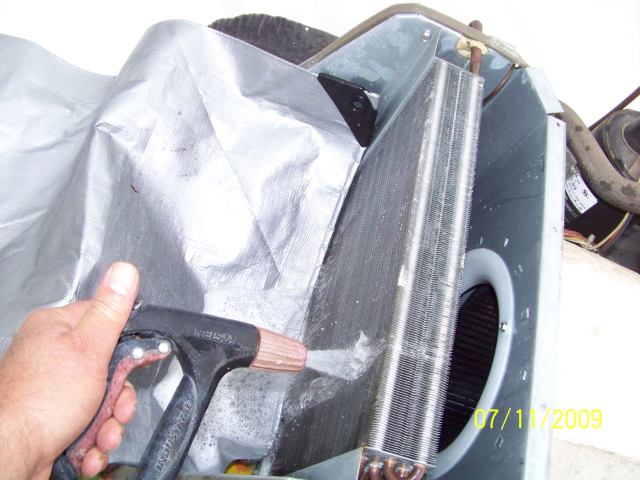
I did the condenser coil first as it is all outside. While I did not know what to expect, this was a very passive flush. No real excitement. The coil defused the water very well. I used a hose nozzle I could create a small fan type pattern with so it was low pressure. I flushed both directions thru the coil. It went off great.

Then it was time to move to the evaporator coil. This is a little more tricky but only to make sure your large beach towel and tarp stay in place to keep water out of the camper. I started flushing away from the fan first. This again was passive. The water barely went thru the coil, was defused and ran into the drain pan and out the sides. It was too simple
.
Then I flushed back towards the fan. Again passive. But do not get too carried away and take care to note the hole under the tarp. If something gets too wet up top, stop and mop up the water in the intake hole area with the beach towel. I had to do that once but it was not much water.
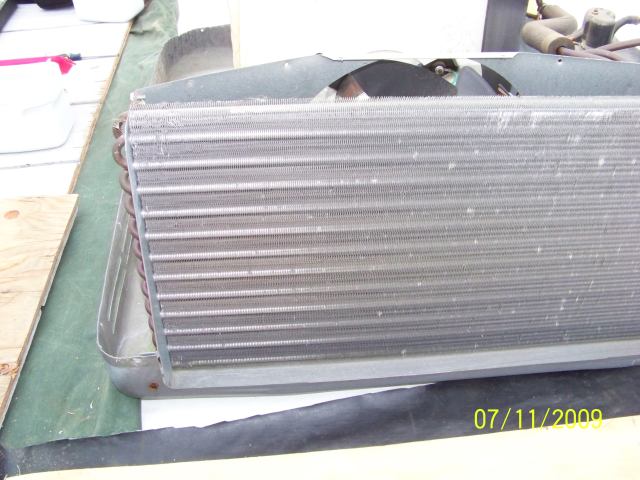
I also made sure the water collection pan at the bottom of the evaporator coil was clean and the 2 pan drains. See here now. It is all white plastic which was black before.

The water runs out the evaporator drains and onto the roof and forward off the sides of the camper. It too was passive. If you are wondering where the drains are, they are here. They literally drain off onto the roof where ever. This is why when the AC is running and water runs off the roof, it is never in the same spot as the camper is tipped a certain direction at each camp site.

Since I did the dry cleaning first, the Awesome and water rinse did not take out as much gunk as Trailblazer reported. Or his was just dirtier. Yes mine needed cleaning but it was not caked and packed in there. Amount of use and conditions it runs in seem to dictate how dirty these get. And how clean you keep the inside ceiling filter. If that is clogged all the dirt from inside the camper comes right up into the evaporator coil. Which is why they tell you to keep the inside lint filter clean and to clean it often.
Once I was done with the water I used a compressed air hose to blow out most of the water out of the coils. I have a long wand type air nozzle with a rubber tip.
The rest up on the roof is to put it all back together and let it dry out before starting.
I redid the duct temp test. It was 75 in the camper now and the return duct was 52 degrees. So I now have a 23 deg temperature drop verses a 19 degree drop when it was dirty. I picked up 4 degrees more cold air.

The constant running current was about the same in my case after cleaning. Not a lot of difference.
So that is the cleaning process. Not that hard to do if you are handy around the house and can get up on the roof. I now know a base line of what clean is as measured in temp drop of return air and amperage draw. This will help me gage how often I need to do this. Every year of every other year etc.
Now some extra stuff
.
While I had my amp meter out I did some other techy things to figure out the draw of the AC unit in relation to my Honda Eu2000I generator.
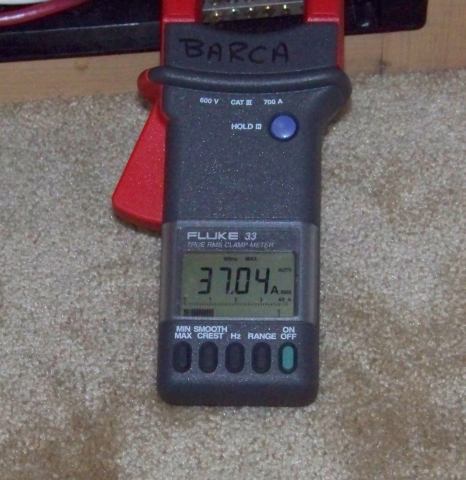
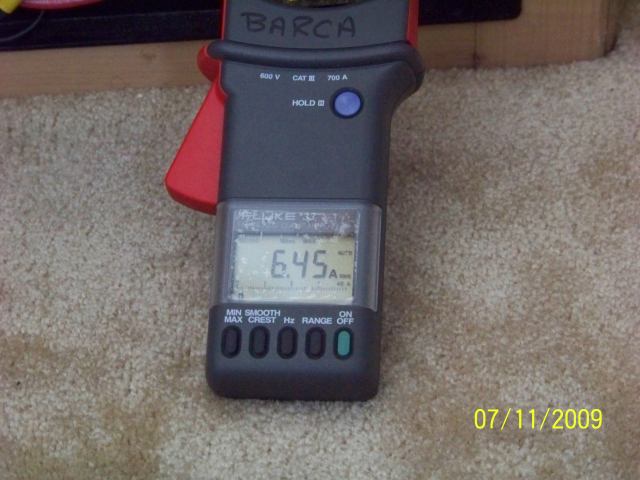
The current inrush when both fan and compressor start is high. 37 amps. That can give the Honda heart burn.
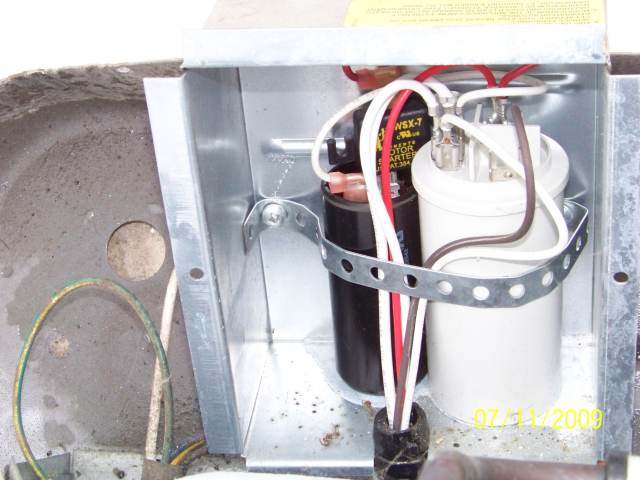
But I did see a large starting capacitor on the compressor up top.

A close up
So I measured some more. Here is just the fan running no compressor. This is the avg constant running amps.
And here is the inrush of just the fan starting. No compressor. Hmm
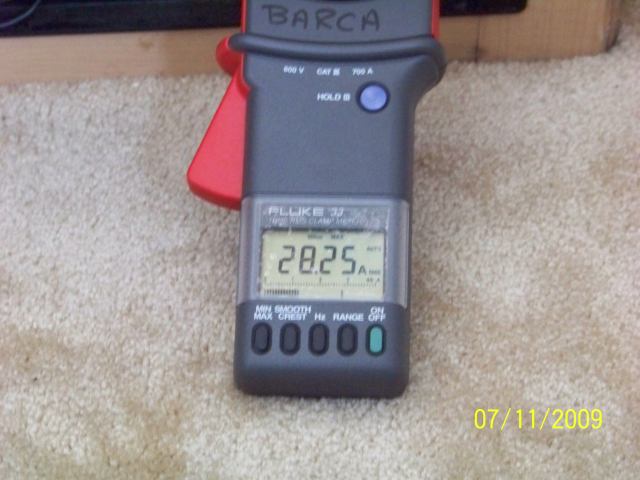
So now I had the fan running manually and started the compressor. 28.25 amps inrush. A lot lower then 37 amps when the compressor and fan start at once.
So I tried an experiment with my Honda Eu2000i. I shut down all internal AC in the camper but the main and the AC unit breaker. Not even the converter was on. I had to turn on the battery to get 12 VDC to work the AC unit controls. I took the Honda out of Eco mode and ramped it up to wide open. I started the fan manually then once stable, I started the compressor. Now I was running the AC unit on both the battery and the Generator. The constant amp draw of the AC unit is within the 2000 watt generator but starting has always been the reported issue. By doing this test in this order I can run the AC off my gen set. However
. It is all I can run other then some minor DC devices sparingly.
The only practical application of this combo is boondocking on an extremely hot day when AC is a must. And then it may only be for a few hours as eventually I have to shut down the AC to run the converter and recharge the battery. If we plan to do a lot of hot weather boondocking in the future, I will get the Honda Eu2000I Companion gen set with the built in parallel kit. Then I can run the entire camper.
Well hope this helps others doing a cleanup on their AC unit.
John


 Linear Mode


