Hi Mtr727,
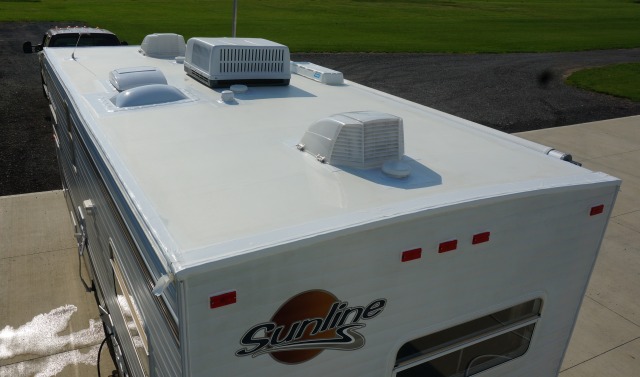
Here is the start of one get-well plan for your roof. This plan assumes you are storing the camper outside this winter, and it thinks you want to keep the camper for as long as you want it. Years worth, to forever if wanted.
For your roof plan, the first thing to do is repair the deteriorated caulking that has not yet addressed. These areas are the front wall to roof seam, (the part not yet caulked) and the left and right side gutter rail. Anytime now works that fit with your schedule before the snow and heavy rains come.
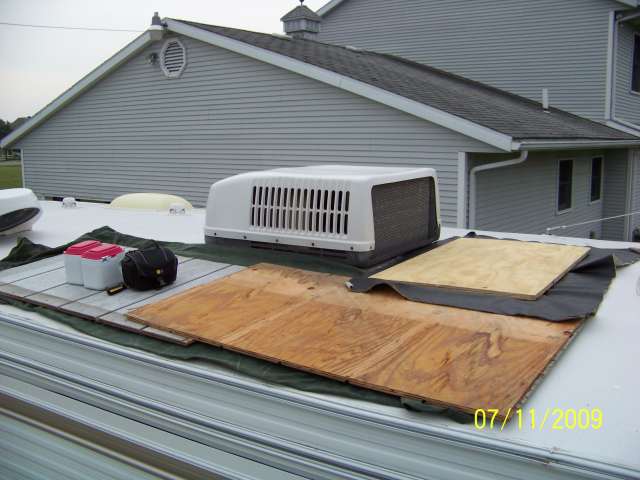
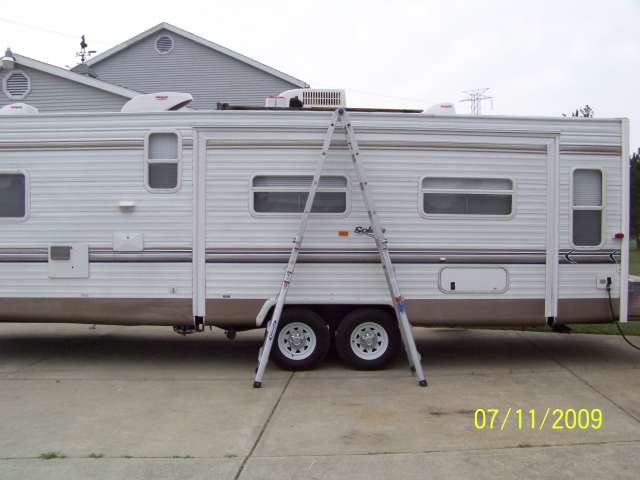
Note: Your Sunline roof is not a direct walk-on roof. You need to place a tarp, old carpet pieces, etc. to protect the rubber from abrasion and then use manageable size pieces of plywood to space the 16 on center rafters. I use 3/8 to 1/2 thick plywood 24 to 30 inch wide by 48 long. Take extra care getting on and off the roof using a good and sturdy ladder. Like this
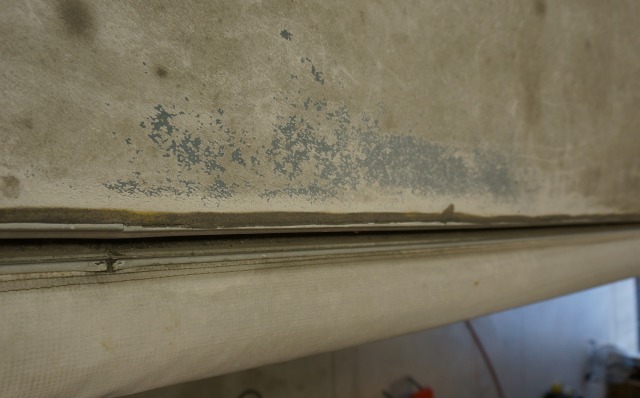
The caulking in your pictures of the front wall seam and gutter rails is sun-baked and deteriorated. We will call these the three areas of caulk for ease of repeating all three regions. The caulking is dried up, cracked and no longer a good seal. It also has a significant degree of embedded dirt in it that needs to be removed before putting new fresh caulk down.
With the age of your caulk and the state it is in; I recommend you remove all the old caulk in those areas before putting the new on. You do not have to do it all at once. Do a section that you can get it done and new caulk down on the same day. To remove the old caulk, I use this method. It is easiest for me. Others may have different approaches.
You start with an approx. 1 wide stiff blade metal putty knife. If you have a grinder, dull every edge on the place tip, you want a small rounded edge all around. You can hand file it, power sand it, etc. The result is there are no sharp edges if you feel all over the blade tip. We do this, so it does not cut into the roof quickly.
Next is to get a heat gun. A 1,300 to 1,500-watt unit is good enough. They cost between $25 to $40 for an acceptable one.
Warm the old caulk with the heat gun. Keep the gun moving; do not stand still as it will burn the roof. You will find you do not need a lot of heat, just enough to soften it up.
Take your dulled end putty knife and lay the blade as parallel flat to the roof as practical and push. The old caulk will curl up. Try not to press down into the rubber as you can create a hole in it. And if you poke a hole in it, it can be repaired.
Once you have scraped up all the old caulk you can, then there is a 2 part chemical cleaning. You start with mineral spirits and a cloth rag. With cleaner on the rag, wipe/rub over the scraped areas to remove all embedded dirt and loose caulk. Do not let the mineral spirits soak with wet liquid showing on the rubber roof. It will negatively affect the rubber if left there soaking for 5 to 10 minutes or more. Once you wipe it on and clean with it, use a dry rag and wipe off the excess right after. Do 1 to 3 feet sections with mineral spirits at a time, then wipe off the excess. Then move onto the next area.
After you have cleaned the area, or if approx. 15 minutes have gone by, whichever comes first, follow up with the 2nd pass of high flash cleaner to remove any mineral spirits oily residue. I use naphtha, as its price attractive, about $12/gal, and it will evaporate off quickly. I get it at our local lumber yard. You can use rubbing alcohol, lacquer thinner. Do not use acetone as that will take off any white paint on the metal moldings and siding. I know the cleaners I listed are camper paint friendly.
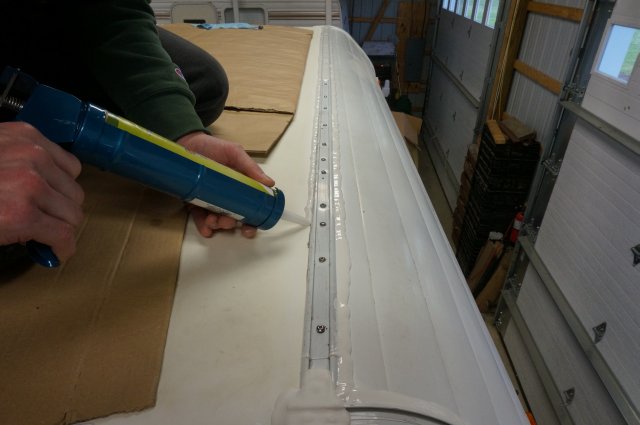
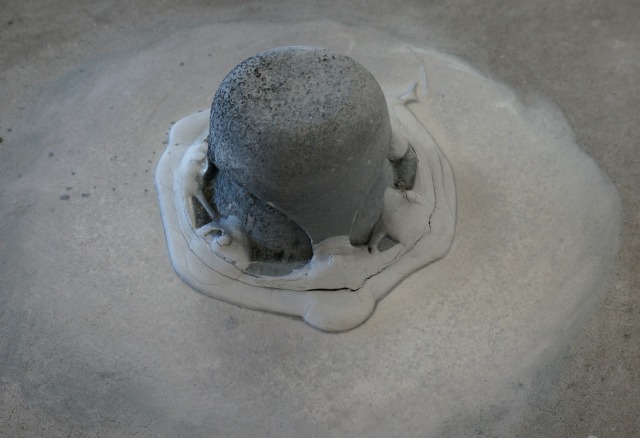
Then apply Dicro self-leveling lap sealant caulking. I use Dicor 501LSW (white) this stuff
https://dicorproducts.com/product/epdm-lap-sealants/ they sell it on Amazon and other RV parts places. Prices vary.
When applying the lap sealant, you need to touch the metal molding and the rubber roof. The caulk does shrink a little while curing. If you do not contact the molding well enough, it can shrink back a little leave a gap, and there is not a good seal.
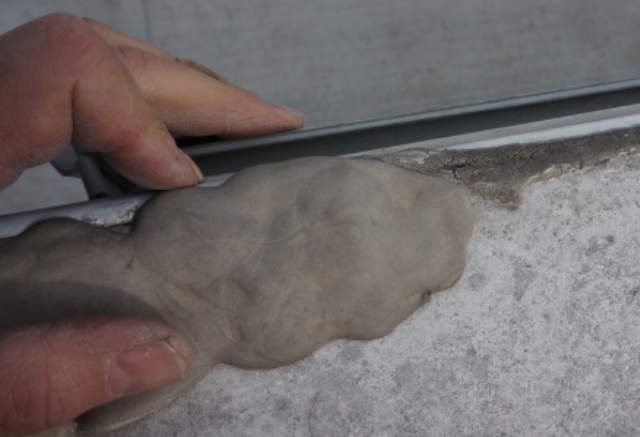
Here is the front molding in the process of being caulked. Do 2 passes on the front and rear of the molding and over all screw heads.,
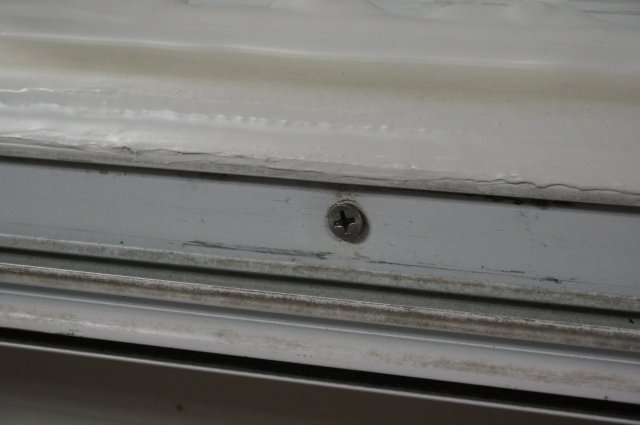
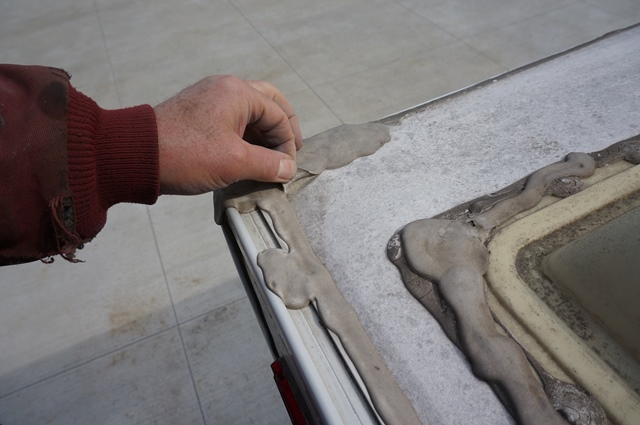
The gutter rail
That will get you through this winter.
Next is what about the rest of the roof the prior owner did? From these pictures, it appears the preceding owner did not do the 2 parts mineral spirits/high flash cleaner cleaning. There is embedded dirt in the caulk in your pics.
This picture of your displays embedded dirt in the caulking around the roof vent. If you look up close at it and feel it, it feels like fine sandpaper. The other areas of your roof with new caulking show the same issue.

Here is embedded dirt on one of my project campers where the prior owner did not properly maintain the roof with routine washing, and caulking inspections, 3 to 4 times a year. Shown in these pics is 13-year-old caulk. It is still the original from Sunline.

Here is that same roof vent caulk cleaned with the 2 part cleaning process. See how white and smooth it is. You can also see all the cracks in it.
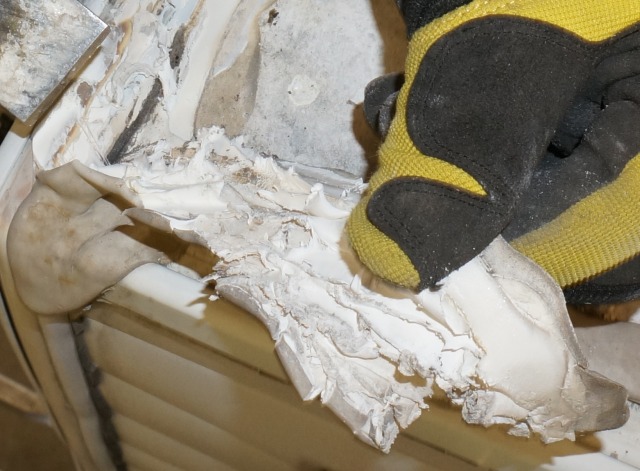
Here is caulking applied over an area not properly cleaned, and new caulk just added on top. The new caulk did not bond correctly to the old caulk. The dirt contaminated the bond. This new caulk was put on 2 to 3 years before I acquired the camper.
You can peel it up by hand
No heat, just push the putty knife into it and it comes apart the bond is so weak.


The black area/thick line next to the rear molding is dirt

A close up showing a contaminated bond from dirt.
In contrast, here is 15-year caulking on a roof vent when the roof was properly maintained, and a UV inhibitor (303 aerospace protectant) added 3 to 4 times a year after cleaning the roof.

With this, what do you do about your roof and the new caulk over the old? You may not have time before winter to deal with the new caulk already on the roof. The odds are favorable it will last a year. Two or more years is unknown. It all depends on how much-embedded dirt is in the joint. You have a few choices or combinations thereof.
1. Camp in the camper and see how well you like it. If you come late next summer and you want to hang onto the camper for a good long time, then work a long term plan for the roof and the other wall seams on the camper. (Camper wall seams is another topic and area of water intrusion. ) Ask if you want more on this.
2. Keep a good eye on the prior owners' caulk. This means getting up on the roof 4 times a year check while you are cleaning the roof and inspecting all the caulking anyway. Dig at some of the edges of the suspect caulk, will it start to lift? The unknown is when it will begin to lift; odds are favorable it will in time.
3. Create a plan to remove a section at a time on your schedule, take up the prior owners new caulk and the old caulk under it down to the roof and replace it with new until the whole roof is completed.
4. Think through how long you want to keep the camper. Do you want to consider making an Eternabond tape application to help stop trying to stay ahead of RV roof caulking failures?
5. Do the Eternabond roof treatment after all the old caulk is corrected. Consider these items before doing this. The sun damages all roof components expect the aluminum molding. The caulking, the rubber, the plastic, all of it. When are you going to replace these items from sun damage?
a. The shower dome
b. The black and gray tank vents
c. Are you going to upgrade a roof vent hatch to a fan unit?
d. Applying a roof coating to restore the white layer.
The topics listed in choice 5 surround thinking through when you want to and should do them before doing an Eternabond upgrade. This post will help explain the Eternabond upgrade.
http://www.sunlineclub.com/forums/f7...ics-11610.html
The Eternabond upgrade will seal all the roof seams. It gets away from caulking being the primary seal. I correct all caulking first, then wait at least 1 month, (can be longer, just not less) from the last Dicor caulk application for it to fully cure and gas off, then apply the Eternabond. You now have 2 good seals to keep water out, and you can rest much easier knowing a caulking failure is not going to creep up on you between your roof inspections.
This Ebonding can be installed in phases. The front and rear roof seam are the worst areas for leaks. Then the gutter rails and then all other roof penetrations. Since the tape goes over all seams, if you have old and brittle tank vents or a shower dome, it is better to replace them before doing the E bond tape over them. 10 years is a lot of sun on any of the plastic on the roof without using a UV inhibitor.
The cost of the materials for the Eternabond is approx. $250 for your size camper. Earlier this year I restored a 2005 T2363 with a whole new roof and the E bonding process on it. See here. This took me 3 ½ full workdays to apply the entire roof with Eternabond. This did not include cleaning all the areas first as it was a new roof install.
The next area is when to do a roof coating to resurface your white layer. Your roof is due for a re-coating. Since there are not yet large areas of white layer missing, you have some time to plan when to do it. I would estimate 1 year maybe 2 at the most. Sooner if you start seeing black patches start showing up. Before doing a coating, recommend you fix all the caulking first as you will roof coat over the caulking. If you plan to do the Eternabond treatment, then do that before you coat the roof as you will cover over the E bond.
Something I did not mention, does your camper have a leak in a wall or the roof that requires you pull off a corner molding? I mention this, as it is best if that leak area is repaired before doing an Eternabond treatment. Its not a mandate, as you can still pull a corner off after once Eternabond is put on the camper, you just have to cut into it and repair it after the corner molding is on.
And before doing a roof coating or an Eternabond treatment, it is recommended you do a roof inspection for prior roof leaks. The backing board under the rubber roof would then be compromised and should be repaired first as that area of the roof needs to be opened up for the repair.
If you need help with any of these leak inspections, this is the place to ask. Here is a place to start.
http://www.sunlineclub.com/forums/f7...per-17613.html
Hope this helps
John


 Linear Mode


