Journey with Confidence RV GPS App RV Trip Planner RV LIFE Campground Reviews RV Maintenance Take a Speed Test Free 7 Day Trial ×
Sunline RV Forum
Sunline User Photos

Go Back   Sunline Coach Owner's Club > Technical Forums > Modifications
Click Here to Login

Join Sunline Club Forums Today


Reply
 
Thread Tools Search this Thread Display Modes
Old 02-28-2009, 10:11 AM   #1
Senior Member
 
Join Date: Mar 2008
Posts: 351
SUN #549
frank
Winter Upgrades (FINALLY completed!)

Very very very slow progress on this stuff. Everything keeps getting in the way.

We wanted to try some winter camping, and a guy on ebay was unloading some (older model) Ultraheat tank heating pads for $20 each. I bought a pair to put on the black & grey tanks. It needs to be kind of warm out to install them, and I caught a warm day back in late November I think. They were on there for a good two months before I had a chance to run some wires to them.

Here's a shot of the heating pad on the black tank. If you look really hard, you can just make out the one on the grey tank as well..


Ultraheat also makes pipe and elbow heaters, but they are rather expensive. I added a length of heat cable to the dump pipes and valves. Once that was on, I covered the pipes with two layers of styrofoam ("sill seal", intended to go between a buildings foundation and the framing). This stuff was much cheaper than any wrap-on pipe insulation..


Wiring was run under the range cabinet, into the bathroom under the vanity cabinet, then in the wall next to the tub which leads to the converter panel..


The wires on the right side of the picture are the 12V feeds to the two heating pads. The large orange cable on the left is the 120V feed to the heat tape. We don't plan on running the heaters without an electric hookup (way too much draw), but I wanted the ability to keep all 3 heaters on in transit if need be. To power the heat tape from 12V, I modified a small inverter so it could be hardwired..


All three heaters are thermostatically controlled internally. I also added a triple switch assembly onto the access panel above the converter, to handle switching the heaters off when they're empty..


I would really like to enclose the tanks, but we need to do an axle flip to make room first. That may happen this spring.


Since everything was all apart, it was a good time to start my next planned upgrade. First, a little story..

Last September, I offered to take Kathy camping for the weekend since it was her birthday. We had some family stuff going on, so we needed to stay somewhat local in case they needed anything. We decided to try one of the NJ state parks about 30 minutes away. NJ State Parks have no hookups, so this was our first time out "boondocking."

I had tested the battery a few months prior, and it tested OK. We loaded up and got to the campground right at sundown. Got setup and started dinner when something just didn't seem right. Grabbed a voltmeter and found the battery at 8 Volts. It was too late to go run for a replacement battery, so I hooked the cable back up to the truck, started the truck and had power to run the furnace for a few minutes and make some hot water. Once the chill was gone, I shut off the truck and we got some sleep.

We made it through the night stealing power from the truck to run the fridge. We left the furnace off as I didn't want a dead truck battery. Waking up to a inside temperature of 40F is not fun!

We fired up the truck, ran the furnace, and got washed up. Then headed off to the nearest Sams Club (hour away) for a pair of golf cart batteries. Two trips, and eight hours later (first time I accidentally grabbed 8V batteries, didn't even know they made those!) and we had a pair of new energizer branded 6V batts. At the campground, I shifted things around and got the batteries strapped in and wired up. It was a really long day, but it kept us busy, and we finally had power!

Turns out, we wound up enjoying the park so much we stayed an extra night. The people at the park tell us it's always very quiet there, since the lack of hookups keeps a lot of people away. At that point, we decided to start boondocking much more often.

Boondocking means more mods!

First, I got a pair of proper 6V battery boxes for the new GC batts..


Now that it's going to get a little nicer out, I will likely make another tray and add two more golf cart batteries.

Until then, I started on some wiring upgrades. The stock wire run from the converter to the tongue is 8AWG. At 30A charge current, the voltage drop across that run is almost a volt. To help that situation, I wanted to upgrade the cable. 0AWG would have been my choice, but I had a large pile of 4AWG in the garage, and with the current price of copper..

Yesterday I ran the 4AWG from the converter to the junction box under the front couch, then another run from that box out to the tongue:


Although we will still see some voltage drop, it will be considerably less. It's been a while since I did the math, but IIRC it will be down to something like .3V, which is a big improvement for no cash spent.

Next I will pull the couch out and finish up that wiring. I'll be adding a fuse at the batteries, a disconnect switch, and will be wiring in a small inverter so we can run the crock pot on the road.

Also planned is to add a battery monitor, most likely the Victron BMV 600 (http://www.jamestowndistributors.com...pid=51843&BASE) which will allow us to keep a close eye on the status of the battery bank.

Finally, I'd like to swap out some (or all) of the existing incandescent fixtures for some small fluorescent ones. The power consumption of those fixtures is a fraction of the existing, and produce just as much (sometimes more) light. A few LEDs will likely find their way into the mix as well.

More updates (and pictures!) coming as time permits.

- Frank
__________________

__________________
frank is offline   Reply With Quote
Old 02-28-2009, 11:03 AM   #2
Moderator
 
JohnB's Avatar
 
Join Date: Nov 2006
Location: Ohio
Posts: 12,654
SUN #89
JohnB is on a distinguished road
Frank

OK I knew you had to be up to something… Cool!!

Thanks for posting the mods. Always learn something from them. An 8 volt battery??? What do they go to? Military use to use 24 volts but 8? And they sell it in Sam’s club?

Also your battery monitor. H’mm looked that one up.
Victron BMV 600

Wow that’s an advanced one as the price reflects. They are doing current monitoring in and out of the battery.

I went with at least a voltage monitor when I upgraded my new converter a 3 stage charger. Converter behind the swinging wood door not the American power panel.


http://www.voltminder.com/ All thought I did not buy it from them. Was cheaper here. http://www.bestconverter.com/

I need to use the volts and a chart to back into % charge.

And on that Victron site I found this. http://www.victronenergy.com/upload/...yUnlimited.pdf

74 pages of techy type battery stuff. My kind of reading. When I finish reading I’ll report back..... Good info

Keep up the good work

John
__________________

__________________
Current Sunlines: 2004 T310SR, 2004 T1950, 2004 T2475, 2007 T2499, 2004 T317SR
Prior Sunlines: 2004 T2499 - Fern Blue
2005 Ford F350 Lariat, 6.8L V10 W/ 4.10 rear axle, CC, Short Bed, SRW. Reese HP trunnion bar hitch W/ HP DC

Google Custom Search For Sunline Owners Club
JohnB is offline   Reply With Quote
Old 07-22-2009, 09:51 AM   #3
Senior Member
 
Join Date: Mar 2008
Posts: 351
SUN #549
frank
After my last post, I got very tied up for a couple of months remodeling the kitchen.

Once that was finished, I was able to get back outside and finish up the work on the Sunline. It's a bit overdue, but here's a quick update on what I wound up with.

Here's where I had left off, this is the original Sunline power distribution/junction box under the couch. Also seen is the new wires I ran to the converter and to the tongue.


Back to work, and out to the tongue. I added a disconnect switch out front, and got the batteries wired up with the new heavier cable:


Then it was back inside to remove the couch and construct a new (larger) junction box to replace the original. Disconnected all the old battery wiring and connected in the new stuff using some junction blocks. I also replaced the small auto-reset circuit breaker with a 12V panel mount type (larger lugs, easier to connect that big cable). The original 30A fuse shown in the picture will be replaced with another panel mount breaker when I get a chance to order one.

Finally, I installed a small inverter to the top of the new box. The inverter is there to run a crock pot while on the road - we used it on our trip 3 weeks back and it was great to walk into hot dinner after 9 hours of driving!


Same box with the cover back on:


Then it was back out to the tongue to install the shunt for the battery monitor. The shunt is housed in a watertight plastic box to protect it from the elements:


and with the cover on:


Ran the connection cable from the shunt back to the converter panel area, where the monitor display will reside. I then installed the monitor display in the removable panel above the converter:


Here's a close-up shot of the display itself:


Apologies to the non-techie types

- Frank
__________________
frank is offline   Reply With Quote
Old 07-22-2009, 06:58 PM   #4
Moderator
 
JohnB's Avatar
 
Join Date: Nov 2006
Location: Ohio
Posts: 12,654
SUN #89
JohnB is on a distinguished road
Frank

Very nice. You do good work.

I seemed to miss the circuit breaker you said you changed. Where is it hiding? And what is that little round thing next to the inverter? Or is that it?

How did you get # 4 wire on that setup?

Your converter, did you upgrade that to a WFCO? That looks a whole lot of new for your year camper.

I re-read your original post to bring back the memories. Still can’t figure out where an 8 volt battery goes and why they sell them at Sams Club….

Thanks for sharing. I’m going to have to measure my voltage drop between battery and converter now that you mention this. I added 2 group 27 batteries this spring.

John
__________________
Current Sunlines: 2004 T310SR, 2004 T1950, 2004 T2475, 2007 T2499, 2004 T317SR
Prior Sunlines: 2004 T2499 - Fern Blue
2005 Ford F350 Lariat, 6.8L V10 W/ 4.10 rear axle, CC, Short Bed, SRW. Reese HP trunnion bar hitch W/ HP DC

Google Custom Search For Sunline Owners Club
JohnB is offline   Reply With Quote
Old 07-23-2009, 11:34 AM   #5
Senior Member
 
Join Date: Mar 2008
Posts: 351
SUN #549
frank
Quote:
Originally Posted by JohnB
Frank

Very nice. You do good work.

I seemed to miss the circuit breaker you said you changed. Where is it hiding? And what is that little round thing next to the inverter? Or is that it?

How did you get # 4 wire on that setup?

Your converter, did you upgrade that to a WFCO? That looks a whole lot of new for your year camper.

I re-read your original post to bring back the memories. Still can’t figure out where an 8 volt battery goes and why they sell them at Sams Club….

Thanks for sharing. I’m going to have to measure my voltage drop between battery and converter now that you mention this. I added 2 group 27 batteries this spring.

John
Thanks, John!

Yep, that little round thing in the panel next to the inverter is the circuit breaker I used. That one sits in between the converter and the battery. The fuse sits between the TV charge line and the battery. I'll replace that fuse with a second breaker when I have a chance.

Here's the data sheet on the breaker: http://www.bussmann.com/pdf/13efbc81...dc73c4c90c.pdf It has #10 threaded studs on the back with plenty of spacing to accept an eyelet connector crimped onto the #4 wire. As you can see in the picture, I used those large terminal blocks to connect the #4 runs and tie in the smaller coach wiring. The blocks came from home depot and are aluminum, so I used a bit of noalox to prevent dissimilar metal corrosion. I believe the original battery to converter wiring was #8 (or maybe even 10) and was all connected with large wire nuts.

The WFCO converter was in the coach when I bought it. I had just assumed it was standard issue Sunline until I started the electrical work and found a price tag stuck on the housing. I figure the stocker died and then was replaced with the WFCO. If memory serves, it's the 8945 model.

Hopefully the fatter cable will help (slightly) reduce bulk charge times. I would have went larger, but I already had a big pile of #4 sitting here.

- Frank
__________________
frank is offline   Reply With Quote
Old 07-23-2009, 09:00 PM   #6
Moderator
 
JohnB's Avatar
 
Join Date: Nov 2006
Location: Ohio
Posts: 12,654
SUN #89
JohnB is on a distinguished road
Quote:
Originally Posted by frank

Hopefully the fatter cable will help (slightly) reduce bulk charge times. I would have went larger, but I already had a big pile of #4 sitting here.

- Frank
Frank

Mr Tweety and I have this, what is limiting the charge rate to the battery post still in question. I think the charger is limiting the bluk mode to C/8 of the battery. But I have not yet been able to prove it or find it in documentation. Other wise why would it not want to try and put up to 60 amps in if the battery was way down and pop the 30 amp circuit breaker in the process.

Your shunt and meter should help give test feedback on the max amps it will put in. I have to get an onbaord amp meter yet.

Please report back with good data once you get it. Us tech'y tpes are into this stuff....

John

PS if you come to Nicks lake in September, we can both validate your charge rate...
__________________
Current Sunlines: 2004 T310SR, 2004 T1950, 2004 T2475, 2007 T2499, 2004 T317SR
Prior Sunlines: 2004 T2499 - Fern Blue
2005 Ford F350 Lariat, 6.8L V10 W/ 4.10 rear axle, CC, Short Bed, SRW. Reese HP trunnion bar hitch W/ HP DC

Google Custom Search For Sunline Owners Club
JohnB is offline   Reply With Quote
Old 07-23-2009, 09:02 PM   #7
Moderator
 
JohnB's Avatar
 
Join Date: Nov 2006
Location: Ohio
Posts: 12,654
SUN #89
JohnB is on a distinguished road
Oh and I forgot

I really like that Bussman breaker. Have to find some. Thanks

John
__________________
Current Sunlines: 2004 T310SR, 2004 T1950, 2004 T2475, 2007 T2499, 2004 T317SR
Prior Sunlines: 2004 T2499 - Fern Blue
2005 Ford F350 Lariat, 6.8L V10 W/ 4.10 rear axle, CC, Short Bed, SRW. Reese HP trunnion bar hitch W/ HP DC

Google Custom Search For Sunline Owners Club
JohnB is offline   Reply With Quote
Old 07-24-2009, 05:04 AM   #8
Senior Member
 
Join Date: Jun 2007
Location: New Hampshire
Posts: 1,025
SUN #292
Honda03842 is an unknown quantity at this point
Power

Frank,

How many watts are the Ultraheat pads?

Thank you,

Norm
__________________
Norm and Ginny Milliard
1982 Sunline 15.5 SB
2004 Honda CRV 4 cyl, manual
Honda03842 is offline   Reply With Quote
Old 07-24-2009, 11:00 AM   #9
Senior Member
 
Join Date: Mar 2008
Posts: 351
SUN #549
frank
John (and Mr. Tweety, if you're reading),

We've only been out once this year, and we had electric hookup, so I haven't had a chance to really run the batteries yet. September it should be nice enough out for us to go to the non-hookup locations. Nick's Lake might very well be our first time out on battery this year.

I know you mentioned you have a clamp-on ammeter. I do as well. If we're all going to be up there, I can bring that along and maybe some other test equipment and we'll do some measuring. I'll have the little genset along as well.


Now, the charge rates - I'm far from an electrical engineer (I dropped out after a few semesters, but that's a different story). In other words, I know enough to be dangerous

That said, here's a few of my thoughts, for what they're worth..


First, a little google action found this post (https://www.goodsamers.com/members/f...g/22696582.cfm) on another forum, where a gentleman contacted WFCO in regards to current limiting on their converters. He supplied the following answer from WFCO:

"For any of our converters there is no way to control current entering into the battery. If the battery resistance is low it will draw up to the limit of the converter minus the electrical load of the RV.
Be Well,
Daniel Derrow
Technical Support
Phone: 877 294 8997 ext. 106
d.derrow@wfcoelectronics.com
www.wfcoelectronics.com"

Interesting, since my 8945 states a maximum of 30A fuses on the charge connection. Those haven't blown yet, but I think that's what started you guys on this discussion before

Of course, other brands may differ. But in this world of cheaper-to-build-is-better, maybe not?


The WFCO answer mentions Battery resistance, which turned on a lightbulb in my head. Battery chemistry is really complex, and I won't claim to know much, but I do remember reading that internal resistance of a lead-acid will change with State Of Charge. Back to google, where I found this (http://www.batteryuniversity.com/partone-22.htm):

"The resistance of lead acid goes up with discharge. This change is caused by the decrease of the specific gravity, a depletion of the electrolyte as it becomes more watery. The resistance increase is almost linear with the decrease of the specific gravity. A rest of a few hours will partially restore the battery as the sulphate ions can replenish themselves. The resistance change between full charge and discharge is about 40%. Cold temperature increases the internal resistance on all batteries and adds about 50% between +30°C and -18°C to lead acid batteries."

There's a pretty little graph included on the page showing the curve of internal resistance vs. SOC.

OK, so the SOC of the battery would play some role in the observed charge current.


Next, I was thinking about what made me do the wire upgrade - The effect of voltage drop across the charge cables. I like examples, but to keep it simple (and me sane), a few caveats: We'll only calculate the positive cable run, since the negative could get very complex being that the chassis, several connections and at least two seperate wire runs are invovled. We'll also assume there is no added resistance on the positive charge cable from connections, connectors, corrosion, fuses and/or circuit breakers.

A Wire chart tells us the following:

8 AWG has a resistance of .6405 ohms per 1000'
4 AWG has a resistance of .2533 ohms per 1000'
0 AWG has a resistance of .096 ohms per 1000'


Assuming a charge rate of 30A and a positive charge cable run of 20', voltage drop is (V=RI):

8 AWG: .3843 Volts
4 AWG: .15198 Volts
0 AWG: .0576 Volts


Voltage drop will decrease as charge current decreases. Run the numbers again, same length wire, this time with a 10A charge current:

8 AWG: .1281 Volts
4 AWG: .05066 Volts
0 AWG: .0192 Volts


Conversely, if charge current increases, so will voltage drop. Say you have a nice beefy converter and can charge at 50A:

8 AWG: .6405 Volts
4 AWG: .2533 Volts
0 AWG: .096 Volts


I think 20' is a pretty fair cable length on most of our coaches. 30A seems like a reasonable current. So the stock cable would chew up .3843 volts. That's probably enough to prevent some chargers from entering the high-rate mode. I've read a few posts on other forums where guys with WFCO's were complaining they never saw boost mode; they all say "problem solved" when they beef up the charge cable.


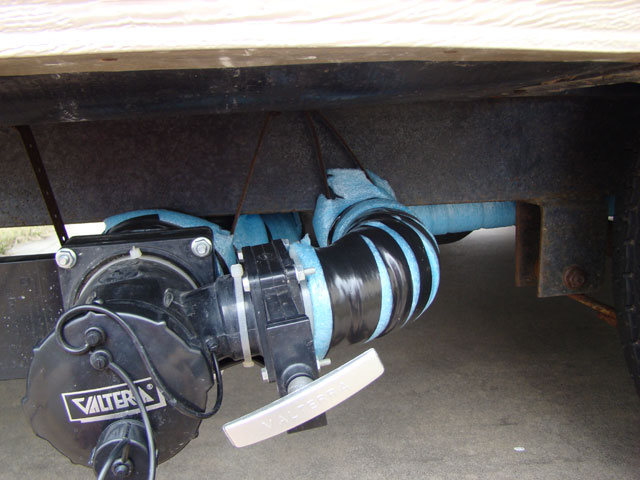
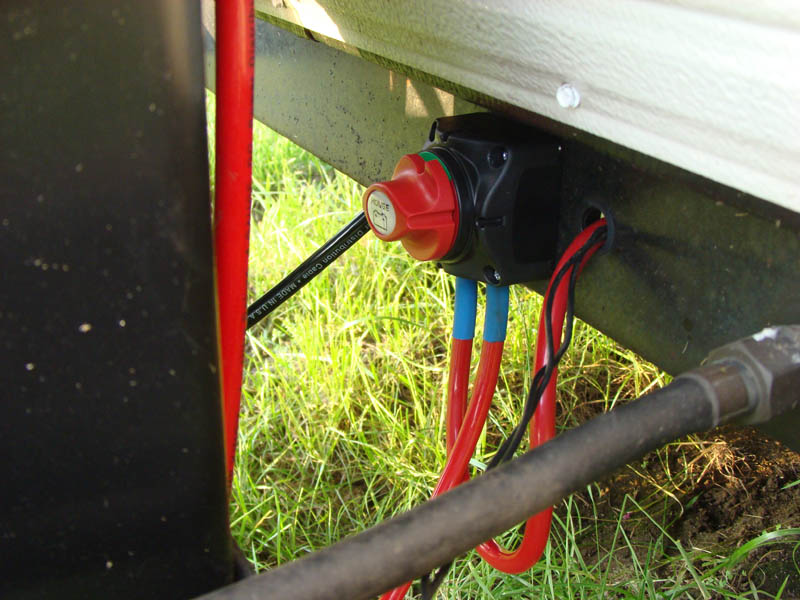
One last thought - connections. When working on the 2363, I've learned that Sunline (and from what I hear, a lot of manufacturers) have a love of wire nuts. Wire nuts are great on sticks and bricks wiring that doesn't move, but IMO, using them in something that bounces down the highway at 65 mph is probably not the best idea. My unit had several wire-nutted connections on the charge line, all a possible place for a less than ideal connection and more resistance. Also, when I crawled under the coach, I found the negative battery cable lug pretty corroded where it attached to the frame. Again, more resistance.


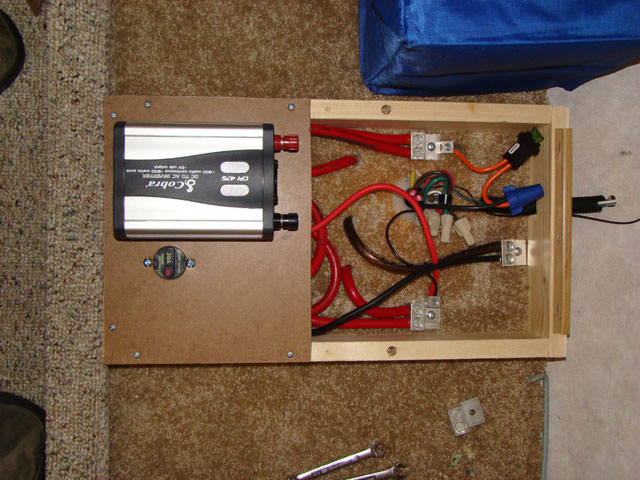
PS: John, I got the Breaker from this dude: http://cgi.ebay.com/Bussman-DC-Circu...3286.m20.l1116, came fast, price was reasonable. They also make a surface mount version, like this 50A model: http://cgi.ebay.com/Bussman-DC-Circu...4.c0.m14.l1262. I *think* the surface mount one comes in 30A as well, but he don't have them.

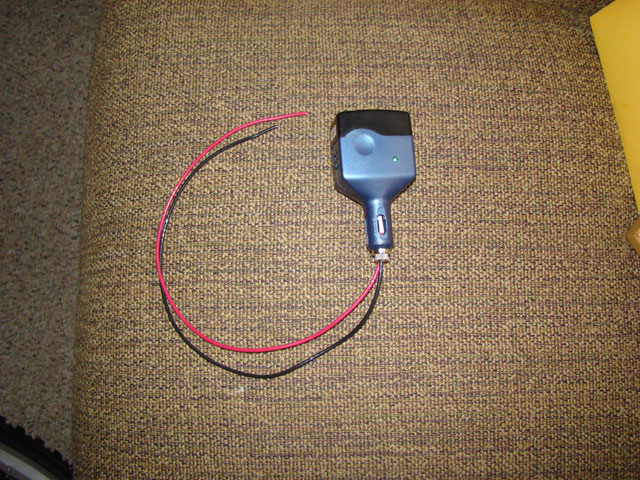
PPS: An inexpensive way to get an high-current ammeter into the coach: http://cgi.ebay.com/Blue-LCD-Digital...3A1%7C294%3A50. Bunch of different styles and shunt ratings on ebay, all very reasonable around $20 for the meter+shunt package.

PPPS: Norm, I dont recall off the top of my head. I will try to take a peek under there today and see if they are marked.


- Frank
__________________

__________________
frank is offline   Reply With Quote
Reply


Currently Active Users Viewing This Thread: 1 (0 members and 1 guests)
 

Posting Rules
You may not post new threads
You may not post replies
You may not post attachments
You may not edit your posts

BB code is On
Smilies are On
[IMG] code is On
HTML code is Off
Trackbacks are Off
Pingbacks are Off
Refbacks are Off


Similar Threads
Thread Thread Starter Forum Replies Last Post
Dear Wife (DW) Modifications/upgrades to the camper JohnB Sunline Community 2 09-27-2012 07:50 PM
Fridge Inside Upgrades JohnB Modifications 11 11-27-2009 08:39 AM
Pics of some more mods completed...... jsms264 Modifications 12 09-01-2009 09:42 PM
Camper Water System Upgrades (T2499) JohnB Modifications 26 11-14-2007 10:19 PM
Costly Upgrades and Great Service!! emam Repairs and Maintenance 2 08-19-2007 05:01 PM


» Featured Campgrounds

Reviews provided by

Disclaimer:

This website is not affiliated with or endorsed by Sunline RV or any of its affiliates. This is an independent, unofficial site.


All times are GMT -6. The time now is 08:34 AM.


×