Journey with Confidence RV GPS App RV Trip Planner RV LIFE Campground Reviews RV Maintenance Take a Speed Test Free 7 Day Trial ×
Sunline RV Forum
Sunline User Photos

Go Back   Sunline Coach Owner's Club > Musikaldave's Profile > Albums
Click Here to Login

Join Sunline Club Forums Today


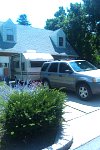
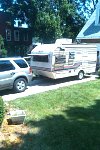
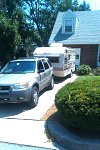
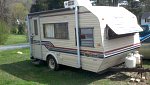
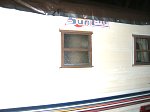
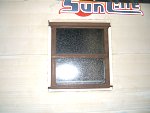
Our 1987 Sunline Saturn T-1661
A few weeks ago, I purchased our first camper. It's a Sunline Saturn T-1661.

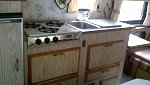
I found this little gem on Craigslist and bought it for a $1,000.00. I was very impressed to discover that ALL of the accessories are in good working condition including the air-conditioner, refridgerator, stove, lights, furnace etc.

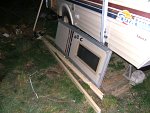
The trailer frame was in great condition, barely any surface rust. I wire brushed the tounge and bumper and gave it a coat of glossy rustoleum black paint. I'll be using the same paint on the rails beneath.

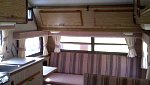
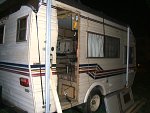
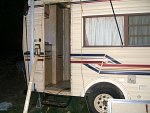
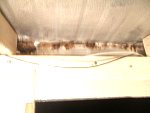
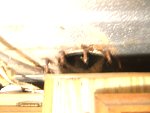
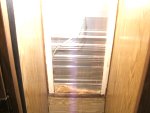
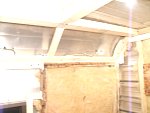
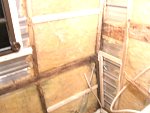
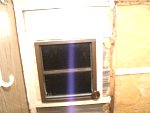
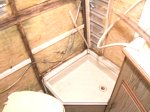
It had some damage to the rear interior due to a leaking roof. There were leaks around the roof vent, the vent pipes and I found some holes in the body.

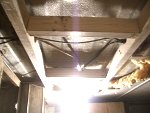
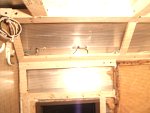
I have been reworking the damaged section by ripping out all the rot and reframing it.

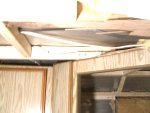
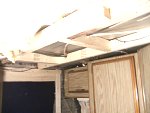
It was a bit of challenge at first, trying to find a place to begin the restructuring, because I wanted to build up from the base and then throughout.

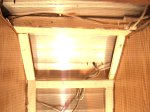
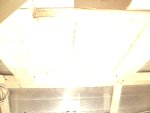
I began at the door jam after removing and reworking the door and then I worked my way across the ceiling to the other side, cutting away the bad material and tying in the new with the old.

The bathroom area is finished, taking about two days to complete. I'm now working through the cabinet area and back over to the door jam. With a total of 4 days work I'll be finished with the framing and new insulation by the end of this weekend.

Once the interior walls are completed, I'm adding a exterior cable tv connection for use with satelite tv or cable or a coaxial antenna.

I also have to trade-in the 25 year old propane tanks and get a new set and a cover.

Things to come;

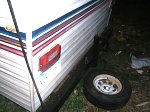
1. New tires, possibly breaks.
2. New shut off valve behind toilet.
3. New wiring harness/adapter for towing.
4. Exterior running lights

I hope you enjoy the pictures I'm posting of the work I'm doing on this camper. If you have any questions please feel free to contact me, I will share any knowledge I have.

Thanks for viewing!

David and Pamala
More work to finish but she's off the side of the house!
She's in the driveway!
She's off the side of the house and made it to the driveway!
The latest addition!
Kitchen area.
Sofa and bunk area.
The rear bumper. Wire brushed and painted with glossy rustoleum black.
Bathroom window from the exterior.
Bathroom window reseeled with plumbers putty between the window frame and body. The putty actually seels through into the interior when the screws...
Another view of the door area.
Door area at the rear end showing some of the reframing from the exterior.
The door was reworked as the framing was rotted from the seepage above the jam area where you see the screws and holed in the body. I'll be putting...
Some of the body screws above the door. Also some holes where the old awning was mounted. It was either pulled off or fell off and took some metal...
Vent pipe and screws (major leaker) the vent pipe cap on the roof cracked and allowed major seepage, you can see the rust on the screws. Everything...
Ceiling frame work and repairs.
Ceiling frame work and repairs, showing some of the new door jam area.
Another view of the ceiling frame work and repairs from the outside looking in.
Top portion of rear center cabinet, restructuring/repair work.
Restructuring and repairs of a top rear center cabinet.
New frame work in bathroom ceiling, the vent, resealed using plumbers putty and overcoated with spray on rubber on the roof.
The new frame work on the upper rear portion of the bathroom walls. Some of the new ceiling frame work.
Bathroom walls in the rear of the camper showing newly added strengtheners and some frame repairs.
Ceiling and back wall frame work showing a portion of the vent area. I retied all the wiring in the walls to keep it organized and in place using 4"...
Bathroom window reworked with new framing, seeled from the exterior with plumbers putty, using 1-1/4 self tapping screws.
Strengtheners and frame repairs in the bathroom around the shower basin.
Disclaimer:

This website is not affiliated with or endorsed by Sunline RV or any of its affiliates. This is an independent, unofficial site.


All times are GMT -6. The time now is 07:13 AM.


×