Journey with Confidence RV GPS App RV Trip Planner RV LIFE Campground Reviews RV Maintenance Take a Speed Test Free 7 Day Trial ×
Sunline RV Forum
Sunline User Photos

Go Back   Sunline Coach Owner's Club > Technical Forums > Repairs and Maintenance
Click Here to Login

Join Sunline Club Forums Today


Reply
 
Thread Tools Search this Thread Display Modes
Old 07-10-2016, 03:21 PM   #1
Junior Member
 
Join Date: Aug 2015
Location: Quebec
Posts: 8
SUN #7736
Bee-Jen is an unknown quantity at this point
Sunline T-2675 completed front end roof repair with pictures

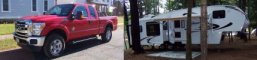
I own a sunline T-2675 which had water infiltration in the front end of the roof. Before starting the project, I greatly benefited from all the information and pictures available on this forum and have been meaning to put together a post with all of mine so that others can benefit. The repair job was completed in September 2015. Here is a picture of the very wavy roof before I attacked it.


I decided to do the work outdoors in my yard. A 60x30ft tarp was used to cover the trailer at night (and did a very good job with some very heavy rain). I also completed the job on 3 sets of scaffolding so that I could work at a comfortable height.


First job, taking things apart: remove awning screws and slide it back as I needed to get the gutter rail trim off in the area, remove sealant and trim and carefully remove staples from the edpm to lift up the front end.

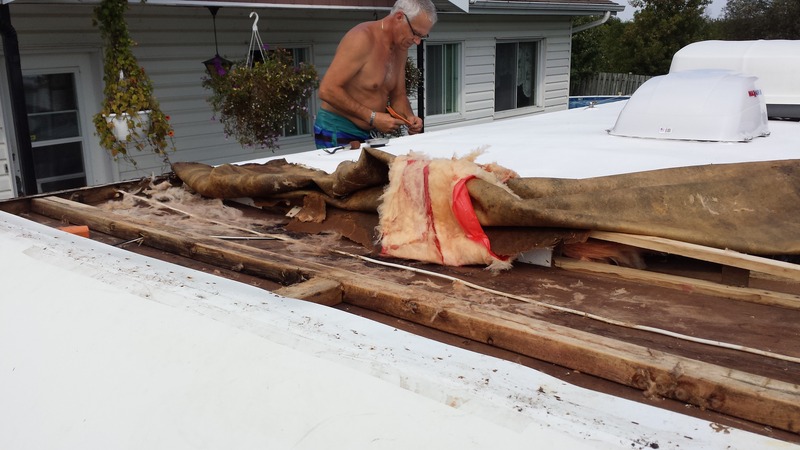
Lifting the membrane, I was greeted with a very very wet budboard. No wonder the roof was so wavy. The insulation had soaked up a lot of water. I was very lucky as it appears I did the roof work before any permanent wood damage due to rot took place. Even the ceiling board didn’t have any soft spots. I let the whole thing air out in the sun all afternoon.
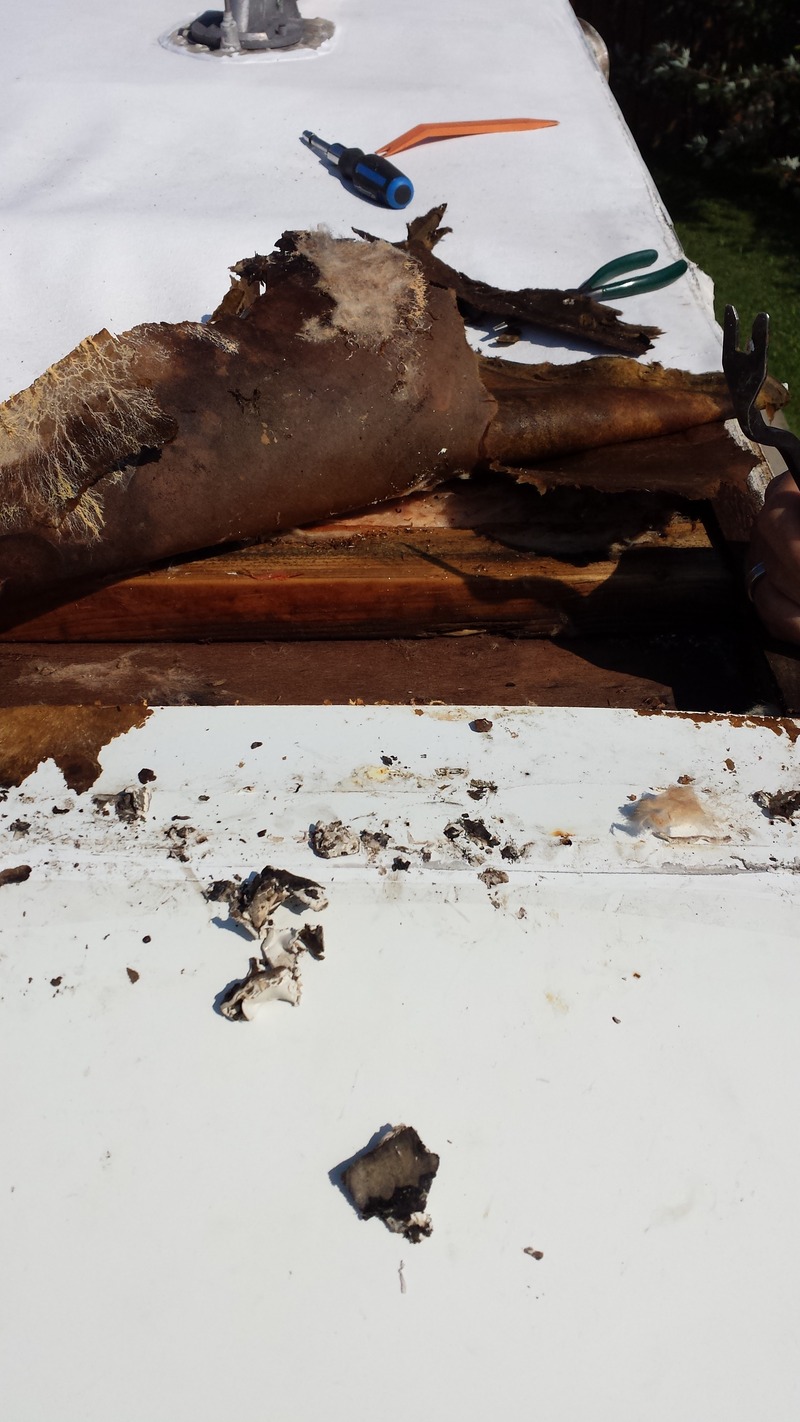


Notice how the trusses are made in the ‘new style’ sunline adopted in the early 2000’s. Top and bottom chord linked together with pieces of stapled in panelling. One of my trusses had split so I also did some wood repairs and added a few vertical members that I glued in to help strengthen the whole thing. I staple back in some of the luan pieces to ensure everything held on tight.


Before putting in new insulation, I decided to use a paintbrush to spread a bit of bleach over all the wood that had been exposed to water just in case any mold might have wanted to spread in the roof area. I let the whole thing dry before installing new batt insulation in between the trusses. To replace the budboard, I used 3/8 inch plywood. Once screwed in place, I used tuck tape over all the heads, wood knots and ‘square’ exterior panel edges to compensate for the job the budboard used to do. My local RV shop was able to sell me the end of a container of edpm glue which was enough for my job and great as it saved me some money and trying to figure out what to do with a huge container of the stuff. We spread it on with a paint roller before folding the membrane back in place and attempting to remove all the air bubbles.


After that, staple the membrane back to the trailer, new butyl tape between the roof membrane and gutter rail and install mostly new screws (we re-used a few when things were tight because the heads on the old screws were just a tad smaller). Reposition the awning and put the lag screws back in. Seal everything with Proflex and Dicor self-leveling sealant. Re-install the front trim + new butyl + additional sealant for weird positioning. I seem to have forgotten to take pictures of this step as I was racing against the clock as I knew we had rain on the horizon.

Initial ‘demo’, drying, re-structuring and re-gluing of the membrane, stapling and installing front frim piece was a 2 day job for 2 people with a shopping trip for missing material thrown in there.

The job of sealing the side trim was longer than originally expected as I decided that I was going to remove the full length of the Proflex sealant to re-do the whole thing. Taking things apart and re-structuring was fast-going but I found that re-sealing everything was time consuming (part of it from lack of experience, and part of it from wanting to do the best job possible). Overall I am happy with the job and it should give me a number of years of life from this roof.

Next job: removing the corner trim on the back end and tearing out part of the floor in the garage area due to the gel coat finish and plywood having been hit in the past in the bottom corner and slowly allowing water infiltration through the bottom of the wall.
__________________

__________________
Bee-Jen is offline   Reply With Quote
Old 07-10-2016, 06:12 PM   #2
Senior Member
 
Join Date: Sep 2010
Location: Michigan
Posts: 854
SUN #1546
apackoftwo is an unknown quantity at this point
Wow! Its wonderful when you can do these things yourself
Save yourself a bunch of money plus no one will take as much time
to do a great job as the person who owns it
__________________

__________________

Joan & Miss Emme Lu Who
Full Timing in T-1950 2005 Anniversary Model
1997 6.5L Chevy Turbo Diesel Truck
"Pure Michigan"
Facebook: Apackof2 for the Rd
apackoftwo is offline   Reply With Quote
Old 07-10-2016, 06:16 PM   #3
Moderator
 
JohnB's Avatar
 
Join Date: Nov 2006
Location: Ohio
Posts: 12,649
SUN #89
JohnB is on a distinguished road
Hi Bee-Jen,

Great job!!! Very nice.

By the looks of the ceiling and rafters, you did the repair just in time. Waiting another 6 months to a year would of been a quantity of rot repair.

Did you find the water intrusion point or points? Front seam, side seams or side corners?

Thanks for sharing. This is good stuff to help others in the future.

One question, The Tuck tape you used on the seams, that is interesting. I can only seem to find it in Canada. The Dicor site stated to use fleece tape which we could not find when we did our sons' roof.

Is this the product? Cantech - Tuck Tape, Industrial Tapes, Construction Tapes, Consumer Tapes, Adhesives, Tape Dispensers, Hockey Tape and laces are in stock at Cantech

http://www.cantech.com/_data_/pdf/sales/205_En.pdf

Thanks

John
__________________
Current Sunlines: 2004 T310SR, 2004 T1950, 2004 T2475, 2007 T2499, 2004 T317SR
Prior Sunlines: 2004 T2499 - Fern Blue
2005 Ford F350 Lariat, 6.8L V10 W/ 4.10 rear axle, CC, Short Bed, SRW. Reese HP trunnion bar hitch W/ HP DC

Google Custom Search For Sunline Owners Club
JohnB is offline   Reply With Quote
Old 07-10-2016, 08:05 PM   #4
Junior Member
 
Join Date: Aug 2015
Location: Quebec
Posts: 8
SUN #7736
Bee-Jen is an unknown quantity at this point
JohnB, yes, that's the stuff. It's a very nice tape to keep handy as it doesn't seem to be affected by water or cold. I use it to tape the bubblewrap insulation around my beedhives in the winter so it's exposed to both.

For the water intrusion point, to me it seems to have been the front seam as the joint was broken and coming apart. We took the unit out once before I did the repair and I had duct taped and gorrila taped the front seam as much as possible to reduce additional water and also riding down the highway, without the structure of the budboard, the membrane just wanted to balloon up.
__________________
Bee-Jen is offline   Reply With Quote
Old 07-10-2016, 08:37 PM   #5
Senior Member
 
Steve Collins's Avatar
 
Join Date: Apr 2007
Location: New York
Posts: 1,846
SUN #264
Steve Collins is an unknown quantity at this point
Sold in the US as InterTape or Venture Tape sheathing tape. Sounds like it might be just as useful as EternaBond, especially for emergency repairs.
__________________

'12 F250 4x4 Super Duty PowerStroke 6.7 diesel
2011 to present: '11 Cougar 326MKS
1999 to 2011: '99 Sunline T-2453
SUN264 * Amateur Radio kd2iat monitoring 146.52
Steve Collins is offline   Reply With Quote
Old 07-13-2016, 07:25 AM   #6
Member
 
Join Date: Mar 2010
Posts: 37
SUN #1022
Sunny06
Thanks

I got some water issues in our little Palomino TC to deal with, and hopefully none in the Sunny
__________________
Dave & MaryAnn Piper
2006 T264SR Solaris Classic
2018 F350 Dually 6.7 PSD
Ginger(Weenie Dog)
Long Time Members
Sunny06 is offline   Reply With Quote
Old 10-15-2016, 08:57 AM   #7
sep
Senior Member
 
sep's Avatar
 
Join Date: Aug 2015
Location: Connecticut
Posts: 164
SUN #7710
sep is an unknown quantity at this point
i put my repair off for long enough

Thanks to you and some other folks who have posted about their repairs. I have to do a section but it is in the back portion of the roof. I also had questions about the tuck tape but it looks like they were already answered so I will look for it locally. Did you notice any dry rot cracks on your EDPM? if so, is that why you sealed the top with Proflex and the dicor self leveling stuff?

Steve P.
__________________

__________________
Steve P
sep is offline   Reply With Quote
Reply

Tags
roof repair, t-2675, water leak


Currently Active Users Viewing This Thread: 1 (0 members and 1 guests)
 
Thread Tools Search this Thread
Search this Thread:

Advanced Search
Display Modes

Posting Rules
You may not post new threads
You may not post replies
You may not post attachments
You may not edit your posts

BB code is On
Smilies are On
[IMG] code is On
HTML code is Off
Trackbacks are Off
Pingbacks are Off
Refbacks are Off


Similar Threads
Thread Thread Starter Forum Replies Last Post
T2075 completed maiden voyage to Maine Codder0511 Introduce Yourself 1 05-21-2012 02:26 PM
Roof replacement is completed Capt Skup Repairs and Maintenance 5 04-11-2012 05:10 AM
Pictures, yes I got some pictures posted kanyonkitty Sunline 5th Wheels 8 12-20-2009 07:13 AM
Pics of some more mods completed...... jsms264 Modifications 12 09-01-2009 09:42 PM
Winter Upgrades (FINALLY completed!) frank Modifications 8 07-24-2009 11:00 AM


» Featured Campgrounds

Reviews provided by

Disclaimer:

This website is not affiliated with or endorsed by Sunline RV or any of its affiliates. This is an independent, unofficial site.


All times are GMT -6. The time now is 03:20 PM.


×