With Tommie's help on the Chrome/Edge browser I was able to view the video several times if needed. As FYI Admin is looking into this as I type.
Now to the video and the pic.
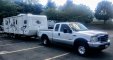
Your 1st video which shows the back of the camper with the roof rail, shows water made it in the rear wall to roof seams and possible partly down the rear right side at the gutter rail. This roof railed area should of had OSB approx 3/8" thick, maybe 7/16". By your finger pressing tests the water has affected the glue in the OSB and separated into wet chips/chucks. The stiff area near the roof rail attaching points is a rafter underneath. They run left to right of the camper.
To stop future water from getting in, you will need to tape the rear seam from the rubber and over the top of the rear wall molding and then Dicor seal the edges of the tape.
You have to really clean the rubber well to get the tape to stick. Is that Eternabond or other form of butyl tape? If I knew which type I could help on how to clean the rubber preparing it for the tape and pass that along.
This rear wall pick shows what I just mentioned

Your 2nd video showed the front seam from the roof to the front wall. You did a good job with the tape you used and the caulk.
The rubber bouncy feel you are feeling is what the rubber will feel like when the budboard on the back side is wet soaked and seperated. The stiff member a few inches towards the back, approx 6" or so, is a rafter in the roof system. I doubt there is any OSB board (not plywood) that far up from by your pics. So the OSB did not rot away, the heavy corrage board did.
You can confirm if you want to, if it is budbaord or OSB. If it is OSB it should get real hard over a very large area once your are out of the rubber bouncy area, like in the back of the camper in the roof rail area. If it is budboard it will be stiffer then the bouncy rubber tire tube only feel, more like a heavy cardboard box feel.
There for sure was a leak on the front left seam you showed in your video. With a leak that large, odds are high water went down the corner of the front wall. It may have infected some of the front wall and some of the left side wall. The water will keep flowing down by gravity . How far down and how much was absorbed by insulation, wall board luan etc depends on the quantity of water. Less water may not have made it to the floor. Enough water, would make it to the floor and into the basement of the camper. It would stop there are there is a black plastic membrane called Darco that prevents road splash water from getting in. And it also prevents water from getting out.
The right rear floor infection,

I would more point to that came down from the right rear roof leak. The water was enough in volume it made it all the way to the floor. It also looks like the wet started in the right rear corner in the floor and spread outwards. If the leak come in the cargo hole, the wet would be expected to be in front of the door itself.
Some day when the time comes and your thoughts you mentioned in the video about taking the whole roof off, that can "depend". The front seam will need to be opened up to address that area. The rear seam will need to be opened up and address that area. Once you get the front and back open you can access it you need to remove the entire roof. Once the front and rear seams are open and the gutter rails partly taken off, there really is not a lot left to the whole roof.
If you really like the camper and want to kept it a good long time, then putting a new roof on will reset the entire roof wear clock and insure you found all the water leaks and have created a total new seal. It is not that much more work. Odds are high the front wall and the rear wall will need come off, water made it's way to the bottom floor area. There may be some side wall areas of wet too at those leak area. That is all fixable and is independent of the roof.
I see the camper is what looks like inside a building in your video. If you have access to that for a good amount of time, then the repairs can be done inside which is extremely helpful over winter months. Even if it is unheated.
If you get a moisture meter, like in this post,
http://www.sunlineclub.com/forums/f7...per-17613.html You can use it to scan the inside, outside, bottom and possible even the roof of the camper to see how far the water went. It is a very good tool to help tell you what you can may expect.
You are doing a good job of sealing it up to help stop new water from getting in. Good for you! Get it all sealed up and have some fun with it. You can then sort out in your head what you want to do. Having fun with the camper helps melt away some of the tension you are feeling right now.
We are here to help as best we can and are rooting for ya!
Hope this helps
John


 Linear Mode


