Hi Jim,
What you are describing is very close to what I have seen on other brands of campers as a OEM fix to the cracking slide floor end problem. Just they used a plastic molded part in place of your aluminum. I will see if I can find those pics I took of it. It is buried in my pile of never ending other camper pics of ideas if I can find them. Key is what year did I take them??
What you are proposing is good, just I will add a few things.
1. The length, you mentioned
Quote:
|
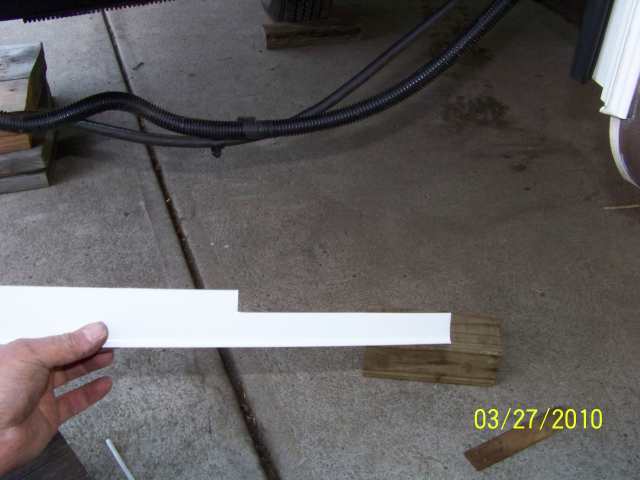
. My thought is to have my metal shop friend cut two pieces of very thin aluminum about 5" wide and as long as the slide is when open.
|
My thoughts are you need it longer than just the length with the slide open. Reason being is, the weight of the slide is mostly supported by the wall ends, meaning the front wall and the rear wall of the slide. When the slide is open there is still weight on the slide wall ends.
When the slide retracts in, my preconceived notion is there is a chance the new angle strip can "catch" the edge of the strip on the embed slide system supporting the floor and over time do it some damage.
My thought would be this. Do as you described but make the angle shaped strip longer, it will need to go up under the floor and inside as far as practical that is still inside the camper. This way the strip will never have a "bump" edge to catch on the new aluminum strip when the slide comes in.
I have found I can lift my slide at least 1/2" up vertical when the slide is full open. I use a jack at the wall end and lift. It will go up easy. You only need to raise it say 1/8", then slide the new angle strip in. Ideally you can fasten it on the inside. When the slide is full in, hoping you can get to that area to at least put a fastener or staple that will not get hit on the way out.
Here is how I lifted mine.
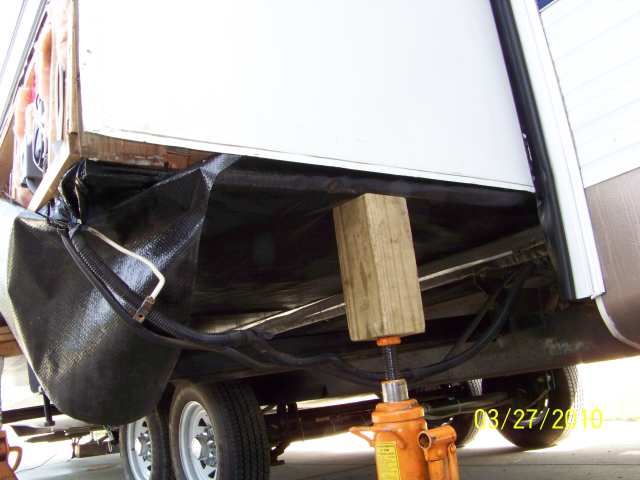
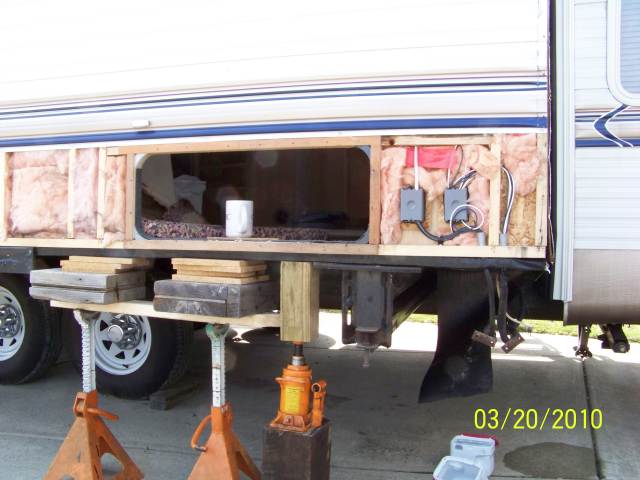
Once it is lifted you can support it along the long outside wall. Like this as you need to get the lifting jack out of the way to put your angle strip in place.
2. Where to install the angle on the wall. You did not mention this but may be thinking it, I will just suggest my view on how I would do it.
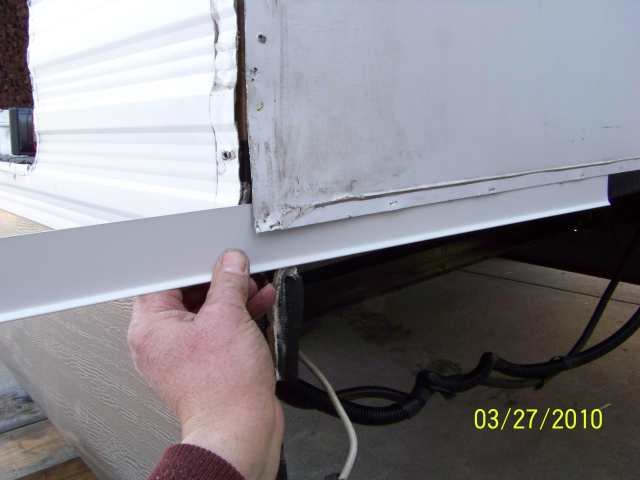
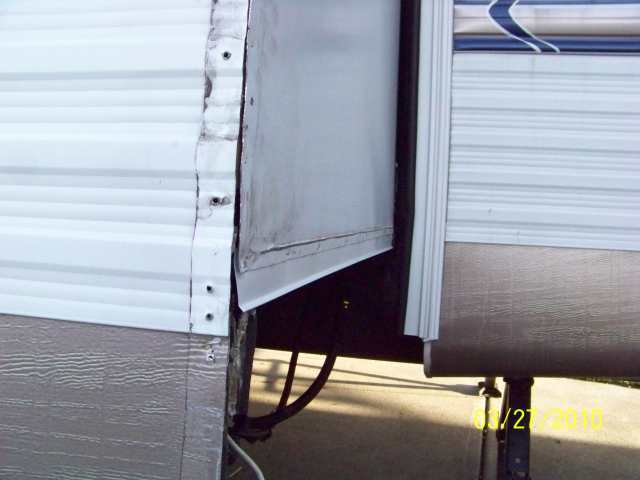
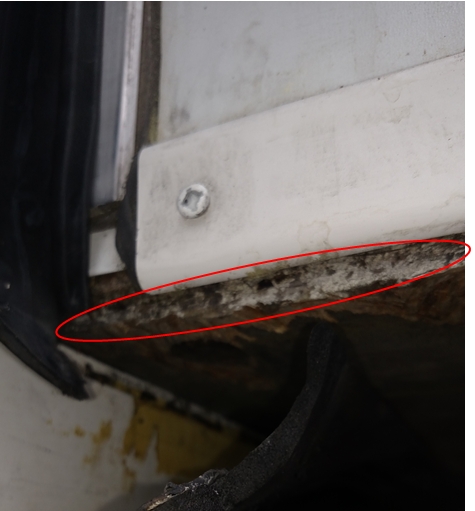
Remove the molding at the bottom of the slide end walls. It will look something like this when you take it off. Once you take the screws out, the strip will come off. If it is stuck on well, using a heat gun or hair dryer, warm the strip and that will soften the putty tape and it will come off with a little gently prying.
Then there may be a few staples holding the wall white aluminum that you will need to pull out. My point is, slide your angle strip up "behind" the wall aluminum so that no water will want to get in behind it running down the wall. Like this. This is my drip edge being installed.
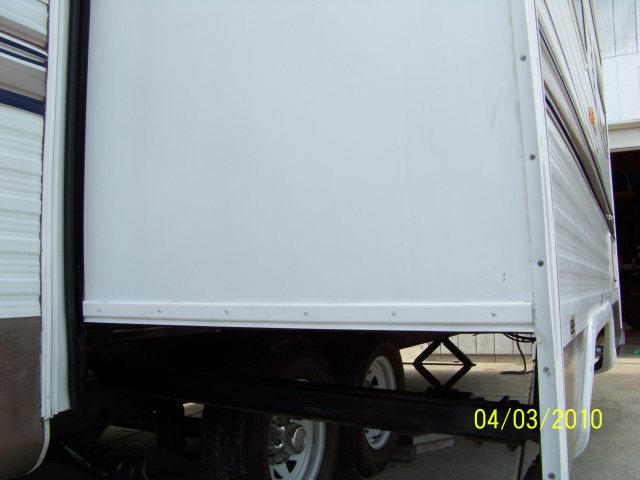
In my case I did not want the slide seal to "catch" the edge of the drip edge so I made the drip edge long enough to go all the way inside. I had to trim it in height to fit under my molding inside. Yours may be a little different then this.
It is attached well inside beyond the slide seals
And a final look with the molding put back on. The slide front wall end
The rear wall of the slide showing water being diverted off the wall now.
Use butyl sealing tape on the molding before you put it back on. The screws then will go through the new angle strip and hold the strip when the slide goes in and out.
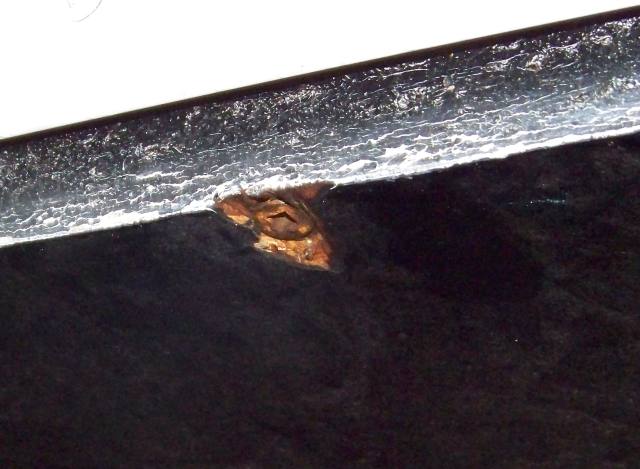
3. Sealing up the now exposed floor end that is cracking.
Clean that cracked end up good when you have the molding off. Make sure it is dried out. Then before sliding up the new angle strip, apply a strip of butyl sealing tape to the cracked end wall of the floor. Press it in good with the release liner still on. Then pull the release liner and carefully slide the new angle strip up behind the wall siding. Hold it at a slight angle to the wall so the new strip does not touch that butyl until it is fully inserted up and about to touch the bottom of the slide floor.
That butyl tape sandwiched in there will seal out any water/moisture from ever getting back up into that end wall area.
4. The exposed OSB of the floor where the black coating chipped off.
Ideally you can do something to the bare OSB before putting the angle shape on. Even if this is a good oil based paint. Something to seal the bare wood to protect it from moisture. Leaving bare OSB is not great when it comes to outdoors.
4. Your foam tape. I have never used the 3M VHB tape. By the looks of the 3M site, this has great promise.
https://www.3m.com/3M/en_US/company-...94857497&rt=r3
Find one of them that is outdoor rated and that should help do what you want it too. Make sure the floor is very clean.
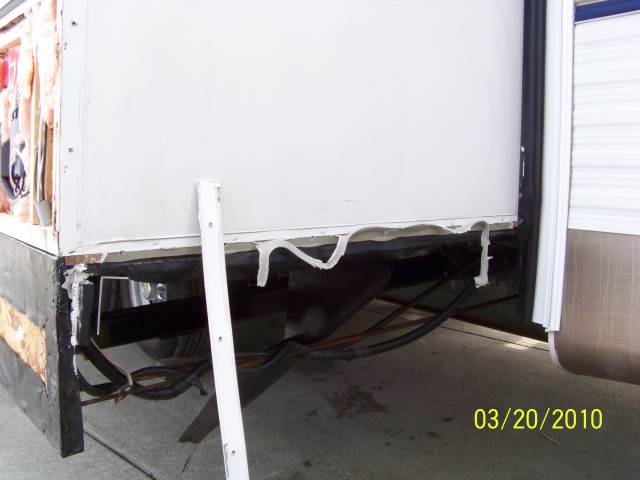
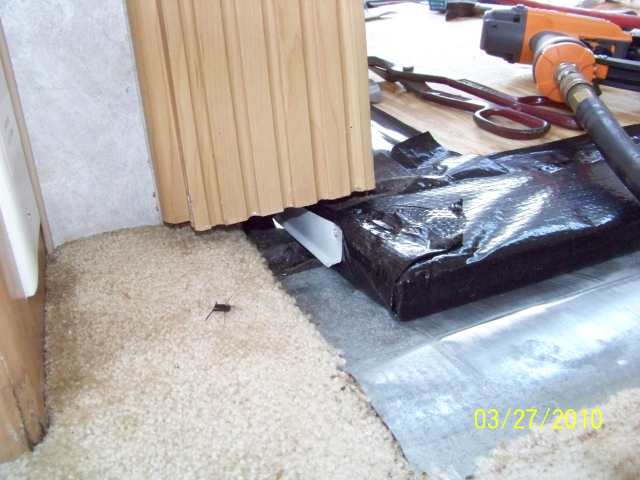
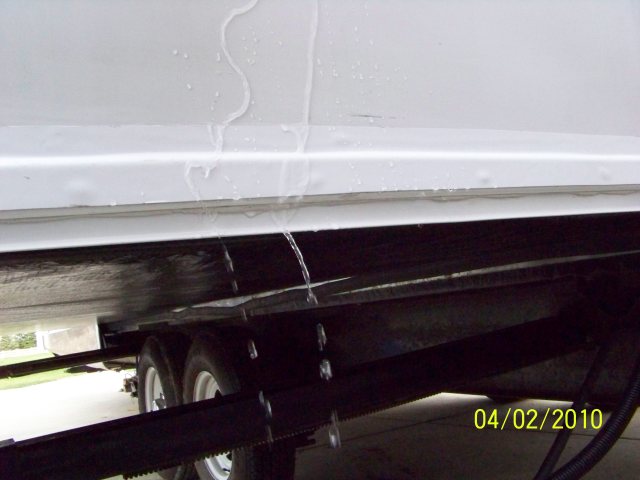
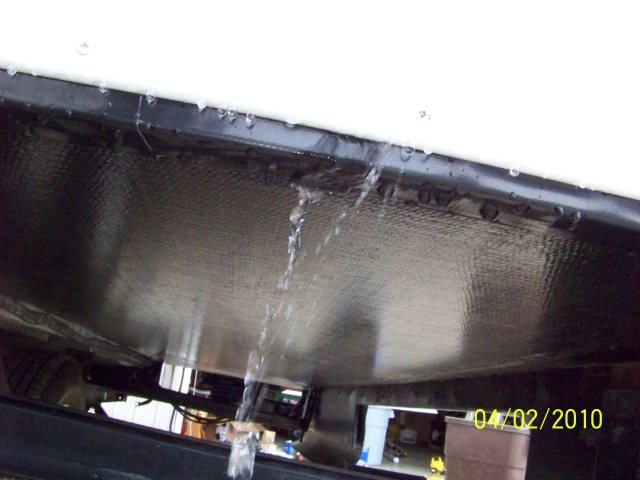
5. Your 3" leg under the floor is a good length. The wall drips should break tension and fall to the ground by then. See this pic showing what mine did before the drip edge. I needed the drip edge to keep the water out of the holes in the Darco bottom floor.
Try and takes some pics of your process and add to your post. This is a good topic as no one with a 2005 or newer has posted about this that I can recall.
Hope this helps
John


 Linear Mode


