This isn't a major modification as many of you have done with excellent pictures accompanying the description. Nevertheless, I've been inspired to try to do the same while tinting the rear window of our 2499 earlier this week.
Tint Film
I didn't choose
http://www.gilafilms.com/ after weeks of research--I stumbled across it in the RV department of our national men's store--Canadian Tire--don't miss it if you come for a visit.
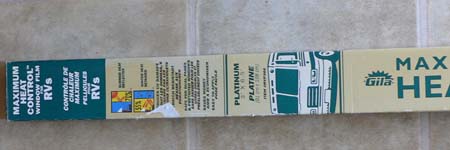
The product is Maximum Heat Control Tinting Film for RVs. It's not listed on their website and wasn't on the automotive tint rack in my store either--likely because it's not legal for auto use. One roll covered the entire window with plenty left, but you only get one chance at cutting the large pane. The automotive film is narrower and two rolls would cover the window with most of a roll left. The main attraction of the RV film is the advertised heat gain/loss advantage. Our coach sits in the sun all the time and the rear window faces directly west.
Materials and Directions
My store didn't sell Gila's application kit, but I already had the necessary tools. Without the application kit I also needed a bottle of "no tears baby shampoo". I didn't know any local babies or I probably could have squeezed the 1/4 tsp of shampoo out of them. That's mixed with 2 qt. of water and I used 1 cup of that. Not mentioned in the instructions, but very useful, is a long Al straight edge used for cutting drywall, a large glass plate which makes an excellent cutting surface and a paper cutter. The included directions are easy to follow, but I found the pdf on the website to be a little more thorough and downloaded that. I couldn't play the instructional videos on my Mac computer.
Preparation--one day
The window needs to be scrupulously clean and scraped down with a razor blade. I had a scraper handle that takes utility knife blades and that worked very well. A rubbery sealant is used between the metal frame and the glass. I used a utility knife and the scraper to cut and remove it. That's not easy to do, but if there's a bead of sealant on the glass it will spoil the edge of the tint film.
Use a piece of paper and fingernail to trace the curve on the lower right window, pencil in a line and cut it very carefully with scissors and a paper cutter so it is the full size of the corner window. This is much easier to do from the outside--which I did, but the curve inside is not exactly the same. Trace the paper pattern onto a piece of box board (cereal box) and cut it out with scissors and the paper cutter. Place the box board template into all 4 corners of the inside window and trim carefully to fit with at most a 1/16" margin. My window appeared to be square and I was able to use this template to cut all 4 corners of the film.
I couldn't follow Gila's suggested method of cutting the film against the outside glass because it's not exactly the same size as inside and in hindsight would be impossible to do with a large window like this and a step ladder. It's also difficult to cut the film on the inside glass because of the deep metal frame. I chose to measure 4 times and cut once--be sure to measure the inside. I made all the smaller cuts on a large pane of glass laid on the dining room table--I knew there was a reason I kept that old coffee table top for 10 years. Keep the backing side up so the framing square doesn't scratch the actual film side.
Application--2 hours
Step 1. Don't even think of doing this yourself.
Use a piece of scrap film to try Gila's instructions for peeling off the backing layer. I learned immediately that scotch tape welds together and cannot be separated. Use masking tape and fold over both ends first so you have a handhold. The backing does indeed come off cleanly, but the masking tape pulled a bit of the tint coating off the tint film when I pulled it off. However, it just needs to be on the very corner of the film so this is not noticeable. I cut the film in the house, but peeled off the backing in the trailer to avoid contaminating the actual tint film in any way.
I had never tinted a window before so started with the small lower corner window--there's also enough film left over to cut another piece if needed. This window is too small for a squeegee, but a credit card--make sure it has a good edge--and old piece of T-shirt make an excellent substitute--as Gila suggests. On the large pane I found that you can't just mist the window with the soap solution--it has to be soaked so you can slide the film into place. Karen helped me peel off the backing and stick the film onto the window. Then she stood back for a different perspective and pointed out all the spots that needed more squeegeeing. The credit card is best here too for final touch ups and I used a pristine KOA card instead because it had a better edge than my heavily used credit cards.
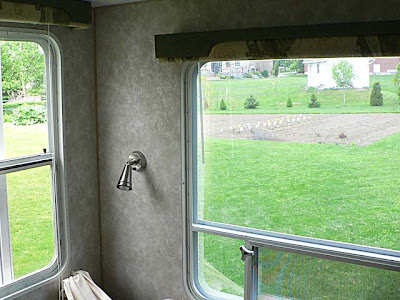
All in all, a good project. The results aren't perfect, but they're very close even for this perfectionist and from the inside, where I'm going to be, flaws are not visible. As to final appearance, from some angles the window looks like any ordinary tinted window, from other angles it is an absolute silver mirror, as you can see in some of the photos.
Almost finished:

It's a mirror:

From the outside looking in to the small window beside the rear entry door:

Henry


 Linear Mode


