This post documents the work that my wife and I did to replace the standard movable chairs and fold down dining table that comes in the back of a 2199 with a wrap around couch that would give us more storage. We designed the couch to have a slide out section and to allow the table to still be fitted to the wall so we could still have a dining area when we wanted it. You can click on any of the pictures below to see the full size image and also check out some of the pictures from this build that I may not have included in this post.
Unfortunately we didn't take any before pictures and I've scoured the web for pictures of the dining areas original configuration and haven't been able to find them. The table was connected to the wall on a framed out metal channel that allowed it to move side to side around a foot each direction. I'm not completely sure why, but that's what it did. We sold off the original chairs almost right after we bought the coach since we knew that we wanted to do this upgrade and we needed the space to transport our stuff when we moved out of our house.
Once we got set to work on the couch the first thing to do was demo the existing frame. We stared by tearing into the top piece and quickly realized a couple of things. The paneling of the walls is not strong enough to allow for prying against to remove framing, and the Sunline guys secured most of this frame by screwing through the paneling from the outside in. This made it impossible to remove most of the fasteners to allow pieces to come apart nicely.
The front paneling and even the top trim piece did come off fairly easily and then we were left with the meat of the frame still connected to the wall.
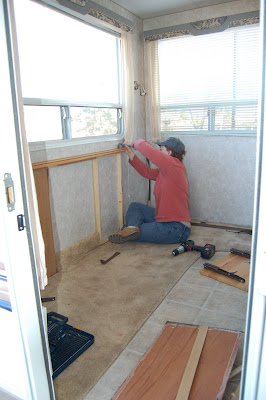 Jessie working on getting as much of the frame torn down as possible
You can see from this picture that the framing is screwed through from the outside of the paneling. I imagine that they put all the wall mounted framing members up and fastened them through the interior paneling before putting up insulation and the skin on. Nice construction, but it makes demoing any interior features like this a pain.

We wound up finding the screw locations and doing some surgical style cutting with a circular saw and a door knob saw bit to cut around the screws. Then when the framing was free we could spin it away from the screw by keeping some gentle pressure on the panelling. Kind of unscrewing the wood away from the screw rather than the other way around.
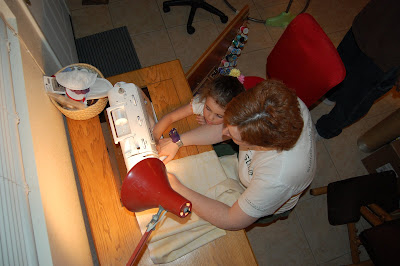
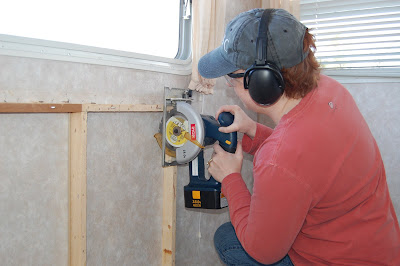 Gotta love a woman who is skilled with power tools
Once we got close to the paneling we cut down the last of the framing pieced with a handsaw. Trying to limit the scoring of the finish to a minimum. Even with that you can definitely see where we demo'd the framing in the few places that its visible. I wonder if its possible to get the wall paper that is used on the inside to be able to patch those sections to make the finish cleaner?
Once we got the frame members down we were left with a batch of screws sticking in through the paneling. As you can see below I took a shot at cutting them off with a cut-off disc, but I wasn't comfortable with the amount of heat that was being built up in the screw shanks and thus transferred to the insulation. In the end we found that we could just turn the screws back into the wall and get them flush with the paneling which didn't take generating any sparks.


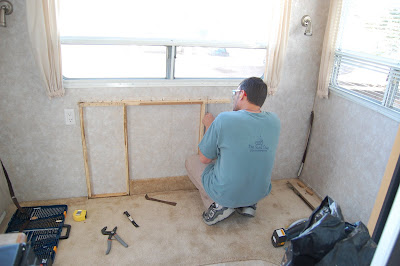
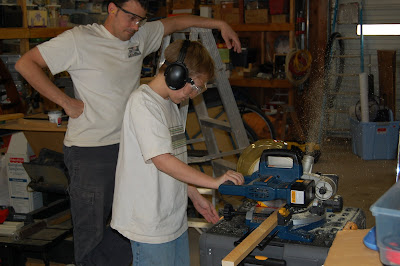
Once all of the demo was complete we started on the rebuild. Jessie and I split forces and she did the upholstery work and I framed up the base of the couch. We designed the couch to go along the back wall of the coach and wrap in an L shape around to the side of the Refrigerator. The framing was fun cause I got to spend some time in the shop teaching my nephew how to do some framing and carpentry.
Easily the most expensive part of this mod was the 4" foam that we use to upholster the base cushions on the couch. The stuff was around $57 per yard at a width of 24". Overall we spent around $240 on fabric and foam since we went with a heavy indoor/outdoor weight canvas for the seats. Jessie was a trooper and even though she would have preferred being in the woodshop she made all of the pillows for the couch by hand.
She got a little assistance at one point from our niece.
We did almost the entire frame for the couch from 1x2's and it was plenty sturdy when we did our test section shown below. The couch had three sections to it, one by the coach door and an L by the fridge and back wall both of which are secured to the floor and walls. The third section is a slide out piece that allows us to still put the dining table in place and have a dinette if we want it.
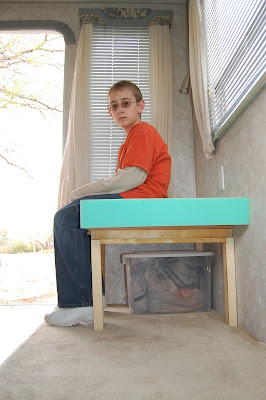 Test section for strength testing. You can see how we get the additional storage under the couch
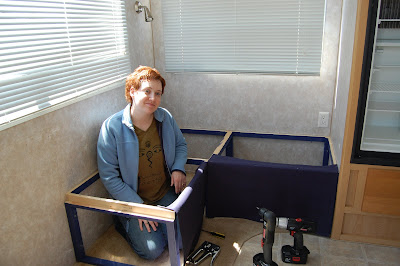
We painted the final frame with some space house paint that was laying around and added skirts to the front of the couch that are the same material as the cushions to hide the boxes underneath. Here is Jessie in the middle of helping fasten in the L section to the coach.
The cushions were made from 1/2" plywood topped with the 4" foam and then canvas just stretched and stapled to the bottoms. We then secured the plywood to the frame by screwing up into it through the top members of the frame. This helps hold everything in place and further stiffens the frame.
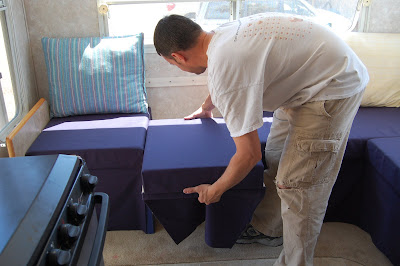
 You can see where the slide out section of the couch goes in this picture
This work took us about a week total of working on it off and on. We used a piece of scrap molding with miter's cut into the back for angle brackets that we had attached to the table to lock the table in place when we want it up. Finally, a few shots of the final couch and its transformation into a dinette.
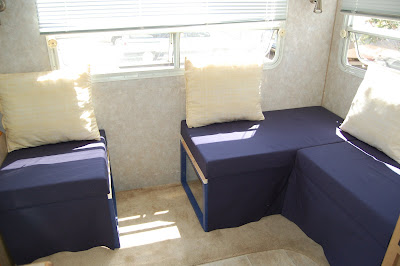
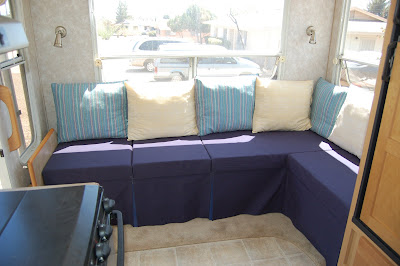 The final couch
 The slide section in action
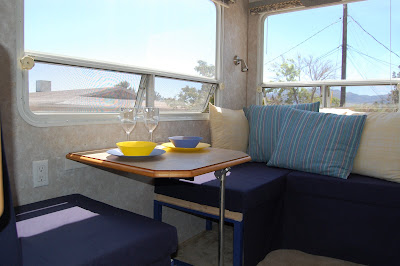 Voila, a dinette
We are really pleased with how this came out and its added some really nice storage to the back of the trailer, which also allows me to more easily load the trailer without putting all of the weight of our stuff on the tongue. If anybody has questions please feel free to reply here or PM me if you want.
Thanks,
Tom


 Linear Mode


