For those of you who have the older Sunline Entertainment Cabinet, this may be an option for you. This cabinet was made for the older CRT TV's. The age of the flat screen sort of changed the need and Sunline parted off the entire top of this I think in the 2006 ish model year. Maybe 2005 but for sure not a 2004.
I have been wanting to do this for a long time. We have been taking the flat screen TV and DVD player out after each campout and towed with the TV face down on the bed. It worked but I also have an organization problem of the upper cabinet. Campfire blankets, rain coats, hats, gloves, heater etc. all jumbled up. And then the his and hers things....
I'll do this in pics. Here is where we started. The old CRT beast. Man it was heavy

Then came the flat screen once analog TV went out. Looks sort of lost in the hole....

And the jumbled up upper cabinet. The pic looks better than it normally is. What you want is always on the bottom....

Now the upgrade was to put the flat screen on a cabinet door to cover up the hole that had a shelf inside. TV would stay on all the time. Started with 30 year old maple cut from the woods of the lower Hudson Valley in NYS. I used to live in this area and I knew is was 30 years.... as I bought a lot of it back then to make my son's cradle, dresser and crib. He turned 30 this year. I kept the left overs and had them up the shed ever since waiting for a special project to use them on. The local mill back in NY cut and planed them for me. Nothing like real clear maple.

And once dried correctly, it still cuts true and no warp. Hard as all heck now but carbide blade cuts it OK

First was to make the outer frame. I'm not a real cabinet maker by any stretch and each time I do one of these things I learn some more. Now to cut the edges and glue the frame together. I used a dado in the bench saw. Did not have the router bit to make this cut, went old school.

Here is the frame glued up waiting to dry

And the corner joints

Now add the inner frame which is part to hold the TV

Added a center piece to stiffen the TV mount and make it rigid

And the back on with more reinforcement for the TV.

Now it was off to finishing. I had some custom stain made up at the Sherwin Williams store a while ago and it matches really well. Here is the start of the shelves and the TV door.
The new shelf up top

Shelf up top and the door front

The lower cabinet shelf and door open

The TV door closed before mounting the TV. I had to make a special pin latch in the lower right that acts like a dead bolt when closed to not come open towing down the road.

Now the TV mounted and the shelves loaded. His and hers shelves and no mixing up or jumbled up...

The front view

And the Movie RV playing....
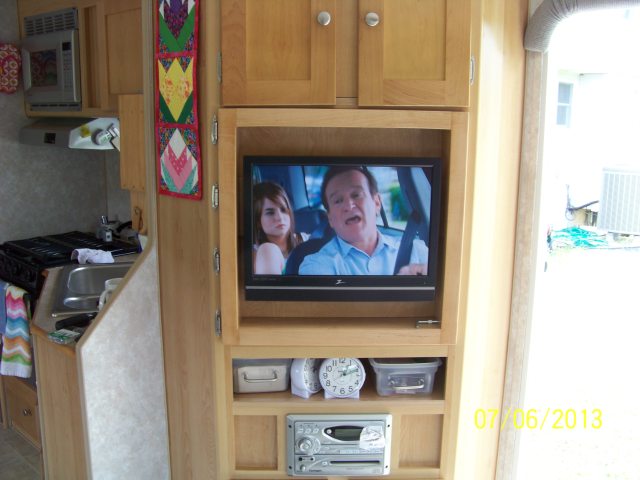
We can also swing open the TV to see it better as needed with our floor plan to help Cindy who sits on the couch. I'm the swivel rocker guy.
Thanks for looking
John


 Thge quality of the junk you get at the big box lumber yards now can be pretty bad. I started with a piano hinge concept, had 2 main issues.
 Linear Mode


